
I remember the first big deck I built back in 2008. From the street, it was a masterpiece, featuring some of those innovative deck design ideas everyone was talking about. But then I walked across it. Every step felt like a mini-earthquake, and the owner’s patio table actually rattled. It was embarrassing. I had followed the span charts to a T, yet the floor had this nauseating spring to it. That was my wake-up call that standard framing sometimes isn’t enough to stop the sway, and it led me to discover the structural magic of staggered blocking.
Stop the Trampoline Effect with Better Blocking
That bounce isn’t just annoying; it’s a sign that your joists are twisting or shifting slightly under pressure. In my early days, I thought straight-line blocking was the gold standard. I’d spend hours squaring up a new deck frame, only to nail in blocks that eventually split the wood because I was driving nails too close together in a straight line. The real secret I learned from a veteran framer is the zigzag pattern. By staggering the blocks about an inch or two apart, you can nail through the joists directly into the ends of every single block without the nails from the opposite side getting in the way. It creates a rigid, interconnected spine that makes the entire structure feel like solid concrete. It is the single best framing move that stops deck boards from bouncing and saves you from a lifetime of shaky floorboards.
Is all this extra lumber really worth the effort?
You might be thinking that cutting fifty extra blocks sounds like a chore you’d rather skip. I felt the same way until I realized that a stiff frame is the only thing protecting your investment. According to the American Wood Council’s DCA 6 – Prescriptive Residential Wood Deck Construction Guide, lateral load resistance and blocking are critical for preventing joist rotation, which is the primary culprit of a soft deck. I once skipped this on a small landing and ended up having to rip up perfectly good composite decking just to retro-fit the blocks because the client complained about the vibration. It was a three-day mistake that I never intend to make again. Have you ever stepped onto a brand-new deck only to feel like you were walking on a trampoline? Tell me about your wobbliest deck experiences in the comments below. We are going to dive into exactly how to layout these blocks to stop your deck from rattling for good.To get this right, you need to think of your deck frame as a skeleton where the blocks act as the connective tissue. If your joists are the ribs, the blocking is the sternum holding everything in alignment so nothing shifts when the weight of a party hits the surface. The goal is to create a continuous line of lateral support that prevents the joists from ‘rolling’ or twisting over time. This is especially vital if you are trying to how to fix the bounce in your over-spanned deck joists before the finish boards go down.
Get Your Layout Lines Straight First
Before you even pick up a saw, you need a reference point that spans the entire width of the frame. I always snap a chalk line across the top of the joists exactly at the midpoint of the span. If you are working on a massive 16-foot deep deck, you might even need two rows of blocking. This chalk line is your guide, but here is the trick: you don’t center the blocks on the line. I learned this the hard way on a job in 2012 when I spent four hours trying to toe-nail blocks into a single line, only to have half of them split. Instead, you stagger them by exactly 1.5 inches—the thickness of your joist material. This allows you to drive fasteners straight through the joist into the end of the block from both sides. It is a much stronger connection than angled nails and is a similar concept to the hidden blocking move for supporting heavy pergola beams.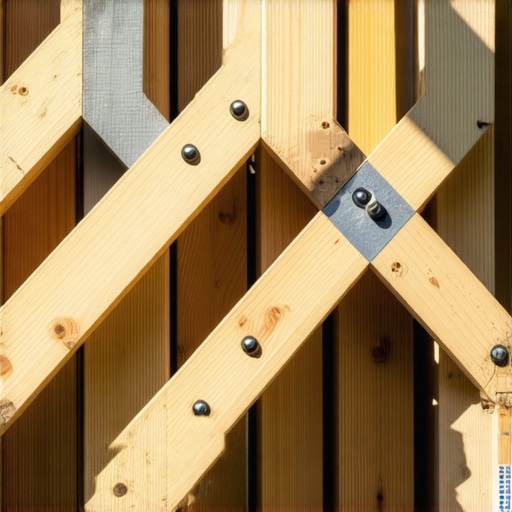
Why One Inch of Offset Makes All the Difference
The zigzag pattern is the secret to speed and structural integrity. By offsetting every other block, you create a path for your nail gun or impact driver to hit the center of the wood every single time. When I was building a custom wraparound last summer, I used a scrap piece of 2×10 as a ‘spacer template.’ I would hold the spacer against the joist, butt the block against it, and fire. This kept the stagger perfectly uniform across twenty-four joist bays. Without that spacer, your stagger starts to wander, and suddenly your ‘straight’ line looks like a drunk person tried to walk a tightrope. This level of precision is what separates a DIY project from a professional build, ensuring that when you finally maximize outdoor living with low-maintenance composite decking, the substructure is as premium as the boards on top.
Drive Your Fasteners with Surgical Precision
Don’t settle for two nails per side. To truly lock the frame, you need three 3-inch framing nails or, better yet, structural screws. Screws are the way to go if you’re working solo because they won’t jar the joist out of alignment like a heavy hammer or a pneumatic nailer can. I prefer using a 6-inch T25 bit to reach into those tight bays. If you find a joist that is slightly bowed, use the clamp and lever move for straightening bowed 2x10s to pull it into the block. This ensures your spacing remains consistent at exactly 12 or 16 inches on center. Once those blocks are sucked tight against the joists, that ‘trampoline’ feeling disappears instantly. It turns a series of individual boards into a unified, rigid platform. This process is equally effective when using the string line method for perfectly level deck surfaces because the blocking helps hold your level adjustments permanently in place.While many homeowners focus on the surface, the real technical battles happen in the substructure. A common belief in the DIY community is that hidden fasteners are the undisputed gold standard for a premium finish. However, in my experience, they can be a massive liability. Many beginners overlook why hidden fasteners pop up in extreme summer heat. In regions with high thermal swings, the expansion and contraction of the boards can actually snap the plastic clips or work the screws loose. It is a classic case where a ‘cleaner’ look can lead to a ‘nosier’ and less stable surface over time. If you are building in a climate with 90-degree summers, you might actually be better off with color-matched face screws that offer superior lateral holding power.
Your Pressure-Treated Frame Is a Ticking Time Bomb
The biggest ‘oops’ factor I see with modern builds is the mismatch between the frame and the finish. You might be installing top-tier boards, but why your pressure-treated frame is pulling your composite apart usually comes down to moisture. Pressure-treated lumber is often ‘wet’ when it leaves the yard. As it dries over the first year, it shrinks. Composite, meanwhile, stays the same size or expands with heat. This tug-of-war is what causes boards to warp or seams to open up. To prevent this, I always use the joist tape secret for doubling your decks life. The tape acts as a gasket, allowing for a bit of movement while preventing water from sitting in the screw holes, which is where most rot begins. Have you ever fallen into this trap of the shrinking frame? Let me know in the comments.
How Do You Stop Dark Boards From Buckling in July?
This is a question I get from advanced builders dealing with the latest composite decking trends. Dark grays and browns absorb massive amounts of UV energy. Research from the Forest Products Laboratory indicates that wood-plastic composites can expand significantly—up to 1/32 of an inch per linear foot for every 50-degree temperature change. If you butt those boards tight against your house, they will have nowhere to go but up. I once saw a deck where the expansion was so powerful it actually buckled the boards three inches off the joists. 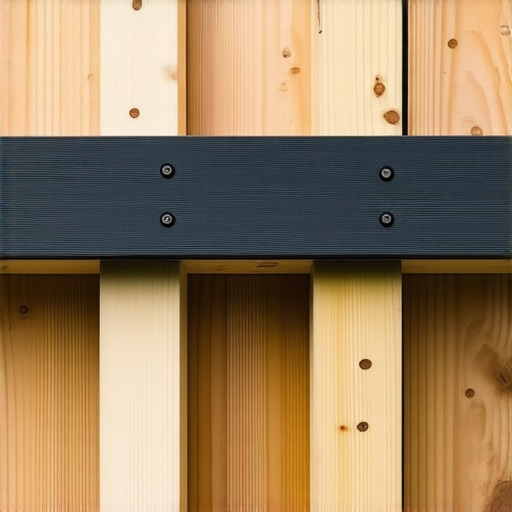 Always calculate your gap based on the ambient temperature during the install. If it’s a cold morning, you need a larger gap; if it’s a scorching afternoon, you can tighten it up. Even the best structural reason your deck needs a mid-span beam won’t save you from a surface that hasn’t been given room to breathe.
Solid Railing Panels Can Rip Your Posts Out in a Storm
Finally, let’s talk about the nuance of railing systems. Everyone loves the privacy of solid panels, but they act like sails on a ship. I’ve witnessed why solid railing panels cause wind damage in storms firsthand when a beautiful glass-and-wood system was literally torn from the rim joist during a localized microburst. If you are using solid panels, your post-to-frame connection needs to be three times stronger than a standard baluster system. This is where 7 reasons your composite decking looks like plastic often start with poor structural integration. If you don’t account for the wind load, you’re just building a very expensive kite. Always prioritize airflow and mechanical tie-downs over pure aesthetics to ensure your deck survives the decade.Building the frame is only half the battle. If you want a result that doesn’t look like a DIY disaster after six months, you have to get religious about your tool kit. I’ve seen builders spend ten thousand dollars on premium boards then ruin the aesthetic because they used a standard drill. I strictly use the jig I use for consistent deck screw depth because composite material is notorious for ‘mushrooming.’ This is that ugly little ring of displaced plastic that pops up around the screw head when it is driven too fast or too deep. If you don’t use a depth-sensing actuator to set every screw perfectly flush, your deck surface will look like a field of tiny plastic volcanoes. For those clean, crisp end-cuts that make neighbors jealous, I never skip the painters tape hack for cutting composite boards without fraying. It provides just enough surface tension to keep the expensive cap-stock from chipping under the saw blade, ensuring every miter joint looks surgical rather than hacked together.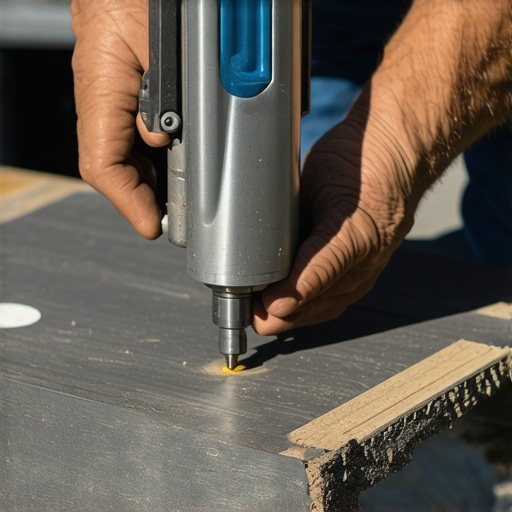
How can I keep my deck looking brand new for decades?
The secret isn’t a magic chemical; it’s the consistency of your inspection routine. Even the best maximize outdoor living with low-maintenance composite decking solutions require a biannual checkup to ensure the hardware is holding up. I recommend doing a walkthrough every spring with a high-lumen LED. I call it the flashlight trick for finding hidden joist rot at night. The side-glare of a concentrated beam often reveals structural cracks or fungal growth in the shadows that flat daylight completely hides. If you catch a grease spill from the summer BBQ, forget the pressure washer, which can mar the finish. Use the soap and sponge fix for oil stains on composite decking immediately to prevent the oils from bonding with the polymer. According to technical guides from the International Association of Certified Home Inspectors (InterNACHI), the primary cause of deck failure isn’t actually the wood failing—it’s the metal fasteners corroding or pulling out due to poor moisture management at the ledger. Don’t let your investment rot from the inside out. For those with older peripheral structures, you can even how to restore faded wood railings without sanding for hours by using a high-quality penetrative oil that breathes with the wood rather than a surface film that eventually peels. Looking toward the future, I predict we are moving toward ‘living structures.’ We’re already seeing pergola trends that incorporate motorized louvers and integrated sensor-based lighting systems. Your deck won’t just be a static platform anymore; it will be a piece of smart hardware that responds to the sun and rain. If you want to get ahead of the curve, start thinking about how to run low-voltage wiring inside your posts and joists now. My best composite decking secrets for longevity always include future-proofing the frame for these tech upgrades. Try this today: go out and check your ledger flashing for any gaps—it’s the one five-minute move that saves you five thousand dollars in structural repairs down the road.
Hard Truths About Decking That Span Charts Don’t Tell You
If there is one thing fifteen years in the dirt has taught me, it is that code minimum is often the floor, not the ceiling. I used to think that if the inspector signed off on the framing, my job was done. But code doesn’t account for the ‘feel’ of a luxury home. I have learned that composite decking secrets for longevity start with over-engineering the skeleton. A deck that meets code but bounces when the dog runs across it feels cheap, regardless of how much you spent on the boards. I have found that adding blocks every four feet, rather than the suggested eight, is the only way to truly kill that vibration.
Another lightbulb moment was realizing that wood is a living thing, even when it’s chemically treated. It moves, breathes, and eventually tries to return to the earth. My biggest shift was moving away from standard fasteners toward high-performance structural screws. It changed how I view choosing railing systems for safety and style because a rock-solid frame allows for much cleaner finishes on the perimeter. Don’t build for the day of the party; build for the tenth winter when the frost is trying to heave your posts out of the ground. The peace of mind you get from knowing your blocking is staggered and screwed is worth every extra hour of labor.
Gear That Saved My Back and My Reputation
I don’t leave the shop without a few specific items that turn a stressful build into a smooth one. First, I never install a single board without the jig I use for consistent deck screw depth. It is the only way to avoid the dreaded ‘mushrooming’ effect on composite that ruins an otherwise perfect surface. Second, I am a firm believer in the protective power of the joist tape secret for doubling your decks life. It’s a small expense that prevents the catastrophic rot that often happens right where the board meets the wood.
For those looking to expand their outdoor horizons, I highly recommend checking out the latest pergola trends to see how vertical structures can complement a stiff frame. These resources aren’t just about ‘how-to’; they are about understanding the ‘why’ behind every cut and fastener. Having the right bit for your impact driver and a reliable chalk line are basics, but they are the difference between a project that looks professional and one that looks like a weekend mishap.
Your Backyard Legacy Starts Under the Boards
At the end of the day, your deck is more than just a collection of lumber and plastic. It’s the stage for your summer memories, your morning coffees, and your family gatherings. When you take the time to block your joists correctly and manage moisture like a pro, you’re creating a legacy that will stand tall for decades. Don’t be afraid to go slow on the framing—the surface is only as good as what’s underneath. When you finally maximize outdoor living with low-maintenance composite decking, you’ll sleep better knowing that the foundation is truly unbreakable. The sweat you put into the sub-structure today is what ensures the joy of the space for years to come. Have you ever inherited a deck that felt like it was held together by hope and prayer? Let me know about your structural horror stories in the comments below!