
I remember looking out at my back porch three years ago, coffee in hand, expecting to feel that sense of pride you get after a weekend of hard labor. Instead, I felt a pit in my stomach. Those ‘maintenance-free’ white railings I’d installed with such confidence were starting to look like an old, neglected refrigerator. They weren’t white anymore; they were a sickly, buttery yellow. I felt like I’d been sold a bill of goods. If you’ve ever looked at your once-pristine outdoor space and wondered if the sun was personally attacking your home, I’ve been there. Today, we’re going to stop the sallow. I’m going to show you exactly how to diagnose why your vinyl is changing color and the specific, low-effort ways to bring back that showroom shine without replacing the whole system. [image_placeholder]
Your Railings Aren’t Just Dirty—They’re Sunburned
Most homeowners think a quick blast with a hose will fix everything. I was one of them. In fact, early on, I made the massive mistake of attacking my yellowing posts with a heavy-duty degreaser and a stiff brush. I thought I was being thorough; in reality, I was stripping away the last of the UV-resistant coating, making the yellowing happen even faster next time. It’s a classic case of more effort leading to more damage. This discoloration usually happens because the Titanium Dioxide—the ingredient that keeps PVC white—is reacting to UV rays or environmental pollutants. According to the International Association of Certified Home Inspectors (InterNACHI), PVC can degrade and discolor when exposed to high levels of UV radiation if the manufacturing process didn’t include enough stabilizers. Before you dive into a cleaning frenzy, it helps to know how to select the perfect railing system for every deck to see if your material is even capable of a comeback. Sometimes you’re fighting a losing battle against cheap, un-stabilized plastic, but most of the time, we can save it.
Is vinyl railing actually worth the maintenance hype?
I get asked this all the time. Neighbors see me out there with a bucket and wonder if they should have just gone with wood or metal. It’s a fair question. Vinyl is often marketed as ‘set it and forget it,’ but that’s a bit of a stretch. While it won’t rot like cedar, it has its own set of quirks. I’ve learned the hard way that why you should avoid white railings near gardens often comes down to the mix of pollen, moisture, and sun exposure that creates a perfect storm for staining. However, if you know the tricks, it’s still one of the most durable choices out there. Have you ever scrubbed your railings until your arms were sore, only to realize the yellow wasn’t coming off? Drop a comment below—I want to know I wasn’t the only one fooled by the marketing. If you’re dealing with a different material, you might even find that the vinegar and water mix that cleans composite better than chemicals is a safer starting point than those harsh ‘miracle’ cleaners. Let’s get into the actual steps of reversing the damage.
Start with a gentle baseline clean
Before you reach for the heavy-duty chemicals, you have to clear the surface debris. Think of this like washing your car before you wax it; if you leave the grit on there and start scrubbing, you are basically sanding your railings with dirt. I use a simple mix of Dawn dish soap and warm water. Last summer, I helped my brother-in-law with his deck, and he was convinced he needed a high-pressure blast to ‘get the yellow out.’ I had to physically stop him from using his pressure washer. I have seen what happens when people ignore the warning that why you should never use a pressure washer on composite or vinyl—it leaves permanent ‘tiger stripes’ in the material that you can never buff out. Use a soft microfiber cloth and get the pollen and dust off first. If the yellow remains after a thorough soaping, we are dealing with oxidation, not just surface grime. You can also try the vinegar and water mix that cleans composite better than chemicals as a middle ground. It is acidic enough to break down some mineral deposits without being a scorched-earth policy for your plastic.
How to scrub away the yellow without scratching the finish
This is where the actual restoration happens. You need a specialized vinyl restorer or a high-quality cream cleanser that is specifically labeled as non-abrasive. Think of your railing like a high-end smartphone screen; you would not use a Brillo pad on your iPhone. I once tried a generic bleach-water mix on a small patch of my own fence, thinking I was being clever. All it did was dry out the plastic and make it feel brittle to the touch. Instead, apply the restorer in a circular motion with light pressure. If you are working on a larger project, you might find that composite decking secrets for longevity also apply here: consistency is key. You are not trying to bleach the color back; you are chemically lifting the oxidized top layer of the PVC to reveal the fresh material underneath.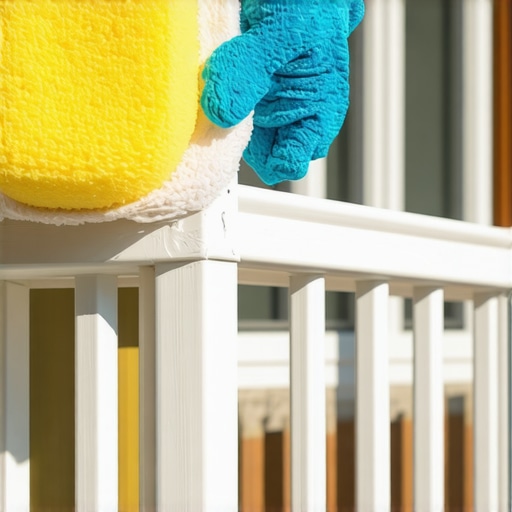
Seal the surface to block future UV damage
Once you have achieved that bright white look, your work is not done. The reason it yellowed in the first place is that the UV inhibitors on the surface were exhausted. If you leave it ‘naked’ now, the sun will turn it yellow again by next season, and the process will be even faster. This is the part most homeowners skip. You need a UV-protectant wax or a specialized vinyl sealer. It is like putting sunscreen on after a chemical peel. When you maximize outdoor living with low-maintenance composite decking or vinyl systems, you expect things to stay pretty, but even the best materials need a shield. This wax layer fills the microscopic pores in the PVC, preventing pollutants and pollen from locking back in. While you are out there, it is a good time to grab the simple tool for making sure your railing posts are plumb to ensure everything is still structurally sound. If your posts have shifted, the mechanical stress can actually cause micro-cracks in the vinyl where yellowing begins deep inside the material frame.But it’s not just the railings that can deceive you; the very foundation of modern ‘low-maintenance’ decks has its own hidden pitfalls. Everyone loves the look of a seamless surface, but I’ve found that the obsession with aesthetics often leads to long-term structural headaches.
The hidden headache of a ‘seamless’ deck
Most contractors will tell you that hidden fasteners are the only way to get a premium look. I disagree. While they look sleek on day one, I’ve spent more hours than I care to admit trying to replace a single damaged board in the middle of a deck using them. It’s like trying to pull a single Jenga block out from the bottom—everything is interconnected. This is why I often argue that why hidden fasteners can be a maintenance nightmare is a reality you need to face before you sign the contract. If you live in an area with heavy foot traffic or pets, you will eventually need to swap a board, and you’ll curse the day you chose ‘invisible’ over ‘accessible.’
Why your frame is actually your deck’s worst enemy
There is a common belief that once you switch to composite decking, your rot worries are over. This is a dangerous half-truth. In my experience, using a standard pressure-treated frame without extra protection is a recipe for disaster. The wood frame and the composite top expand and contract at completely different rates. According to the North American Deck and Railing Association (NADRA), structural failures often begin at the connection points where moisture is trapped between dissimilar materials. This is exactly why your pressure-treated frame is pulling your composite apart over time. I always recommend using joist tape because the deck joist tape test proves it’s the only way to ensure the frame lasts as long as the expensive boards on top.
How do you handle the massive expansion of composite boards?
This is a more sophisticated question than most homeowners realize. Composite boards can expand up to a quarter-inch over a twelve-foot span depending on the temperature. If you don’t leave proper gaps, you’ll see why your composite boards are crowning and how to fix it as they have nowhere to go but up. I once saw a DIY deck where the owner hadn’t accounted for this, and by July, the boards had pushed so hard against the house siding that they buckled the door frame. You also have to consider the joist spacing. If you want that solid, premium feel, you need to tighten those joists. For many, why your composite deck feels spongy between joists comes down to sticking with the 16-inch standard when 12-inch centers were actually required for that specific material density. 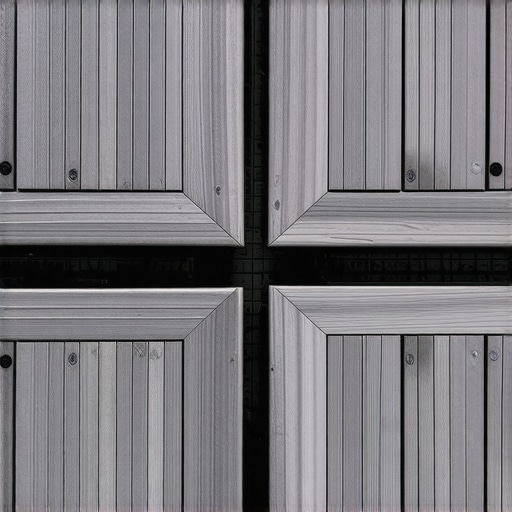
Don’t let the ‘pretty’ details ruin the structure
Finally, let’s talk about the ‘picture frame’ border. It looks amazing, but it requires a very specific framing move. If you don’t add the extra blocking, you’re essentially supporting the most visible part of your deck with nothing but air. I’ve seen the chalk line error that ruins your picture frame border happen to the best of us, leading to sagging edges and water pooling. It’s these tiny, nuanced decisions that separate a deck that lasts 30 years from one that needs a rebuild in 10. Have you ever fallen into the ‘aesthetic over function’ trap or had a contractor skip these ‘invisible’ steps? Let me know in the comments—I’ve definitely paid the ‘lazy tax’ more than once.I realized after my third build that ‘eyeballing it’ is just another way of saying ‘fixing it later.’ If you want that glass-smooth finish on your railing or a deck that doesn’t creak, you have to embrace a level of precision that most DIY videos gloss over. For me, that meant investing in a quality rotary laser. I used to struggle with water pooling in the center of my projects until I mastered the level and laser method for setting pergola heights alone, which ensures that every post is mathematically perfect. When you are dealing with expensive composite, a fraction of an inch can be the difference between a sleek surface and why your composite deck feels like a trampoline because of inconsistent joist support.
Stop guessing and start using dedicated jigs
One tool I will never go without again is a dedicated deck board straightener. Even the best composite boards arrive with a slight crown or bow. Trying to manhandle these into place while keeping your gaps consistent is a losing game. I also swear by the jig I use for consistent deck screw depth. If you drive a screw even a millimeter too deep into a capped composite board, you create a ‘mushroom’ of plastic that traps water and dirt, eventually leading to those ugly dark spots we all hate. According to the Simpson Strong-Tie Deck Connection and Fastening Guide, structural integrity relies heavily on the specific torque and placement of fasteners, particularly in high-load areas like ledger boards and stair stringers. Ignoring these technical specs is how you end up with a sagging structure in less than five years.
How do I maintain my deck’s integrity over a decade?
The secret isn’t a magic chemical; it is a routine inspection. Every spring, I perform a walkthrough that looks specifically for signs of movement. I use the simple tool for making sure your railing posts are plumb to check for shifting footers. If the bubble isn’t centered, I know the ground has settled or the frost line has pushed my posts. I predict that in the next few years, we are going to see ‘smart’ composite boards with embedded thermal sensors that alert homeowners to excessive heat or moisture trapped in the joist bays. Until then, we have to do the manual work. 
The future of outdoor living is heat-mitigation
As we see composite decking trends move toward darker, more natural wood aesthetics, the issue of heat absorption is becoming the primary complaint. If you’ve ever tried to walk barefoot on a dark grey deck in July, you know the pain. Manufacturers are starting to integrate infrared-reflective pigments, but even with that tech, you need to be smart about your layout. I’ve started recommending lighter border colors and integrated shade structures like pergolas to manage these ‘hot zones’ before they become a problem. If you’re worried about your current setup, I strongly encourage you to try the 10-minute flashlight test for finding hidden ledger rot tonight. It is the single most effective way to catch a catastrophic failure before it happens, and it costs you absolutely nothing but a few minutes of your time.
The Hardest Lesson I Learned About Maintenance-Free Spaces
The biggest myth in the industry is that ‘maintenance-free’ means you never have to touch your deck again. I spent years paying the ‘lazy tax’ because I ignored small shifts in my deck design and railing alignment. First, never mistake oxidation for dirt; if you treat a chemical yellowing with a pressure washer, you are effectively sanding down your protection. I’ve seen homeowners destroy their finish because they didn’t realize why you should never use a pressure washer on composite or vinyl surfaces. Second, consistency is your best friend. A ten-minute inspection every spring saves you a three-day restoration project every five years. Third, UV rays are relentless. Even the best stabilizers in the world will eventually yield to the sun if you don’t provide a secondary barrier like a high-quality wax. I learned the hard way that ignoring the frame while obsessing over the boards is a fatal error, which is why your pressure-treated frame is pulling your composite apart if you aren’t careful with your moisture barriers. [image_placeholder_E]
My Secret Toolkit for Professional Results
I don’t believe in buying every gadget on the shelf, but there are three things I never go without when maintaining composite decking and railing systems. I always keep a high-end rotary laser in my kit; mastering the level and laser method for setting pergola heights alone changed the way I view structural symmetry. For cleaning, I bypass the harsh acids and stick to the vinegar and water mix that cleans composite better than chemicals for about 90% of my maintenance needs—it’s safer for the material and your garden. Finally, a simple dedicated LED flashlight is the most underrated tool you own. I use it for the 10-minute flashlight test for finding hidden ledger rot, which has saved me from at least two catastrophic deck failures over the last decade. Trust these tools because they focus on the science of the build, not just the sparkle on the surface.
Reclaim Your Pride in Your Outdoor Space
Your home is likely your biggest investment, and the outdoor area is its most visible extension. Don’t let a little yellowing or a few squeaky boards make you resent your backyard. By following these restoration steps and keeping an eye on composite decking trends, you can ensure your space stays as vibrant as the day it was installed. Whether you are fixing a small section of railing or planning an entirely new deck design, the goal is always longevity and safety. You have the knowledge now to move from guessing to knowing, and that is where true craftsmanship begins. Take a walk outside tonight, look at your ledger boards, and start your journey toward a truly durable outdoor oasis. Have you ever tried a ‘miracle’ cleaner that ended up making your railings look worse, or did you find a trick that worked perfectly? Let me know your experiences in the comments below!