
I remember the day I pried up a seemingly perfect board on my five-year-old deck. I expected to find solid pressure-treated wood, but instead, my screwdriver sank into the rim joist like it was a wet sponge. I was devastated. I had invested so much in composite decking secrets for longevity, yet I had overlooked a tiny, fifteen-dollar strip of metal because I thought drip edges were only for roofs. That single oversight turned my weekend retreat into a structural nightmare. We often think of decks as outdoor furniture that can just ‘get wet,’ but water is a patient enemy. It doesn’t just fall off the edge; it clings, it wicks, and it crawls into the very places where your deck is most vulnerable.
The Stealthy Killer Lurking Under Your Rim Joist
Most homeowners assume that if the top of the deck looks dry, everything is fine. However, gravity and surface tension work together to pull water around the edge of your decking and straight onto the face of your rim joist. Without a physical break to force that water to drop, it sits in the tight gap between the wood and the fascia. This is exactly where pressure treated joists rot faster than usual. I learned the hard way that even the best stunning deck design strategies won’t save a frame that is constantly bathing in trapped moisture. By installing a simple drip edge, you create a literal ‘cliff’ for the water, forcing it to fall clear of the structural timber. It is the cheapest insurance policy you will ever buy for your home.
Is a Tiny Strip of Metal Really Worth the Hassle?
You might be thinking that your deck has survived a few seasons just fine without one. I thought the same thing until the rot became visible. According to the USDA Forest Products Laboratory, wood-decay fungi can begin to compromise structural integrity whenever wood moisture content stays above 20 percent for extended periods. A drip edge ensures that the fascia doesn’t trap that moisture against the frame. This is why I always recommend the drip edge hack for preventing deck rim joist rot as a non-negotiable step. It’s not just about the wood; it’s about protecting the hardware and the joist tape secret you’ve already applied. Have you ever noticed dark, damp stains on the underside of your deck long after the rain has stopped? That is the warning sign I ignored, and I don’t want you to make the same mistake. Today, I’m going to show you exactly how to retro-fit or install this simple fix so your deck lasts as long as your mortgage.
Pick a Metal That Won’t Corrode in Three Years
Before you run to the big-box store, you need to understand that not all flashing is created equal. For most projects, I recommend a PVC-coated aluminum or a heavy-duty stainless steel. Plain galvanized steel will eventually succumb to the chemicals found in pressure-treated lumber, especially the newer ACQ formulas. Think of your drip edge as the frontline soldier in the war against moisture. I once tried to save a few dollars by using some leftover roof flashing I had in the garage. It was paper-thin, and within two seasons, it had bent like a discarded soda can because I didn’t account for the expansion of my low-maintenance composite decking. Now, I only use a minimum of 0.019-inch thick aluminum. It has enough rigidity to maintain its shape while remaining flexible enough to tuck into tight spots.
Slide, Level, and Secure the Edge
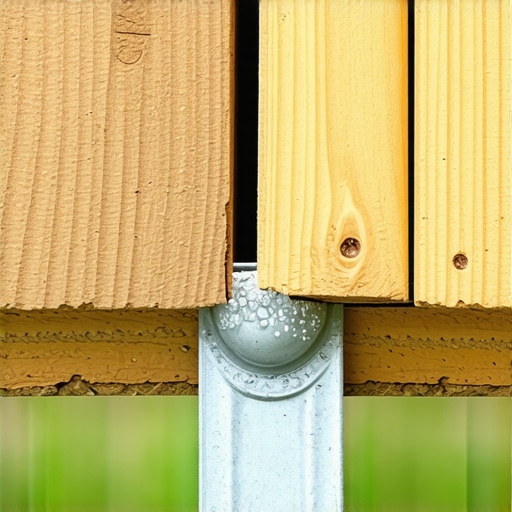
The installation process is straightforward but requires precision. You want to slide the long leg of the L-shaped flashing underneath the first board of your decking so it rests directly on top of the rim joist. If you are retrofitting an existing deck, you might need to back out a few screws to get the clearance you need. The goal is to have the drip part—that little outward kick at the bottom—extending just past your fascia board. This creates a break in surface tension, forcing water to fall straight to the ground rather than wicking back into the wood. This is the core of the drip edge hack for preventing deck rim joist rot. When I was working on a project last summer, I realized that the fascia wasn’t perfectly flush, causing the metal to slope backward. I had to use a pry bar to reset the fascia because if that metal doesn’t slope away from the house, you’re actually funneling water into the very rot-zone you’re trying to protect.
The Secret to Leak-Proof Corners
Corners are where most DIY jobs fail. Instead of just butting two pieces of flashing together, you need to overlap them by at least two inches and use a high-quality sealant. If you just leave a gap, water will find it. This is especially true if you have a complex stunning deck design with multiple angles. I always tell people that mitered corners are a mistake for high-traffic decks if they aren’t properly flashed from beneath; the movement of the boards will eventually open those joints and let water pour onto the frame. When you reach a corner, snip the bottom kick of the first piece, fold the top flange over the corner, and then overlap the second piece on top. It is like shingles on a roof—always work from the lowest point up, ensuring the overlap follows the direction of the water flow.
The Ultimate Shield: Combining Metal and Tape
For the best results, you shouldn’t rely on the metal alone. I always combine my drip edge with the joist tape secret. First, apply the butyl-based tape to the top of the joist, then slide your drip edge over it. This creates a redundant seal. Even if a little moisture gets blown under the metal by a heavy wind, the tape prevents it from soaking into the wood fibers. This belt and suspenders approach is what I call the flash and tape method for protecting deck joists. It might add an hour to your build time, but it easily adds a decade to the life of the frame. I’ve seen decks where the owner followed the 2-inch-gap-rule for preventing rot behind your deck ledger, but ignored the rim joist, and the results were lopsided—a perfectly healthy house-side ledger and a crumbling outer rim. Don’t let your deck be a half-success.
Composite Moves More Than You Think
Everyone tells you that wood is the material that warps and twists, while composite is “stable.” That is a dangerous half-truth. In my experience, composite decking is actually far more temperamental when it comes to temperature fluctuations. While wood reacts to moisture, composite is a thermal sponge. I’ve seen beautiful installs ruined because the builder didn’t account for the fact that a 20-foot board can grow or shrink by over half an inch in a single day. This is exactly why your composite decking is expanding more than the manual says. If you don’t leave the right gaps at the butt joints, those boards will buckle, or worse, they will shear your expensive hidden fasteners right off the joists.
This leads to a common “oops” factor: the fastener pop. People love the look of a screw-free surface, but the reason why your hidden fasteners are popping up in heat usually comes down to the friction between the clip and the board. When the board expands, it wants to slide; if the clip is too tight or the joist isn’t perfectly flat, the board will arch. I’ve had to go back to jobsites where the homeowner was terrified the deck was “lifting,” only to find the clips had become tiny catapults because the framing didn’t allow for linear movement.
Why Do Your Railing Posts Still Wobble Despite Extra Screws?
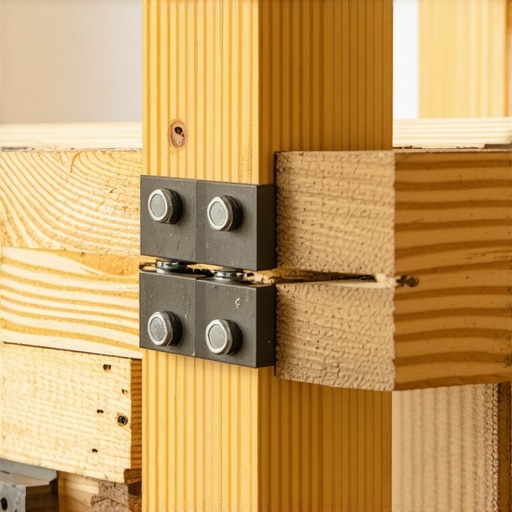
Most DIYers—and even some “pros”—think that a few extra long screws driven into the rim joist will make a railing post rock solid. It won’t. Over time, the leverage of a 36-inch post will pull those screws right through the wood fibers as people lean on the rail. According to the American Wood Council, the withdrawal strength of fasteners decreases significantly with repeated lateral loading. This is why your railing posts should be bolted not nailed. You need through-bolts and internal blocking to distribute that force. If you’re building a rustic mountain deck with heavy timbers, you might think the wood is strong enough on its own, but the internal hardware is the real hero of the system.
The Structural Heavyweight No One Mentions
Don’t even get me started on the density. A low-maintenance composite decking surface is significantly heavier than cedar or pressure-treated pine. If your stunning deck design strategies didn’t include beefing up the footings or tightening the joist spacing, you’re in for a literal sinking feeling. Have you ever noticed your deck feels “bouncy” or vibrates when you walk across it? It might be the lack of mid-span blocking, which is essential to combat the dead weight of high-end composite decking trends. This extra mass puts immense stress on the rim joists we just protected with our drip edge. Have you ever fallen into this trap? Let me know in the comments.
Keep the Heat Away From Your Bare Feet
One thing nobody tells you in the showroom is that composite can get remarkably hot under the summer sun. If you’ve ever wondered why your black metal railings are too hot to touch, it’s the same principle for the decking. I predict that within the next five to ten years, we will see ‘smart’ composite materials with phase-change technology that actively regulates surface temperature by reflecting a massive portion of the infrared spectrum. For now, focus on choosing lighter shades or products with high-reflectivity ratings if your deck faces south. Using a simple infrared thermometer—one of my favorite ‘hidden’ tools—can help you identify the hottest spots on your deck so you can strategically place outdoor rugs or furniture during peak afternoon hours.
How do I maintain composite decking without ruining the finish?
The most common mistake I see is the ‘pressure washer hero.’ Someone gets a new machine and thinks they can blast away five years of grime in five minutes. Stop. High-pressure water can actually etch the surface of your boards, creating microscopic pits that trap even more dirt later. Instead, use a soft-bristle brush and a pH-neutral cleaner. If your deck has already suffered from UV exposure, knowing how to restore the color of a faded composite deck is crucial. Usually, a specialized brightening agent is all you need to lift the haze. According to the North American Deck and Railing Association (NADRA), regular cleaning isn’t just about aesthetics; it is the first step in a mandatory annual safety inspection to spot structural shifts or loose hardware before they become hazards.
The Specific Drill Bits That Won’t Snap on You
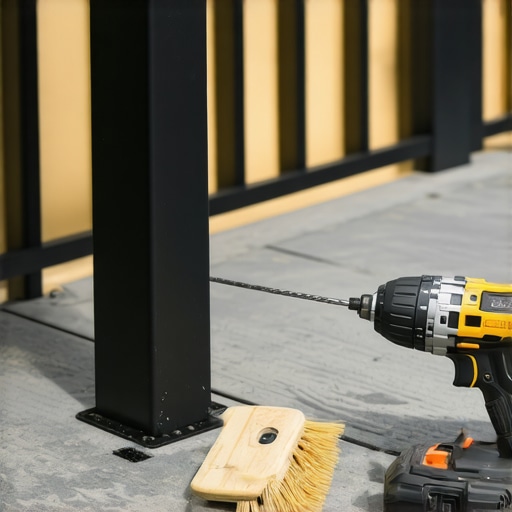
When you are installing modern systems, especially metal rails, standard high-speed steel bits are your enemy. I personally only use M42 Cobalt bits. Why? Because they can handle the intense heat generated when you’re pushing through thick-walled aluminum or steel posts. This is the secret to drilling through metal railing posts without wasting twenty bucks on broken hardware. I also recommend keeping a digital level in your belt. When you are looking at pergola trends and trying to align long rafters, a tiny 1/8-inch mistake at the post becomes a massive eyesore by the end of the run. Precision tools are what separate stunning deck design strategies from a weekend project that looks like it was built in a hurry.
Ultimately, these composite decking secrets aren’t about magic; they are about using the right gear for the specific material you’ve chosen. If you’re ready to take your project to the next level, I challenge you to try one thing this weekend: get a scrap piece of your decking and test a high-quality miter-joint sealant on a sample corner. See how it prevents that expansion gap from looking like a canyon when the weather turns cold. Your future self will thank you when the frame is still rock solid two decades from now.
Hard-Earned Truths from Two Decades on the Joists
Building a deck is a physical conversation between you and the elements. Over the years, I’ve realized that the most common failure point isn’t the material choice, but the arrogance of thinking we can outsmart water. My biggest lightbulb moment came when I stopped treating a deck like a platform and started treating it like a roof that people happen to walk on. If you aren’t thinking about drainage at every step, you aren’t building for longevity.
Another lesson that took years to sink in is that ‘maintenance-free’ is a marketing myth. While low-maintenance composite decking saves you from the sander and the stain brush, it demands respect in terms of thermal movement and cleaning. If you ignore the specific needs of these materials, they will punish you with squeaks, pops, and warped boards. Finally, never underestimate the power of ‘hidden’ structural elements. I’ve seen beautiful modern farmhouse decks with black railings fail within five years because the builder spent all the budget on the surface and skipped the vital flashing underneath.
The Gear I Never Step Onto a Jobsite Without
#IMAGE_PLACEHOLDER_E#
If you want professional results, you need to stop using general-purpose tools for specialized tasks. I always carry a high-end digital inclinometer. When you are working on the string line secret for perfectly level railing runs, being off by half a degree is the difference between a rail that looks straight and one that makes you feel dizzy. I also swear by 3M All Weather Flashing Tape 8067 for every joist top—it has an aggressive adhesive that actually works in the cold, unlike the cheap stuff.
For anyone serious about safety, the North American Deck and Railing Association (NADRA) manual is my ‘bible.’ It provides the structural clarity you won’t find on most YouTube tutorials. I also recommend keeping a small bottle of PVC cement or specialized composite miter glue; it’s the only way to ensure those beautiful corners stay tight through three winters and three summers.
Your Foundation for a Lifetime of Outdoor Memories
It’s easy to get overwhelmed by the codes, the types of screws, and the technical jargon. But remember: at the end of the day, you are creating a sanctuary for your family and friends. Every drip edge you install and every bolt you tighten is an investment in their safety and your peace of mind. By applying these composite decking secrets, you aren’t just building a structure; you’re mastering your environment. Don’t be afraid to take it slow—the extra hour you spend today is what keeps you off the repair ladder ten years from now. Have you ever encountered a surprise rot-pocket while renovating an old deck? Tell me your ‘horror story’ in the comments below!