
I still remember the Fourth of July three years ago. I was carrying a tray of ice-cold lemonade and my “world-famous” potato salad. As I stepped onto the third stair, the whole thing dipped like a cheap mattress. Liquid went flying, and my ego took a bigger hit than the salad bowl. That spongy, unsettling “give” underfoot wasn’t just annoying; it felt dangerous. It’s that subtle, rhythmic vibration that tells your brain something isn’t quite right.
Stop the Trampoline Effect on Your Back Porch
If your stairs feel like a diving board, you aren’t alone. Most homeowners assume it’s just “old wood” or maybe a loose screw. I used to think the same. Early in my DIY journey, I spent an entire Saturday driving three-inch screws into every tread I could find, thinking I’d “tighten it up.” Spoiler alert: it did absolutely nothing because I was ignoring the real culprit. The bounce isn’t usually in the surface boards; it’s hidden in the structural skeleton. We are going to look at exactly why your deck stair treads feel bouncy and how to stiffen them up so they feel as solid as a concrete sidewalk. Sometimes, the solution is as simple as the framing move that stops deck boards from bouncing, which often involves adding better lateral support.
Is My Whole Deck About to Collapse?
It is the first thing every neighbor asks me when they notice a bit of flex. That vertical movement makes you feel like the wood is failing right under your feet. However, a bouncy stair usually isn’t a sign of immediate collapse, but rather a sign of “deflection.” According to InterNACHI, stairways are statistically the most complex part of deck construction and are frequently the most neglected by builders who want to cut corners on lumber costs. If your builder didn’t use a double header move for extra wide stair openings, your stringers might be doing way more work than they were ever designed to handle. Have you ever felt that “heart-in-your-throat” moment when a stair gives way just a little too much? It’s a common frustration, but once you understand how gravity is winning the battle against your stringers, the fix becomes surprisingly logical.
Shorten the Span to Kill the Spring
The primary reason your stairs feel like a diving board is that the stringers—the notched boards that act as the staircase skeleton—are over-extended. When you cut a 2×12 to create steps, you are effectively reducing its structural depth to about five inches. A five-inch beam cannot span eight or ten feet without significant deflection. I learned this the hard way on a lakefront project where the stairs were so long they actually swayed in the wind. We solved it by installing a mid-span support. By digging two small footings and adding 4×4 posts topped with a 2×10 carrier beam, we cut the span in half. This is the structural reason your deck needs a mid-span beam for any run exceeding six feet. It transforms the physics of the staircase from a flexible spring into a rigid foundation.
Install Solid Blocking Between Stringers
If your stringers are spanning a reasonable distance but still feel ‘mushy,’ they are likely twisting or racking horizontally under your weight. To stop this, you need to install solid blocking—short pieces of lumber cut to fit tightly between the stringers. I usually use scrap pieces of 2×10 for this. By staggering these blocks every three feet, you force the stringers to act as a single, unified unit. This is very similar to the blocking trick that stops railing post wobble; it’s all about creating lateral rigidity where none existed before. When one stringer wants to flex, the blocks transfer that load to its neighbors, spreading the weight across the entire assembly.
The Diagonal Bracing Secret for Ultra-Stiff Stairs
One move I rarely see DIYers make, but one that makes a massive difference, is adding a ‘brace of strength’ on the underside of the carriage. This involves taking a 2×4 and running it diagonally across the bottom edges of all your stringers, from the top corner to the opposite bottom corner. Fasten it with two structural screws at every intersection. This creates a triangle within your framing, and triangles are the strongest shape in construction. I call this the diagonal bracing secret for ultra-stiff deck stairs because it eliminates that subtle side-to-side vibration that people often mistake for vertical bounce. 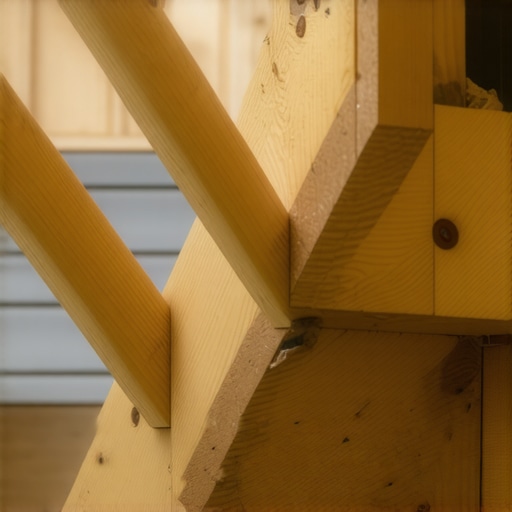
Tighten the Connection Points
Sometimes the bounce isn’t in the wood itself, but in how it’s attached to the house. If your stringers are just ‘toenailed’ into the rim joist, they will eventually pull away, creating a gap that allows for movement. I always recommend using specialized stringer hangers or structural screws rather than nails. If you want to check the overall integrity of your stair assembly, you can adapt the 3-second push test for wobbly railing systems. Give the staircase a firm, horizontal shove from the side at the midpoint. If you feel the entire structure move or hear the wood groaning at the top ledger, your attachment point is failing and needs immediate reinforcement with through-bolts or tension ties.Most homeowners upgrade to composite decking because they want to escape the cycle of sanding and staining. But here is the nuance that usually gets missed: composite isn’t wood, and if you treat it like wood, the structure will suffer. There is a common belief that composite is ‘set it and forget it,’ but in my years of building, I have seen more structural issues on composite decks than on traditional wood ones. Why? Because people often ignore the internal tension between materials. This is why your pressure-treated frame is pulling your composite apart; the organic wood frame shrinks and twists as it seasons, while the synthetic capped boards remain dimensionally stable, leading to popped fasteners and skewed stairs.
Stop Treating Composite Like It Is Inert Wood
While wood movement is dictated by moisture, composite movement is almost entirely thermal. If you install your boards on a 90-degree afternoon and do not leave a proper gap at the butt joints, they will shrink significantly in the winter, leaving unsightly half-inch gaps. Conversely, if you install them tight during a cool spring morning, they will buckle and ‘mushroom’ by the heat of July. This is a major ‘oops’ factor for DIYers. You have to learn how to stop composite deck boards from expanding into your siding by using specialized spacing jigs and allowing for linear expansion at the house ledger. #IMAGE_PLACE_HOLDER_C#
Why do my board gaps look different every morning?
This isn’t your imagination; it’s physics. A dark-colored board can reach surface temperatures of 160 degrees in direct sun, causing it to grow in length. According to the North American Deck and Railing Association (NADRA), the expansion of a 20-foot composite board can fluctuate significantly within a single 24-hour cycle. This is why dark composite boards need extra expansion space compared to lighter grays or tans. If you don’t account for this, the boards will actually shear the heads off your stainless steel screws or warp the hidden clips.
Protect the Frame or Lose the Investment
Another hidden nuance is what happens underneath those expensive boards. Because composite decking is denser and often installed with tighter gaps or hidden fasteners, it traps moisture against the joists better than traditional wood slats. This means your pressure-treated joists can actually rot faster if they aren’t protected from the ‘sandwich’ effect. I always use the joist tape secret for doubling your decks life. This butyl tape prevents water from seeping into the screw holes where it can sit and fester. Also, when it comes to cleaning, be extremely careful with your chemicals. I have seen beautiful, expensive decks ruined because a homeowner used a harsh chlorine cleaner; why you should never use bleach on composite decks is a lesson in chemistry that ends with a faded, chalky finish. If you want the most stable, solid feel underfoot, understanding why solid core composite is worth the extra bulk is essential, as it resists the ‘spongy’ vibration common in cheaper, hollow-core products. Have you ever fallen into this trap of ignoring thermal movement? Let me know in the comments.
The Specialized Gear That Makes a DIY Job Look Professional
When I first started building, I thought a standard impact driver and a tape measure were enough. I was wrong. The difference between a deck that looks like a weekend project and one that looks like a high-end architectural feature comes down to precision tools you won’t find in a basic kit. For instance, achieving perfectly flush fasteners on a 500-square-foot surface is impossible by eye. That is exactly why I rely on the jig i use for consistent deck screw depth; it ensures every single screw head sits exactly 1/16th of an inch below the surface, preventing those annoying ‘mushroom’ bumps that catch your socks. For the frame itself, you cannot trust a 4-foot level over a 20-foot span. I have moved away from expensive lasers for residential work and gone back to the basics: the string line method for perfectly level deck surfaces. It is a foolproof way to see every crown in every joist before you ever lay a single board. If your frame isn’t square from the start, your composite boards will eventually run ‘off the rails,’ creating trapezoidal gaps at the edges. I always verify my corners using the 3-4-5 triangle move for squaring up a new deck frame to ensure the foundation is mathematically perfect before the first post is set.
How do I keep my deck from looking aged after five years?
Long-term maintenance is less about scrubbing and more about preventative structural care. Even the highest-grade composite needs an annual check-up to ensure the hardware hasn’t succumbed to the elements. According to the American Architectural Manufacturers Association (AAMA) 611 standards, even high-performance coatings on aluminum railing systems require a simple fresh-water rinse every six months to prevent salt and pollutant buildup from pitting the finish. Beyond the railing, look at your main support beams. Water often collects on the flat top of a 2×10 beam, eventually rotting the wood from the top down. I use the shingle trick for protecting the top of your deck beam, which provides a shed-style roof for your structural lumber. These small, low-cost composite decking secrets and longevity tips are what separate a deck that lasts 10 years from one that lasts 40. 
The Future of Smart Decking is Closer Than You Think
Looking ahead to 2025 and beyond, I predict we are going to see ‘smart’ deck structures become the norm. We are already seeing the integration of moisture sensors embedded within the joist pockets to alert homeowners of leaks before rot begins. We are also seeing a massive shift toward pre-engineered steel framing systems that eliminate the warping issues of pressure-treated lumber entirely. If you are planning a build this season, don’t just build for today; build with the precision of a master craftsman. I strongly encourage you to try the string line method on your next project—it is a simple, analog technique that will save you hours of frustration when trying to get your boards to lay flat. If you have any questions about which jigs actually work versus which ones are just marketing gimmicks, reach out to us at our contact us page and I will share my updated tool list with you.
3 High-Stakes Lessons from the Job Site
I’ve spent years getting my hands dirty, and the most vital thing I’ve learned is that the hidden details matter far more than the surface appearance. First, never underestimate how much thermal expansion affects your hardware. I have seen many instances where hidden fasteners pop up in extreme summer heat because the installer didn’t account for the linear growth of the boards. Second, always assume an old frame has hidden issues. I never trust a visually ‘okay’ beam without performing the ice pick test for checking joist strength on older decks before I even think about laying new boards. Finally, structural integrity isn’t just about vertical weight—it’s about lateral movement. If you can stop the side-to-side sway, you effectively stop the rhythmic vibration that people perceive as bounce.
The Master Toolkit for Zero-Flex Decks
If you want to move past amateur results and achieve a truly professional feel, you need to look beyond the basic hammer and saw. I never start a major layout without the string line method for perfectly level deck surfaces; it is a time-tested, analog technique that is far more reliable than a budget laser level for spotting crowns in joists. I also swear by the joist tape secret for doubling your decks life. This butyl-based barrier is the single best investment you can make to protect your framing from rot-inducing moisture traps. For those of you dealing with unique layouts or complex stair geometry, don’t hesitate to reach out to us via our contact us page for a more tailored equipment list.
Your Journey Toward a Rock-Solid Home
Your outdoor space is more than just a collection of wood and plastic; it’s the foundation for your family’s summer memories. By applying these composite decking secrets and longevity tips, you aren’t just fixing a temporary annoyance—you are building a legacy of safety and superior craftsmanship. Don’t be afraid to take that first measurement and reclaim the solid, secure feeling of a well-built deck. Have you ever dealt with a staircase that felt more like a trampoline than a walkway? Let me know your biggest DIY headache in the comments below!