
I remember standing in my backyard three years ago, sweating through my shirt, looking at a row of railing posts that looked like they were trying to escape my deck. It was heart-breaking. I had spent weeks researching low-maintenance composite decking and painstakingly laying out every board, but the crooked posts made the whole project look like a DIY disaster. I made the classic rookie mistake: I thought a standard level and a ‘good eye’ were enough. They weren’t. Today, I’m going to save you the literal headache I got from squinting at my work. We’re talking about the one tool that makes plumbing a post so easy your neighbor’s dog could probably do it. No more ‘close enough’—we’re aiming for perfection. [image_placeholder]
Stop Eyeballing Your Way to a Crooked Deck
You’ve probably been there. You hold a level against the front of the post. It looks great. You move it to the side. It’s leaning like the Tower of Pisa. You nudge it back, and suddenly the front is off again. This ‘level-dance’ is exactly how I ended up with a wobbly railing that failed inspection. What I didn’t know then was that professional-grade results don’t always require professional-grade prices. According to the American Wood Council, maintaining perfect verticality isn’t just about looks; it’s essential for the structural load-bearing capacity of the post under lateral pressure. Even a few degrees of lean can compromise the blocking trick that stops railing post wobble. I learned the hard way that when your framing is off, your perfectly selected railing system will never sit flush, leading to gaps that drive you crazy every time you sit outside.
Is a Tiny Plastic Level Really Worth Your Time?
I get the skepticism. In a world of laser levels and high-tech sensors, a $5 piece of plastic with a rubber band seems like a toy. But here’s the thing: it works because it stays put. It wraps around the corner of the post, showing you both vertical planes at the same time. No more juggling. I spent years fighting with my tools instead of letting them help me. The first time I used one, I felt like a genius—everything just lined up. Have you ever found yourself three hours into a job, staring at a post and wondering if the ground is actually just slanted? I’d love to hear if you’ve ever had to rip out a whole section of railing because of one leaning post—shoot me a message and let’s commiserate.
Set Your Foundation with Rock-Solid Blocking
Before you even think about verticality, your post needs a home that doesn’t move. I used to think a single bolt through a rim joist was enough until I saw a railing lean two inches just from someone leaning on it. You need to implement the blocking trick that stops railing post wobble by sandwiching that post between solid framing members. Think of the post like a lever; if the base isn’t locked in a tight ‘socket’ of wood, it’s going to pivot no matter how much you level it. This starts with ensuring the secret to a perfectly square deck frame is already handled, because if your joists are out of alignment, your railing posts will never look consistent down the line of the deck. 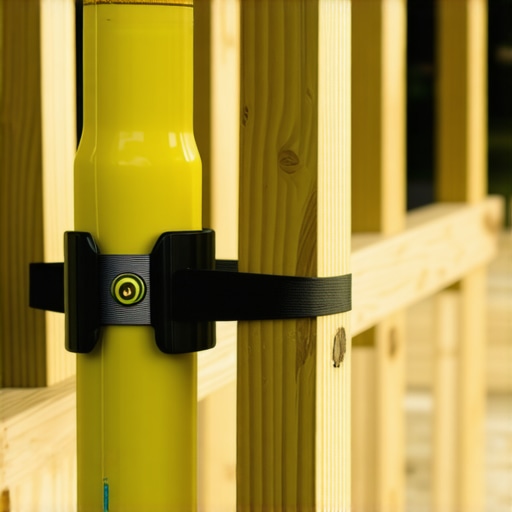
Snap the Level On and Let Gravity Do the Work
This is where that $5 tool becomes your best friend. Instead of holding a standard level with one hand and a drill with the other—which is a recipe for a dropped tool and a lot of swearing—you strap the post level on with its rubber band. It shows you the ‘plumb’ on two faces of the post simultaneously. I remember a humid July afternoon when I was trying to install twelve posts solo. I was exhausted and started rushing, only to realize my old-school level was slightly tilted because of a wood knot. The wrap-around post level ignores those surface imperfections and gives you a true reading. Once it’s on, you can use both hands to manipulate the wood. If you’re dealing with a particularly stubborn or bowed post, you might need to use the clamp and lever move for straightening bowed 2x10s applied to your bracing to force the timber into submission before driving your first fastener.
Stop Fighting Gravity with Temporary Bracing
Once the vials are centered, don’t just start driving screws. Wood has a memory, and it wants to return to its original shape. I once had a post perfectly plumb, drove the bolts home, and watched in horror as the post pulled three degrees to the left as the wood fibers compressed. Now, I use two scrap-wood ‘legs’ screwed into the top of the post and anchored to the deck boards. This creates a tripod that holds the post in place while you work on the permanent hardware. It’s a five-minute extra step that saves you from having to back out heavy-duty bolts later.
Fasten for Permanence without Ruining the Wood
When you’re ready to lock it in, hardware choice is everything. A common error is using screws that aren’t rated for the shear force a railing will take. You want heavy-duty structural screws or carriage bolts, but avoid the 3-inch screw mistake that ruins composite joists by ensuring your fasteners are long enough to bite deep into the blocking but not so long that they split the underlying structure. I usually pre-drill every hole. I learned this the hard way after splitting a beautiful 4×4 cedar post because I was too lazy to swap bits. The split didn’t show up until two weeks later when the sun dried out the wood, and I had to dismantle an entire section of railing to fix it. If you’re worried about consistency, you can even use the jig i use for consistent deck screw depth to make sure your bolt heads are perfectly recessed and uniform.
The Plumb Post Paradox You Aren’t Considering
Most DIYers—and even some pros—believe that once a post is plumb and the bolts are tight, the battle is won. I’m here to tell you that’s a dangerous half-truth. In my first five years of building, I focused entirely on the ‘now.’ But wood is a living, breathing material. The biggest trap I see is ignoring how a wet, pressure-treated frame interacts with a rigid railing system. If you’ve ever wondered why your pressure-treated frame is pulling your composite apart, it’s usually because the wood is drying and shrinking at a different rate than your railing fasteners can handle.
Can Your Railing Survive the Shrinkage of a Wet Frame?
This is the advanced question that separates the amateurs from the masters. When you buy ‘wet’ lumber from the big-box store, it contains a massive amount of moisture. As it seasons on your deck, that 4×4 post can shrink by as much as an eighth of an inch. This doesn’t sound like much until you realize that shrinkage creates a gap in your hardware. The North American Deck and Railing Association (NADRA) emphasizes that structural integrity is often lost not during the build, but during the first full seasonal cycle when wood fibers compress. If you don’t account for this by re-tensioning your bolts or using specialized hardware like the tension cable move for modern railing looks, your rock-solid railing will eventually start to rattle. #IMAGE_PLACE_HOLDER_C#
Stop Trusting Your Bolts Alone
I used to think that doubling up on carriage bolts was the ultimate solution for a stiff railing. It’s a common belief: more steel equals more strength. However, I’ve seen posts split right down the middle because too many large-diameter bolts were crammed into a small area, creating a ‘perforation’ effect. Instead of over-bolting, you should be looking at the structural chemistry of the whole frame. You need to avoid the 3-inch mistake that ruins composite joists by selecting fasteners that allow for a tiny bit of movement without sacrificing shear strength. This is where the blocking trick that stops railing post wobble becomes your best insurance policy. It distributes the leverage across three joists instead of putting all the stress on one rim board. Have you ever fallen into the trap of over-tightening everything only to hear the wood crack a week later? Let me know in the comments or send me a message—I’ve likely made the same mistake twice so you don’t have to.I’ve spent a lot of time talking about the ‘moment of creation’—that satisfying hour when you finally stand on your new boards. But the real test of a builder’s skill isn’t how it looks on day one; it’s how it looks on year ten. Every season, I make it a point to perform the ice pick test for checking joist strength on older decks on my own projects. It’s a humble method, but it’s the most reliable way to find out if your frame is holding moisture before the rot becomes a structural hazard. I’ve seen beautiful composite decking secrets longevity tips for a lasting deck ignored, only for the owner to realize the underlying pressure-treated wood was turning to mush while the plastic surface looked brand new.
Guard Your Investment Against Invisible Rot
Wood doesn’t just fail; it rots from the inside out where you can’t see it. In my experience, most deck collapses start at the ledger board or the stair stringers where water gets trapped. To combat this, I’ve started recommending the deck joist tape test does it actually stop rot to every client. That $100 investment in butyl tape can literally double the life of your frame by preventing water from sitting between your joists and boards. When you are trimming your lumber, remember that the American Wood Protection Association (AWPA) Standard M4 specifically mandates treating all field-cut ends with a copper-naphthenate preservative to maintain the structural integrity of the timber.
How do I maintain my composite deck over time?
The most common mistake I see is the ‘clean it till it hurts’ mentality. I beg of you: why you should never use a power washer on composite boards is because it can actually etch the surface and trap more dirt long-term. Instead, I’ve found that the vinegar and water mix that cleans composite better than chemicals is all you really need for a deep seasonal refresh. It’s safer for your garden and keeps that factory finish looking crisp. For those with a pergola, checking rafter tails for signs of splitting should be a biannual ritual to prevent moisture from traveling deep into the beam.
Software Beats a Pencil Every Time
If you’re planning to scale up your project or add complex features like a curved staircase or multi-level tiers, stop using graph paper. I personally use structural design software now because it catches load-path errors and weight distribution issues that my human brain misses. When you’re looking to elevate your backyard innovative deck design ideas for 2025, having a 3D model allows you to see exactly where the sun will hit your pergola at 4 PM in July. This digital rehearsal is the difference between a deck that is ‘fine’ and a deck that is a masterpiece. #IMAGE_PLACE_HOLDER_D#
Prepare for the 2025 Shift in Outdoor Living
As we move into 2025, I’m seeing a massive trend toward ‘resilient design.’ This means we aren’t just building for aesthetics; we are building for climate extremes. Whether it’s high-heat-resistant boards or enhanced drainage systems, the industry is shifting toward materials that handle the ‘wet-dry-freeze’ cycle better than ever before. Before your next spring cleaning, go perform the ice pick test on three different joist sections—it’s the fastest way to find out if you need a weekend of repairs or if you’re ready for another decade of hosting.I remember standing in my backyard three years ago, sweating through my shirt, looking at a row of railing posts that looked like they were trying to escape my deck. It was heart-breaking. I had spent weeks researching low-maintenance composite decking and painstakingly laying out every board, but the crooked posts made the whole project look like a DIY disaster. I made the classic rookie mistake: I thought a standard level and a ‘good eye’ were enough. They weren’t. Today, I’m going to save you the literal headache I got from squinting at my work. We’re talking about the one tool that makes plumbing a post so easy your neighbor’s dog could probably do it. No more ‘close enough’—we’re aiming for perfection. [image_placeholder]
Stop Eyeballing Your Way to a Crooked Deck
You’ve probably been there. You hold a level against the front of the post. It looks great. You move it to the side. It’s leaning like the Tower of Pisa. You nudge it back, and suddenly the front is off again. This ‘level-dance’ is exactly how I ended up with a wobbly railing that failed inspection. What I didn’t know then was that professional-grade results don’t always require professional-grade prices. According to the American Wood Council, maintaining perfect verticality isn’t just about looks; it’s essential for the structural load-bearing capacity of the post under lateral pressure. Even a few degrees of lean can compromise the blocking trick that stops railing post wobble. I learned the hard way that when your framing is off, your perfectly selected railing system will never sit flush, leading to gaps that drive you crazy every time you sit outside.
Is a Tiny Plastic Level Really Worth Your Time?
I get the skepticism. In a world of laser levels and high-tech sensors, a $5 piece of plastic with a rubber band seems like a toy. But here’s the thing: it works because it stays put. It wraps around the corner of the post, showing you both vertical planes at the same time. No more juggling. I spent years fighting with my tools instead of letting them help me. The first time I used one, I felt like a genius—everything just lined up. Have you ever found yourself three hours into a job, staring at a post and wondering if the ground is actually just slanted? I’d love to hear if you’ve ever had to rip out a whole section of railing because of one leaning post—shoot me a message and let’s commiserate.
Set Your Foundation with Rock-Solid Blocking
Before you even think about verticality, your post needs a home that doesn’t move. I used to think a single bolt through a rim joist was enough until I saw a railing lean two inches just from someone leaning on it. You need to implement the blocking trick that stops railing post wobble by sandwiching that post between solid framing members. Think of the post like a lever; if the base isn’t locked in a tight ‘socket’ of wood, it’s going to pivot no matter how much you level it. This starts with ensuring the secret to a perfectly square deck frame is already handled, because if your joists are out of alignment, your railing posts will never look consistent down the line of the deck. #IMAGE_PLACE_HOLDER_B#
Snap the Level On and Let Gravity Do the Work
This is where that $5 tool becomes your best friend. Instead of holding a standard level with one hand and a drill with the other—which is a recipe for a dropped tool and a lot of swearing—you strap the post level on with its rubber band. It shows you the ‘plumb’ on two faces of the post simultaneously. I remember a humid July afternoon when I was trying to install twelve posts solo. I was exhausted and started rushing, only to realize my old-school level was slightly tilted because of a wood knot. The wrap-around post level ignores those surface imperfections and gives you a true reading. Once it’s on, you can use both hands to manipulate the wood. If you’re dealing with a particularly stubborn or bowed post, you might need to use the clamp and lever move for straightening bowed 2x10s applied to your bracing to force the timber into submission before driving your first fastener.
Stop Fighting Gravity with Temporary Bracing
Once the vials are centered, don’t just start driving screws. Wood has a memory, and it wants to return to its original shape. I once had a post perfectly plumb, drove the bolts home, and watched in horror as the post pulled three degrees to the left as the wood fibers compressed. Now, I use two scrap-wood ‘legs’ screwed into the top of the post and anchored to the deck boards. This creates a tripod that holds the post in place while you work on the permanent hardware. It’s a five-minute extra step that saves you from having to back out heavy-duty bolts later.
Fasten for Permanence without Ruining the Wood
When you’re ready to lock it in, hardware choice is everything. A common error is using screws that aren’t rated for the shear force a railing will take. You want heavy-duty structural screws or carriage bolts, but avoid the 3-inch screw mistake that ruins composite joists by ensuring your fasteners are long enough to bite deep into the blocking but not so long that they split the underlying structure. I usually pre-drill every hole. I learned this the hard way after splitting a beautiful 4×4 cedar post because I was too lazy to swap bits. The split didn’t show up until two weeks later when the sun dried out the wood, and I had to dismantle an entire section of railing to fix it. If you’re worried about consistency, you can even use the jig i use for consistent deck screw depth to make sure your bolt heads are perfectly recessed and uniform.
The Plumb Post Paradox You Aren’t Considering
Most DIYers—and even some pros—believe that once a post is plumb and the bolts are tight, the battle is won. I’m here to tell you that’s a dangerous half-truth. In my first five years of building, I focused entirely on the ‘now.’ But wood is a living, breathing material. The biggest trap I see is ignoring how a wet, pressure-treated frame interacts with a rigid railing system. If you’ve ever wondered why your pressure-treated frame is pulling your composite apart, it’s usually because the wood is drying and shrinking at a different rate than your railing fasteners can handle.
Can Your Railing Survive the Shrinkage of a Wet Frame?
This is the advanced question that separates the amateurs from the masters. When you buy ‘wet’ lumber from the big-box store, it contains a massive amount of moisture. As it seasons on your deck, that 4×4 post can shrink by as much as an eighth of an inch. This doesn’t sound like much until you realize that shrinkage creates a gap in your hardware. The North American Deck and Railing Association (NADRA) emphasizes that structural integrity is often lost not during the build, but during the first full seasonal cycle when wood fibers compress. If you don’t account for this by re-tensioning your bolts or using specialized hardware like the tension cable move for modern railing looks, your rock-solid railing will eventually start to rattle. #IMAGE_PLACE_HOLDER_C#
Stop Trusting Your Bolts Alone
I used to think that doubling up on carriage bolts was the ultimate solution for a stiff railing. It’s a common belief: more steel equals more strength. However, I’ve seen posts split right down the middle because too many large-diameter bolts were crammed into a small area, creating a ‘perforation’ effect. Instead of over-bolting, you should be looking at the structural chemistry of the whole frame. You need to avoid the 3-inch mistake that ruins composite joists by selecting fasteners that allow for a tiny bit of movement without sacrificing shear strength. This is where the blocking trick that stops railing post wobble becomes your best insurance policy. It distributes the leverage across three joists instead of putting all the stress on one rim board. Have you ever fallen into the trap of over-tightening everything only to hear the wood crack a week later? Let me know in the comments or send me a message—I’ve likely made the same mistake twice so you don’t have to.I’ve spent a lot of time talking about the ‘moment of creation’—that satisfying hour when you finally stand on your new boards. But the real test of a builder’s skill isn’t how it looks on day one; it’s how it looks on year ten. Every season, I make it a point to perform the ice pick test for checking joist strength on older decks on my own projects. It’s a humble method, but it’s the most reliable way to find out if your frame is holding moisture before the rot becomes a structural hazard. I’ve seen beautiful composite decking secrets longevity tips for a lasting deck ignored, only for the owner to realize the underlying pressure-treated wood was turning to mush while the plastic surface looked brand new.
Guard Your Investment Against Invisible Rot
Wood doesn’t just fail; it rots from the inside out where you can’t see it. In my experience, most deck collapses start at the ledger board or the stair stringers where water gets trapped. To combat this, I’ve started recommending the deck joist tape test does it actually stop rot to every client. That $100 investment in butyl tape can literally double the life of your frame by preventing water from sitting between your joists and boards. When you are trimming your lumber, remember that the American Wood Protection Association (AWPA) Standard M4 specifically mandates treating all field-cut ends with a copper-naphthenate preservative to maintain the structural integrity of the timber.
How do I maintain my composite deck over time?
The most common mistake I see is the ‘clean it till it hurts’ mentality. I beg of you: why you should never use a power washer on composite boards is because it can actually etch the surface and trap more dirt long-term. Instead, I’ve found that the vinegar and water mix that cleans composite better than chemicals is all you really need for a deep seasonal refresh. It’s safer for your garden and keeps that factory finish looking crisp. For those with a pergola, checking rafter tails for signs of splitting should be a biannual ritual to prevent moisture from traveling deep into the beam.
Software Beats a Pencil Every Time
If you’re planning to scale up your project or add complex features like a curved staircase or multi-level tiers, stop using graph paper. I personally use structural design software now because it catches load-path errors and weight distribution issues that my human brain misses. When you’re looking to elevate your backyard innovative deck design ideas for 2025, having a 3D model allows you to see exactly where the sun will hit your pergola at 4 PM in July. This digital rehearsal is the difference between a deck that is ‘fine’ and a deck that is a masterpiece. #IMAGE_PLACE_HOLDER_D#
Prepare for the 2025 Shift in Outdoor Living
As we move into 2025, I’m seeing a massive trend toward ‘resilient design.’ This means we aren’t just building for aesthetics; we are building for climate extremes. Whether it’s high-heat-resistant boards or enhanced drainage systems, the industry is shifting toward materials that handle the ‘wet-dry-freeze’ cycle better than ever before. Before your next spring cleaning, go perform the ice pick test on three different joist sections—it’s the fastest way to find out if you need a weekend of repairs or if you’re ready for another decade of hosting.
What I Learned After My First Railing Failed Inspection
Looking back at years of construction, the biggest lessons always came from the failures. I learned that you must respect the wood’s moisture content; pressure-treated lumber is often saturated when it arrives, and if you lock it down without room for seasonal expansion, it will eventually split your brackets. I also realized that a tiny error of 1/16th of an inch at the base of a post becomes a massive, noticeable gap once you get to the top of a 42-inch railing. Precision at the base is non-negotiable. Finally, I never start a layout without reviewing the complete guide to choosing railing systems for safety and style, because local codes change and safety should never be an afterthought.
The Essential Toolbox for a Stress-Free Build
You don’t need a warehouse full of equipment, but you need the right items to ensure a professional finish. My personal ‘must-haves’ include the wrap-around post level for hands-free plumbing and high-quality structural screws that won’t shear under pressure. I also keep a powerful LED torch in my kit for the 10-minute flashlight test for finding hidden ledger rot during my annual maintenance checks. If you’re upgrading to premium surfaces, don’t forget the soap and sponge fix for oil stains on composite decking, which has saved me from permanent marks more times than I care to admit.
Start Building Your Dream Outdoor Space Now
There is a unique kind of pride that comes from standing on a deck you built with your own hands, knowing every post is perfectly plumb and every joist is protected. By focusing on these structural details today, you’re securing years of safety for your family. Whether you are seeking innovative deck design ideas that elevate your home’s curb appeal or simply want to tighten up a wobbly railing, remember that patience is your best tool. Your perfect outdoor sanctuary is well within reach—now go grab your level and make it happen. Have you ever struggled with a railing post that just wouldn’t stay plumb? Let me know below.