
I stood on my back porch ten years ago, holding a lukewarm coffee and staring at a 100-square-foot rectangle of pressure-treated wood that felt more like a prison cell than an outdoor oasis. My backyard wasn’t small; it was just cramped. I’d spent thousands on materials, and yet, once the grill and two chairs were out there, it looked cluttered and tiny. I realized then that I hadn’t just built a deck; I had built a visual trap. I had laid out my boards perfectly straight, thinking clean lines would mean a clean look. Instead, I created a visual “runway” that led the eye directly to the railing, highlighting exactly how few steps it took to cross the space. Most homeowners think of a deck as just a platform, but it is actually a series of leading lines. Today, I am going to show you how a 45-degree shift can completely change your perspective and why this is [the secret to making a small deck feel massive](https://deckforgebuilders.com/the-secret-to-making-a-small-deck-feel-massive) without adding a single square foot of framing.
Stop Building Decks That Feel Like Hallways
Most DIYers and even some pros default to the “standard” layout because it is easy. You just slap the boards down perpendicular to the joists and call it a day. But on a small deck, those straight lines act like a measuring tape for the eye. They tell your brain exactly where the boundaries are. By shifting that perspective to a diagonal, you force the eye to follow the longest dimension of the board—the hypotenuse—which is significantly longer than the width or depth of the deck. I learned the hard way that you cannot just flip the boards and keep the same frame. My first attempt resulted in a floor that dipped and bounced like a trampoline because I did not adjust my joist spacing. If you have ever wondered [why your composite deck feels spongy between joists](https://deckforgebuilders.com/why-your-composite-deck-feels-spongy-between-joists), it is usually because the diagonal span is longer than the joists can support at standard intervals. You need your joists at 12 inches on-center for a rock-solid feel when going diagonal. It is one of those [innovative deck design ideas for 2025](https://deckforgebuilders.com/elevate-your-backyard-innovative-deck-design-ideas-for-2025) that relies entirely on getting the hidden skeleton right first. [image_placeholder_1]
Is This Layout Actually Worth the Extra Hype?
I get it. Cutting 45-degree angles on every single board end sounds like a tedious nightmare. You are going to have more waste—typically about 15% more material—and it takes significantly longer to install. However, the return on “visual square footage” is massive. According to research published by the *International Journal of Design*, floor patterns that lead the eye toward the corners of a room can increase the perceived area of a space by up to 20% compared to parallel patterns. That is the difference between a deck that feels like a storage closet and one that feels like a true extension of your living room. Have you ever stepped onto a deck and felt like you were walking on a narrow plank? I would love to hear if you have tried to “cheat” the size of your space with layout tricks before. Before we get the miter saw out, we need to address the specific framing moves that prevent [your deck boards from bouncing](https://deckforgebuilders.com/the-framing-move-that-stops-deck-boards-from-bouncing) under this new angle.
Tighten Your Joists to Kill the Bounce
When you pivot a board 45 degrees, you increase the distance it has to stretch between your floor joists. If your joists are 16 inches apart—the standard for straight boards—that diagonal span suddenly jumps to over 22 inches. That is how you end up with a deck that feels like a trampoline. I learned this lesson the hard way while helping a friend build a budget platform. We thought we could skip the extra lumber, but the first time his grill rolled across the center, the boards dipped so significantly we thought the frame had snapped. To avoid this, you must set your joists at 12 inches on-center. It adds a bit of cost in pressure-treated lumber, but it is the only way to ensure how to fix the bounce in your over-spanned deck joists isn’t a search query you are making six months from now. 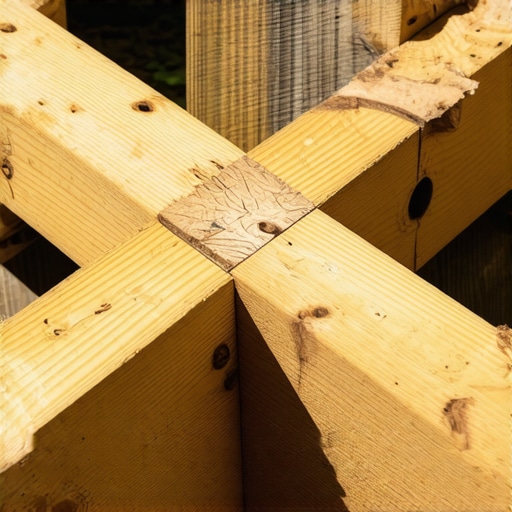
The First Board Dictates Everything
You cannot just start throwing boards down and hope they line up. I once tried to eyeball a 45-degree start on a small 12×12 deck. By the time I reached the opposite corner, I was nearly three inches off-square. I had to rip up hundreds of dollars worth of material because the pattern looked like a dizzying spiral instead of a clean diagonal. Now, I always use the 3-4-5 triangle move for squaring up a new deck frame before a single fastener goes in. Once the frame is square, pull a line from the center of the house-side ledger to the outer corner to establish your true diagonal path. When cutting your ends, remember that composite can be brittle; I highly recommend using the painters tape hack for cutting composite boards without fraying to keep those mitered edges looking sharp and professional.
Frame the Perimeter for a Pro Finish
A diagonal layout looks unfinished if the jagged ends of the boards are just hanging out over the rim joist. You need a picture frame border. This is a solid perimeter of boards that runs perpendicular to the main field. It hides the cut ends and gives the whole project a high-end, custom look. However, you cannot just screw a border board into thin air. You need to install the double joist trick for perfectly flush picture frame borders. By doubling up the framing at the edges, you provide a wide enough landing pad for both the diagonal ends and the border board to sit securely without one of them overhanging the wood.
Select Railings That Open the Horizon
After you have gone through the effort of expanding the visual floor space, do not ruin it by installing heavy, chunky wood railings that act like a solid wall. A small deck needs transparency. I have seen beautiful diagonal floors get completely swallowed by thick 4×4 posts and wide balusters that block the yard. Instead, look for slim-profile systems. My go-to for making a tight space feel infinite is the stainless cable trick for views that never get blocked. The thin horizontal lines of the cable disappear into the background, allowing your eyes to travel past the deck and into the yard, which makes the entire area feel like one continuous living space.I have spent years defending composite decking, but here is a hard truth: the ‘low maintenance’ label is a marketing trap. Most homeowners think they can skip the cleaning, but neglect leads to organic growth that eats the aesthetic. But the real expertise comes in understanding material behavior. While most pros swear by hidden clips to get that ‘floor-like’ finish, I have started moving back to high-quality face fasteners for specific layouts. Why? Because why hidden fasteners can be a maintenance nightmare becomes very real the moment you need to replace a single damaged board in the middle of a twenty-foot span. With clips, you are basically playing a high-stakes game of Jenga where you have to disassemble half the deck to fix one deep scratch.
The Hidden Fastener Nightmare
I get the appeal of a screw-free surface, but if you are building in a high-traffic zone or near a pool, the board replacement factor is huge. Using a face-screw approach combined with the jig I use for consistent deck screw depth allows for a much more service-friendly structure without sacrificing the look. Have you ever fallen into this trap and had to pull up ten boards just to fix one? Let me know in the comments.
Is Your Composite Decking Actually Moving Under Your Feet?
The biggest mistake I see advanced DIYers make isn’t the framing—it is ignoring physics. Composite isn’t wood; it’s a thermo-polymer. A study in the Journal of Building Engineering found that dark composite boards can expand significantly depending on ambient temperature changes and solar absorption. If you don’t account for this linear expansion, you will see why your composite boards are crowning and how to fix it becoming your new weekend project. You need to leave specific end-to-end gaps based on the temperature at the time of installation, or the boards will eventually push against the house siding or buckle. 
Tiny Cuts That Save Your Pergola
When we pivot to shade structures, the same ‘hidden’ nuances apply. Most people focus on the rafters and forget the physics of water. I have seen beautiful cedar structures rot in five years because the builder ignored the 15-degree cut that keeps water off your pergola beams. This small miter on the rafter tails prevents water from wicking back into the grain of the main beam. Similarly, if your structure feels flimsy, you likely missed the bracing. You will quickly find out why your pergola shakes when the wind blows if you treat the joints like simple 2D connections.
Why Zero-Maintenance Is a Dangerous Myth
Everyone says composite is ‘set it and forget it,’ but that is the industry’s greatest lie. In reality, it is just ‘lower’ maintenance. If you live near trees, the tannins will stain your boards faster than you think. I always recommend the vinegar and water mix that cleans composite better than chemicals to keep the surface pristine without stripping the UV-protective cap. And speaking of heat, if you are opting for that sleek modern look, be careful with your railing choices. I have seen homeowners get quite a shock when they realize why your black aluminum railing gets too hot to touch during a July afternoon. Expert deck building isn’t just about the boards you see; it’s about anticipating how the materials will behave long after the last screw is driven.
The Tools That Actually Save Your Back
When you are working alone or with a small crew, you need tools that act like an extra set of hands. I never step onto a job site without my board lever. If you have ever fought with a piece of warped pressure-treated lumber, you know the frustration of trying to hold it flush while driving a screw. I use the clamp and lever move for straightening bowed 2x10s to force those stubborn joists into alignment before they are fastened. For layout, skip the old-school bubble level. I rely on the level and laser method for setting pergola heights alone. A rotary laser level ensures that your rafters are perfectly horizontal across a 20-foot span, something a string line can never guarantee due to sag. It is about precision that lasts long after you have packed up your gear. 
How do I keep my composite deck looking brand new for decades?
The secret isn’t a magic chemical; it is consistency. Even the best capstock can be ruined if you get aggressive with it. I have a strict rule: why you should never use a power-washer on composite boards is because the high pressure can actually micro-tear the plastic surface, creating a porous texture that traps more dirt later. Instead, stick to the soap and sponge fix for oil stains on composite decking for localized spills. According to the North American Decking and Railing Association (NADRA), structural failure is often a slow burn caused by ignored rot, so checking your ledger and joists annually is a necessity. For the surface, following these composite decking secrets and longevity tips will help you maintain that showroom finish through every season.
Where the Backyard Industry is Heading
Looking toward 2025 and beyond, we are seeing a massive shift toward “smart” decks. We are not just talking about LED strips anymore; we are seeing the integration of moisture sensors embedded in the framing and heat-reflective cooling technology built directly into the boards. It is an exciting time for outdoor living because the materials are finally catching up to our architectural ambitions. Decks are becoming high-tech extensions of our homes rather than just wooden platforms.
Don’t Just Build, Optimize
Now that you have the layout and the maintenance plan, my biggest piece of advice is this: go buy a high-quality miter saw blade designed specifically for composite materials. It is a $100 investment that prevents thousands of dollars in wasted, frayed material. I want you to try the painters tape hack I mentioned earlier on your next diagonal cut—you will be shocked at how much cleaner the edge is. If you are ready to take the next step and finally get that frame square, check out my deep dive on the 3-4-5 triangle move for squaring up a new deck frame. Your future self will thank you when those diagonal boards line up perfectly to the millimeter.
Hard Lessons Learned in the Sawdust
Building hundreds of outdoor spaces has taught me that the most expensive mistakes are the ones you can’t see until the sun hits the deck at a certain angle. First, thermal expansion is not a suggestion; if you don’t respect the gap requirements, your beautiful floor will eventually buckle against the house. Second, I’ve realized that a deck is only as good as its skeleton. You can buy the most expensive boards on the market, but if you don’t master the 3-4-5 triangle move for squaring up a new deck frame, the diagonal lines will look like a funhouse mirror. Lastly, always remember that ‘low maintenance’ doesn’t mean ‘zero maintenance.’ Even the best low-maintenance composite decking needs a regular rinse to prevent organic debris from staining the protective cap. These nuances are what separate a DIY weekend project from a legacy build that adds real value to your home.
The Gear That Won’t Let You Down
I am often asked what is actually worth the investment versus what is just marketing hype. For any composite project, I swear by Diablo’s Trex-specific saw blades; they prevent the melting and fraying that ruined my early projects. For the layout phase, a Stabila rotary laser level is the only way to ensure your posts are perfectly height-matched across a wide span. If you are diving into shade structures, I recommend checking out pergola design inspiration from professional architectural guilds to see how they handle weight distribution without bulky hardware. Finally, never skip Butyl joist tape—it is the cheapest insurance policy you can buy to double the lifespan of your pressure-treated frame.
Build a Space You Actually Want to Live In
At the end of the day, your deck isn’t just a construction project; it’s the backdrop for your family’s summer memories. Whether you choose a complex diagonal layout or a clean, modern aesthetic, the goal is to maximize your deck’s longevity through smart material choices and precise framing. Don’t be afraid to take that extra day to get the details right. Your future self will thank you when you’re sitting out there five years from now, coffee in hand, on a floor that is still as rock-solid and beautiful as the day you finished it. Staying ahead of modern pergola trends and deck layouts will ensure your backyard remains a sanctuary for decades. Have you ever attempted a diagonal board layout, or are you planning to stick with the classic straight-line approach? Let me know in the comments below!