
I’ll never forget the sound of my boot sinking through a perfectly good-looking deck board. It wasn’t the board’s fault—it was the skeleton underneath. I’d spent weeks on the deck design, picking the perfect composite decking to avoid maintenance, but I completely ignored the pressure-treated joists. I assumed “treated” meant “forever.” I was wrong. When I finally pulled up the boards to investigate that squishy spot, the tops of my joists looked like wet cardboard. That mistake cost me thousands and taught me a lesson I’ll never forget: the most important part of your deck is the part you never see.
Your Joists Are Trapping Water Like a Sponge
Most people think rot comes from the ground up. It doesn’t. It starts right where the deck board meets the joist. Every time it rains, water seeps into the screw holes and sits in the tiny gap between the board and the wood. It can’t evaporate. It just sits there, feeding fungi. Even composite decking secrets won’t save a frame that’s rotting from the inside out. I’ve seen 10-year-old decks that had to be completely torn down because the owner didn’t spend $100 on flashing tape. I once made the 3-inch screw mistake that ruins composite joists by driving them too deep, creating even larger pockets for water to pool.
Is Joist Tape Actually Worth the Hype?
You might be thinking this is just another gimmick sold at big-box stores. I get it. I used to be a skeptic too. But here’s a surprising fact: the USDA Forest Products Laboratory notes that moisture trapped in these horizontal interfaces creates a “wetting-drying cycle” that is the primary cause of structural failure in outdoor wood. By applying a simple butyl or bitumen tape, you’re creating a waterproof cap. It’s like putting an umbrella over the most vulnerable part of your home’s extension. Have you ever noticed your deck feeling a bit “spongy” even though the surface looks fine? If so, you might already be fighting a losing battle against hidden moisture.
The Simple Move That Buys You Decades of Safety
We’re talking about doubling the lifespan of your frame here. If you’re currently planning a pergola design or a new backyard oasis, this is the one step you cannot skip. I learned the hard way that why pressure-treated wood still rots isn’t a myth; it’s a structural reality. Using joist tape is the difference between a deck that lasts 15 years and one that stays rock-solid for 30. Let’s get into the specifics of how to apply it so you don’t waste your time or money.
Prep Your Joists Before You Stick Anything Down
You can’t just throw tape onto a dusty beam and expect it to survive a winter. I learned this the hard way on a project in late July. I was rushing to beat a rainstorm and slapped the tape directly onto joists that were covered in sawdust and pollen. By the time I came back the next morning, the tape was curling up like a bad sunburn. I had to waste three rolls of expensive material just because I didn’t take thirty seconds to wipe the wood down with a damp rag. If you’re working on an older frame, ensure you avoid why you should never use a pressure washer on composite boards or even your joists right before taping, as the wood needs to be bone-dry. Dust is the absolute enemy of adhesion.
Choose Butyl Over Bitumen Every Single Time
Not all tapes are created equal. You’ll see bitumen-based tapes (which are basically asphalt) and butyl-based tapes. Bitumen is cheaper, but it gets brittle in the cold and turns into a gooey mess in the heat. Butyl is like the high-end gasket on a submarine; it’s more flexible and creates a tighter seal around the screws. In the deck joist tape test does it actually stop rot, butyl consistently outperforms because it “heals” around the fastener. When you drive a screw through it, the rubbery compound grips the threads, effectively caulking the hole as you go. This is the secret to a frame that doesn’t just look good but stays structurally sound.
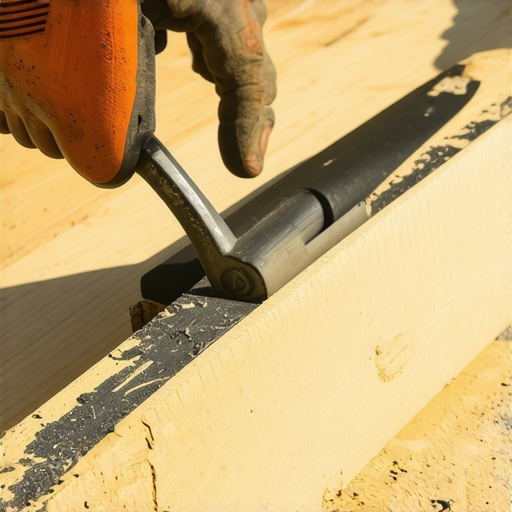
Roll and Press to Seal Out the Fungi
The goal is to eliminate air pockets. Think of it like applying a screen protector to your phone—one bubble and the whole thing looks off, but on a deck, that bubble is where water hides. Start at one end of the joist and pull the tape taut, centering it so there’s about a quarter-inch of overhang on each side. This “cap” allows water to shed off the sides of the joist rather than soaking into the grain. I use a small J-roller to firmly press the tape into the wood. This creates a bond that is almost impossible to break. If you’re working on complex pergola design inspiration from modern to classic looks, you’ll want to apply this same logic to the tops of your main beams. It’s often the the structural reason your pergola is leaning—unprotected beams rotting at the connection points.
Don’t Forget the Most Vulnerable Spots
Joists are the easy part. The real danger zones are the ledger board and the stair stringers. The ledger board is where the deck meets your house, and failure here is catastrophic. It’s often the culprit behind the ledger board error that causes house leaks. Run your tape up the house wall slightly before installing your flashing to create a double-redundant water barrier. For your stairs, tape the horizontal “cut” of the stringer where the tread sits. This is a high-moisture area that is notorious for early failure. If you ignore this, you’ll soon be asking why your deck stairs are squeaking and the fast fix usually involves replacing the whole stringer because the wood has gone soft. By taping these high-stress points, you’re essentially waterproofing the skeleton of your entire outdoor living area.
Beyond the structural skeleton, there is a massive misconception about ‘premium’ aesthetics. Most homeowners I work with are dead-set on hidden fasteners because they want a seamless surface. They believe it’s the gold standard of transform your home with stunning deck design strategies. But here’s the contrarian truth: why hidden fasteners can be a maintenance nightmare is a reality you don’t want to face three years down the line. If a single board in the middle of your deck gets gouged or stained, you can’t just pop it out. You often have to unzip the entire deck starting from the edge to reach that one board. For high-traffic family decks, I frequently recommend color-matched face screws with plugs. It’s easier to repair, and frankly, it provides a more secure mechanical bond during extreme temperature shifts.
Why Does My Composite Deck Feel Like a Trampoline?
Even with the best composite decking secrets, your surface might feel ‘bouncy.’ This is the ‘Oops’ factor that catches DIYers and even some pros off guard. People assume if 16-inch joist spacing works for wood, it works for composite. It doesn’t. Composite material is naturally more flexible than lumber. The North American Deck and Railing Association (NADRA) emphasizes that reducing joist spacing to 12 inches on center significantly improves the ‘stiffness’ of the walking surface. If you ignore this, you’ll end up wondering why your composite deck feels like a trampoline every time you walk across it. It’s an advanced nuance that separates a ‘good’ deck from a ‘luxury’ one.
The Scale Trap That Cheapens Your Design
I’ve seen beautiful projects ruined because the owner used 4×4 posts. Structurally, they might pass inspection, but visually, they look like toothpicks holding up a piano. This is why 6×6 posts look better than 4x4s on any outdoor structure—the added mass provides a sense of permanence and architectural weight that transforms the overall look of your property. 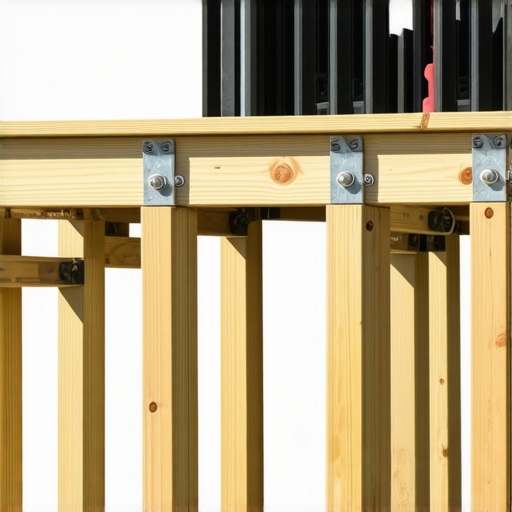
Fix the Railing Wiggle Before It Starts
The biggest safety trap in deck building is the ‘wobbly post’ syndrome. Many people simply bolt a railing post to the outside of the rim joist and call it a day. Within a year, that post will have an inch of play. This is where the blocking trick that stops railing post wobble becomes essential. You need to install solid wood blocks behind the post, inside the joist cavity, and use through-bolts rather than lag screws. This transfers the load to the entire floor system, not just the outer board. Also, never forget the expansion gap rule that stops boards from buckling; composite expands and contracts significantly more than wood, and a tight joint in the morning can become a buckled mess by noon. Have you ever fallen into this trap? Let me know in the comments.After years of fighting with warped lumber, I realized that brute force is the amateur’s way. If you’re installing a premium composite decking trends durable solutions for modern outdoor living, you need a specialized lever like a BoWrench. This tool locks onto your joist and pulls even the nastiest ‘banana’ boards straight so you can secure them with precision. Without it, you’ll end up with uneven gaps that scream ‘DIY fail.’ I also never start a railing project without the drill guide hack for centered baluster holes. It’s a ten-dollar piece of equipment that ensures every single spindle is perfectly vertical. If you’ve ever looked at a finished railing and noticed one baluster slightly crooked, it’s because someone tried to eye-ball it. Don’t be that person; use the simple tool for making sure your railing posts are plumb to save yourself the visual headache later.
How do I maintain my composite deck so it stays looking brand new?
Most people assume ‘low maintenance’ means ‘no maintenance,’ and that is exactly how you end up with mold in the grooves. Every spring, I pull out the bucket. Forget the fancy high-pressure equipment; in fact, I’ve warned people why you should never use a power washer on composite boards because it can literally shred the protective capping. Instead, I use the vinegar and water mix that cleans composite better than chemicals. It’s gentle, kills fungal spores, and won’t harm your landscaping. For a deeper dive, checking out composite decking secrets longevity tips for a lasting deck will show you that keeping debris out of the gaps is actually the number one way to prevent rot on the joists below.
Why Vinegar Beats Every Hardware Store Chemical
I’ve spent hundreds on ‘specialty’ deck cleaners only to find they left a white film on my dark boards. The technical reason, as noted by the International Research Group on Wood Protection, is that harsh alkaline cleaners can actually degrade the polymers in some capped composites over time. A simple 50/50 mix of white vinegar and water breaks down mineral deposits and pollen without stripping the UV inhibitors. It’s the pro move that costs pennies and preserves the architectural integrity of your home.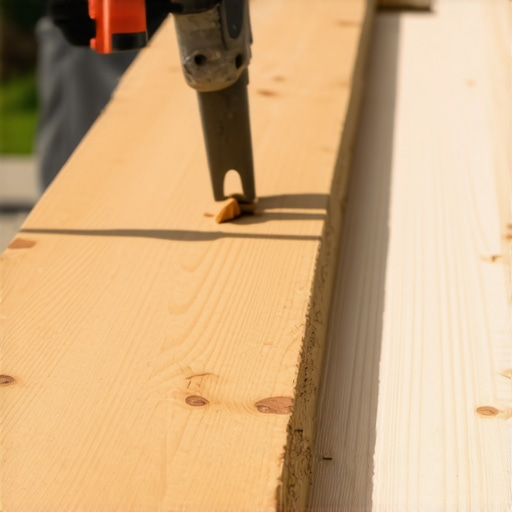
The 15-Minute Habit That Saves Thousands
Every May, I do what I call the ‘Structural Walkthrough.’ I take a screwdriver and a high-lumen flashlight and follow the 15-minute deck inspection every homeowner should do. I’m looking for loose bolts, ledger separation, and any signs of the dreaded ‘spongy’ feel. This isn’t just about looks; the North American Deck and Railing Association (NADRA) reports that millions of decks in the U.S. are past their life expectancy and potentially unsafe. Catching a loose bracket now is much cheaper than replacing a collapsed stair system later.
Where the Backyard Revolution is Headed
Looking forward to 2025 and beyond, I see a massive shift toward ‘Heat-Reflective’ technology. We are moving away from the days where a dark deck was a literal frying pan for your feet. I predict that ‘Cool-Deck’ technology will become the industry standard, making why black composite decking burns your feet and how to fix it a problem of the past. We’re also seeing a trend toward darker aesthetics—just remember why you should avoid white railings near gardens if you want to keep your view focused on the greenery rather than dirt splashes. My advice? Start today by running through that structural inspection list I mentioned. It is the single best thing you can do for your home’s value this weekend.
The One Thing I’d Change About My First Three Decks
If I could go back in time, I’d stop obsessing over the price per square foot and start obsessing over the physics of the structure. I used to think a deck was just a floor outside, but it’s actually a living, breathing system that fights the elements every day. The biggest ‘lightbulb moment’ for me was realizing that why your composite deck feels spongy between joists isn’t usually a board problem—it’s a framing oversight. I also learned that skipping the expansion gap rule that stops boards from buckling is a recipe for a warped mess by mid-July. My best advice? Treat your deck frame like the foundation of your house; if it isn’t waterproofed and rock-solid, the prettiest boards in the world won’t save it.
The Gear That Makes Professional Results Possible
You don’t need a trailer full of tools, but these three are non-negotiable for my projects. First, a dedicated butyl-based joist tape—it is the single best investment for composite decking secrets longevity tips for a lasting deck. Second, I always keep a specialized drill guide on hand; using the drill guide hack for centered baluster holes is the only way to ensure your railing looks like it was installed by a master craftsman. Finally, never underestimate the simple tool for making sure your railing posts are plumb. These small precision instruments bridge the gap between a ‘good enough’ DIY job and a professional-grade outdoor living space.
Build the Sanctuary Your Family Deserves
At the end of the day, we don’t build decks just to have a place to put a grill. We build them for the Sunday morning coffees, the birthday parties, and the quiet evenings under a well-designed pergola. By taking these extra steps—taping your joists, cleaning with the vinegar and water mix that cleans composite better than chemicals, and respecting the structural needs of your materials—you are protecting those future memories. You’ve got the knowledge now, so don’t let the fear of a ‘big project’ stop you from using these stunning deck design strategies to elevate your home. Your future self will thank you every time you step out onto a deck that feels as solid as the day it was built. What’s the one part of deck building that has you feeling the most nervous? Let me know in the comments below!