
I still remember the feeling of pride as I laid down the last board on my first big cedar project. My knees were throbbing and the sun was dipping low, but I felt like a master craftsman. Then, I stood up and looked down the length of the boards. My heart sank. What I thought were straight lines were actually a wavy mess, with some gaps tight enough to trap water and others wide enough to lose a car key. I had spent thousands on premium lumber, but it looked like a total amateur job. This is the moment most DIYers face: the realization that ‘eyeballing it’ is the fastest way to ruin a beautiful deck design. Today, I want to save you that heartache. I am going to show you the spacer trick that changed everything for me, ensuring your gaps are laser-straight and your wood has the room it needs to breathe.
Why Your Eyeballs Are Lying to You
Trust me, I get the temptation to just start screwing boards down once you have mastered the 3-4-5 rule for squaring your deck frame. You think you can maintain a consistent 3/16-inch gap just by feel. You can’t. Wood is a living, breathing material. Depending on whether you are working with kiln-dried cedar or why your pressure-treated wood feels wet, those boards are going to move. If you don’t use a physical spacer, you are practically inviting the expansion gap rule violation that leads to buckling and premature rot. It is not just about looks; it is about the structural integrity and lifespan of your outdoor investment. Have you ever stepped onto a deck and felt a board pop or noticed a gap that seemed to vanish overnight? That is the result of ignoring the spacer.
Is a tiny plastic wedge really worth the extra effort?
Some folks tell me they don’t want to ‘waste time’ fumbling with spacers when they could be finished in half the time. My response is always the same: do you want to build this deck once, or do you want to be out here in three years ripping it up because the boards have cupped and trapped debris? According to the American Wood Council, wood can expand significantly based on moisture content, and without proper ventilation provided by consistent gaps, you are essentially creating a petri dish for mold underneath your feet. Using a simple tool—whether it is a specialized plastic spacer or even a handful of 16d nails—ensures that every single board has the same ‘breathing room’ to expand and contract without fighting its neighbor. It turns a stressful afternoon into a rhythmic, predictable process.
Pick Your Gap Based on the Forecast
The first thing you need to realize is that wood is like a sponge. If you are working with wet pressure-treated lumber, it is going to shrink as it dries. If you are working with composite decking, it is going to expand as the sun hits it. This is why why your composite decking is expanding more than the manual says is such a frequent point of confusion for new builders—temperature and moisture are the invisible architects of your project. I usually aim for a 3/16-inch gap for most projects. It is wide enough for a heavy rain to wash away pine needles but narrow enough that a chair leg or a high heel won’t get caught. Think of it as a relief valve for your deck boards.
Wrestle Those Crooked Boards into Submission
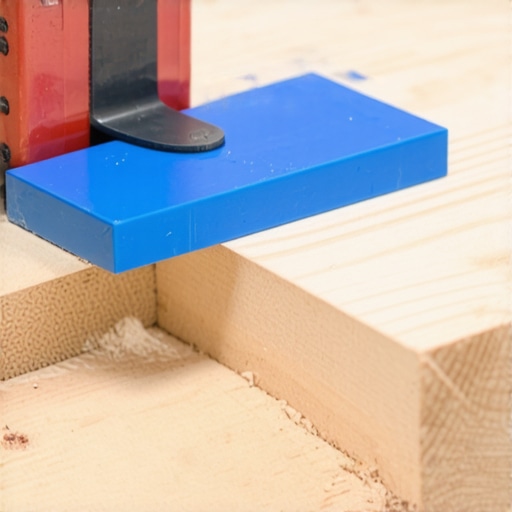
When I was building a wrap-around for a client last summer, I ran into a batch of boards that were bowed like recurve bows. If I had not used hard plastic spacers, those boards would have pushed back and narrowed the gap down to almost nothing by the time I reached the middle of the run. I had to use a deck board straightener—think of it like a giant lever—to pull the wood into the spacer before driving the screw. It feels like you are fighting the material at first, but once that screw bites, the spacer stays snug, and you move on. This ensures you are following the expansion gap rule that stops boards from buckling even when the lumber itself wants to be difficult.
Keep the Rhythm Across Every Joist
Consistency is your best friend here. You want to place a spacer at every single joist location. If you only space at the ends, the middle of the board can ‘belly’ out, creating a wavy line that will haunt you every time you look out the window. It is like buttoning a shirt; if you miss one in the middle, the whole thing looks lopsided. This is especially vital when you are implementing composite decking secrets longevity tips for a lasting deck because synthetic materials don’t have the natural ‘give’ that cedar does. If they don’t have room to move, they will buckle and warp your joists.
The Secret to Gap-Free Perimeter Corners
If your deck design includes a picture-frame border or mitered corners, spacing becomes even more critical. I have found that the pvc glue trick for gap-free composite miters works wonders, but only if your initial board spacing is perfectly parallel. If you’re off by even a fraction of an inch at the start, your miters will never close properly at the end. Once you reach the perimeter, ensure you have a the double rim joist secret for rock-solid deck edges to provide a firm landing for those final boards. Without that extra support, your spacers will just be pushing against air, and your borders will lose their crisp, professional look.
Let’s dig deeper into a hard truth that the big-box stores won’t tell you: the term ‘maintenance-free’ is a dangerous myth. While you might never have to stain those boards again, the structural skeleton of your project is still vulnerable. Everyone says composite is the ultimate solution, but in my experience, the biggest failure point isn’t the decking itself—it’s the wood frame hidden beneath. If you’re not using the flash and tape method for protecting deck joists, you’re essentially building a high-tech surface on a ticking time bomb. When composite boards are screwed tight against a joist, they trap moisture in a ‘sandwich’ that never dries out. This is why pressure-treated wood still needs maintenance under composite; without that protective barrier, your joists will rot long before your deck boards even show their age. According to studies by the Forest Products Laboratory, moisture trapped at fastener points is the primary driver of fungal decay in residential deck frames.
The Structural Trap Most Builders Ignore
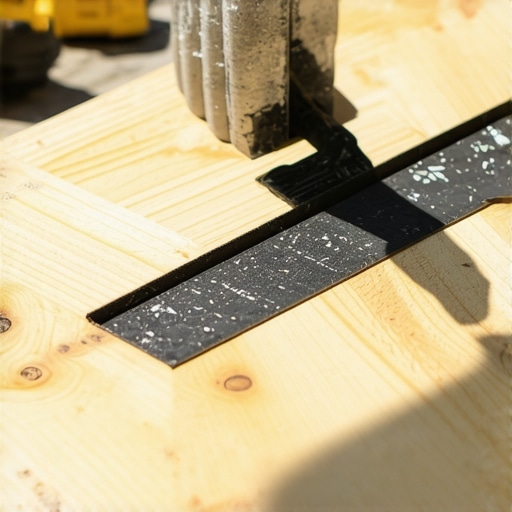
I once consulted on a project where the homeowner had installed beautiful low-maintenance composite decking, only to find the entire perimeter felt ‘spongy’ within a year. The mistake? They installed the railing posts after the deck boards were already down, using only the surface boards for support. This is a classic ‘Oops’ factor that leads to wobbly, dangerous railings. You must integrate the hidden bracket trick for perfectly rigid railing posts directly into the frame before the first deck board is even cut. If you miss the simple blocking move that stops your deck from shaking when you walk, no amount of expensive hardware will save your railing from eventually sagging or failing a safety inspection.
Can your railing posts really handle a 200-pound lateral load?
Most DIYers think a couple of carriage bolts through the rim joist are enough. They aren’t. The International Residential Code (IRC) requires railings to withstand a 200-pound concentrated load applied in any direction at the top of the rail. To achieve this, you need internal tension ties that connect the post to the actual joist structure, not just the outer band. When you are learning how to select the perfect railing system for every deck, you have to look past the aesthetics and focus on the leverage that a 42-inch post exerts on your frame. Have you ever fallen into this trap of prioritizing the ‘look’ over the sub-frame strength? Let me know in the comments. It’s a mistake that turns a relaxing evening into a safety hazard, and it’s much cheaper to fix during the framing stage than after the party starts.
Building the structure is only half the battle; the real mastery lies in ensuring it stays as solid as the day you finished the last board. I have seen too many homeowners invest in composite decking trends durable solutions for modern outdoor living only to let the hidden details fail them. If you want to keep that structure pristine, you have to shift your mindset from ‘builder’ to ‘steward.’ This starts with the tools you use to keep things aligned and the rituals you perform every season to ward off rot.
Stop Guessing and Use a 3D Model
I cannot stress this enough: why you need a 3d model before buying a single deck board isn’t just about pretty pictures. I use modeling software to calculate exactly where my pergola designs that turn your garden into a sanctuary will cast their shadows at 2:00 PM in July. This level of planning prevents you from placing a high-end grill in a spot that will eventually melt your siding or choosing innovative deck design ideas that elevate your homes curb appeal that look great on paper but create impossible-to-clean debris traps in reality. A digital twin of your deck allows you to troubleshoot the structural load before you ever pick up a drill.
How do I maintain my composite deck over time?
While we call it ‘low-maintenance,’ it is never ‘no-maintenance.’ Every spring, I perform the 15-minute deck inspection every homeowner should do. I’m looking specifically for any signs of movement in the joists or debris buildup in the gaps. According to the North American Deck and Railing Association (NADRA), more than half of the 60 million decks in the U.S. are over 20 years old and require immediate safety attention. You should be checking for ‘ledger pull-away’ and ensuring your the joist tape secret for doubling your decks lifespan is still intact. A simple wash with mild soap and water—never bleach—will keep the surface from developing a film that can eventually support mold growth.

Every Pro Needs a String Line
If there is one physical tool I refuse to work without, it is a high-visibility string line. Even the most expensive laser levels can struggle in bright sunlight or over long distances where a slight bump can throw off the calibration. I rely on the string line secret for perfectly level railing runs because gravity never lies. By pulling a line tight across your posts, you can see exactly where a board might be bowing or where a post has settled. It’s the only way to ensure that long, clean horizon line that defines a professional build. It turns a ‘good enough’ DIY project into a ‘how did they do that?’ masterpiece.
The High-Tech Future of Your Backyard
Looking ahead, I predict we are going to see a massive shift toward Augmented Reality (AR) for field adjustments. Within the next few years, you’ll likely be wearing glasses that overlay your 3D structural model directly onto the mud and wood of your job site, highlighting exactly where every screw and bracket needs to go. This will make complex deck design strategies accessible to everyone, reducing waste and structural errors. For now, the best thing you can do is stick to the fundamentals. Before you drive another screw, I want you to go out and perform that 15-minute inspection I mentioned; it’s the single most important thing you can do to protect your investment.
Hard Truths About Wood Movement You Can’t Ignore
Looking back at my first few builds, I wish I had known that a deck isn’t a static object; it is a moving machine. If you are working with why your pressure-treated wood feels wet even after weeks, those boards are going to shrink significantly over the first summer. Conversely, why your composite decking is expanding more than the manual says is usually down to direct UV exposure and poor airflow. My biggest lightbulb moment was realizing that over-spacing by a hair is always safer than leaving things too tight. A tight gap acts like a dam for pine needles and pollen, which eventually leads to rot, regardless of your deck design quality. Always prioritize drainage over that ‘tight seam’ look.
The Gear I Actually Use Every Day
If you want to move past the amateur phase, you need to stop using scrap wood as spacers. I always carry a set of dedicated 3/16-inch plastic wedges that won’t compress when you pull a bowed board against them. For the sub-frame, I never install a single joist without applying the joist tape secret for doubling your decks lifespan. It’s the cheapest insurance policy you can buy. Finally, always consult why you need a 3d model before buying a single deck board to visualize the interaction between your railing systems and the main frame before you cut your first piece of lumber.
#IMAGE_PLACEHOLDER_E#
Build Your Dream Backyard This Weekend
There is nothing quite like the feeling of sitting on a deck you built with your own two hands, knowing that every board is perfectly spaced and every joist is protected. Whether you are following the latest composite decking trends durable solutions for modern outdoor living or sticking with classic cedar, the attention you pay to these small details today will pay off for decades. Don’t let the fear of a crooked board stop you from starting your next project. Take it one joist at a time, use your string line, and trust the process. Have you ever had a deck board buckle or a gap disappear unexpectedly during a heatwave? Let me know your experiences in the comments below!