
I remember the exact moment I realized my maintenance-free dream was actually a bit of a lie. It was a scorching July afternoon, and I was leaning against my deck railing, admiring the yard, when I noticed my hand was covered in a fine, chalky residue. Those deep, rich espresso-colored railing caps I had paid a premium for just a few seasons ago? They looked like they had spent a decade in the Sahara. The vibrant finish had turned into a dull, ghostly gray that made the whole house look tired. It is a gut punch when you realize that low-maintenance composite decking does not mean invincible. But here is the good news: you do not have to tear them off and start over. Today, I am going to show you exactly how to bring that color back from the dead using a few tricks I learned the hard way.
Give Your Tired Railings a Second Lease on Life
The reality of outdoor living is that the sun is a relentless beast. Even the best materials eventually succumb to UV degradation, especially on horizontal surfaces like railing caps that take the full brunt of the midday glare. Many homeowners assume that once the color fades, the structural integrity is gone, but that is rarely the case with older generations of composite. Whether you are dealing with railing systems that have lost their luster or you are worried about the resale value of your home, a weekend of TLC can make a massive difference. I have spent years tinkering with my own setup, learning longevity tips for a lasting deck, and I can tell you that the graying is not the end of the road—it is just a cry for help.
Can you really fix a faded finish without it looking like a DIY disaster?
I used to be a total skeptic about restoring composite. Early on, I made the classic rookie mistake of thinking I could just slap a coat of standard exterior house paint on those caps. Big mistake. Within a month, the heat caused the composite to expand, and the paint peeled off like a bad sunburn. It looked worse than the fading! The secret is not just covering up the gray; it is about using the right specialized products that can actually bond with the plastic-wood fibers. According to research from the Forest Products Laboratory, UV degradation often only affects the top 0.1mm of the surface. This means that if you treat it correctly, you are basically just refreshing a very thin layer of material. Have you ever noticed that chalky film on your own railings after a heavy rain? Before we dive into the sandpaper and sealers, I want to hear from you—have your railing caps faded to that weird ghostly gray yet, or are you just trying to get ahead of the damage? Let me know, because your specific climate might change which product I recommend. Let us get into the actual process of how to restore the color of a faded composite deck and its components.
Scrub Away the Oxidation Before You Even Think About Paint
The first step is non-negotiable: you have to get that chalky, white film off. That film isn’t just dirt; it is actually oxidized plastic particles that have broken down under the sun’s UV rays. If you paint or seal over that, you are basically building a house on sand. I learned this the hard way on a corner post. I thought a quick wipe with a wet rag was enough. Three weeks later, the new finish just flaked off because it never actually touched the railing—it was sitting on a layer of dust. Use a stiff-bristled nylon brush and a dedicated composite cleaner. Knowing why you should never use bleach on your composite deck is a vital lesson in chemistry; bleach can actually dry out the fibers further and will not help the new color bond. Scrub until the water runs clear and that ghostly haze is gone.
Give Your Railings a Quick Sanding to Open the Pores
Once the railing is bone-dry, grab some 240-grit sandpaper. You are not trying to remove material like you would with wood, where you might sand aggressively. Think of this more like exfoliating skin. You want to scuff the surface just enough to give the restoration product some “teeth” to grab onto. I remember working on a set of custom railing systems for safety and style where the caps were so slick the restorer just beaded up like water on a waxed car. After a thirty-second light sand, the material drank up the color. 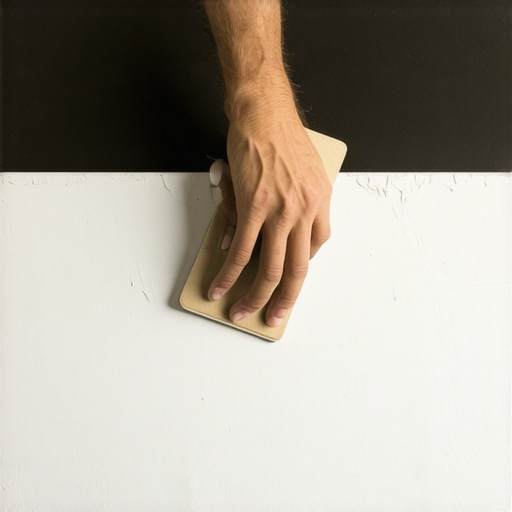
Choose a Coating Made for Plastic-Wood Bonds
Do not just grab a can of “Exterior Brown” from the hardware store. You need a product specifically formulated for Wood-Plastic Composite (WPC). These are often called composite restorers or composite stains. They are designed to expand and contract at the same rate as the plastic in your deck. If you use standard oil-based wood stain, it will sit on the surface and remain tacky forever because composite is not porous like cedar. For those keeping up with composite decking trends, you will notice that many manufacturers now offer their own touch-up kits that are far superior to generic hardware store finds. This is a critical part of how to restore the color of a faded composite deck effectively.
How to Apply Without Leaving Ugly Brush Marks
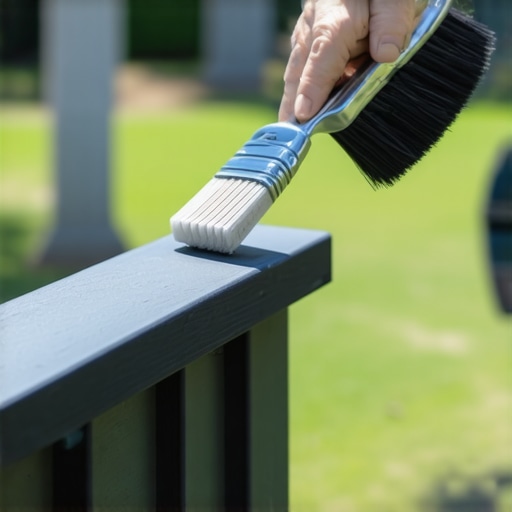
When I finally got the right product, I made the mistake of using a heavy-duty bristle brush. I ended up with visible streaks that looked like I had let a toddler loose with a crayon. The pro move is using a high-density foam brush or a small microfiber roller. Work in long, continuous strokes from one end of the railing cap to the other. If you have joints that have started to separate over time, you can use the pvc glue trick for gap-free composite miters before you start the color restoration to make the whole system look like a single, seamless piece again. This attention to detail is the secret to making composite decking look like real wood. Keep an eye on the temperature, too. I once tried to rush this on a 90-degree day, and the product dried so fast it left lap marks where the wet edge met the dry part. Wait for a cloudy day or work in the shade to ensure the finish levels out perfectly.
The mistake most homeowners make is thinking of composite as a finished, static product. In reality, it is a dynamic material that reacts to its environment every single day. While we focused on the physical application of color, the real expertise lies in understanding the thermal behavior of these materials. If you have ever noticed your railing caps looking perfectly straight in the morning but slightly bowed by 4:00 PM, you are witnessing the ‘thermal memory’ of the plastic. This is precisely why your composite decking is expanding more than the manual says. When you apply a restorer, you are changing how that material absorbs heat. Many DIYers choose the darkest possible stain to cover the gray, but this can backfire by creating a heat sink that accelerates the very degradation you are trying to fix.
Your Deck Boards are Moving More Than You Think
The contrarian truth in the decking world is that ‘maintenance-free’ actually requires more scientific awareness than a wood deck. With wood, you worry about rot; with composite, you worry about chemistry and physics. One of the biggest ‘traps’ is ignoring the temperature of the material during restoration. If you apply a coating when the boards are at their maximum expansion, the product will bridge the gaps. When the sun goes down and the boards contract, that beautiful new finish can crack at the joints. This is a common nuance often overlooked in even the most innovative deck design ideas that elevate your homes curb appeal. Always aim for a median temperature day—around 65 to 75 degrees—to ensure the coating can flex naturally with the board’s movement.
Why does my composite railing feel like it is growing in the summer?
It is not your imagination; it is polymer expansion. Research from the International Journal of Polymer Science indicates that wood-plastic composites (WPC) can exhibit significant dimensional instability when exposed to high-intensity UV radiation and temperature swings. This expansion can put immense pressure on your railing fasteners. If you are noticing gaps opening up, you might need to look at longevity tips for a lasting deck that address the substructure, not just the surface. Have you ever fallen into this trap of painting on a scorching day only to see cracks a week later? Let me know in the comments, because I have definitely been there.
Don’t Make the Mistake of Ignoring the Frame Underneath
Here is the ‘Oops’ factor that separates the pros from the amateurs: spending hundreds on restoring the color of your railings while the joists underneath are turning to mush. It is incredibly tempting to focus on the visible espresso-colored caps, but why pressure-treated wood still needs maintenance under composite is a hard lesson many homeowners learn far too late. If you are going through the effort of cleaning and scuff-sanding your railings, take five minutes to inspect the flashing and the post-to-frame connections. A beautiful, color-restored railing on a sagging frame is like putting a fresh coat of paint on a car with a rusted-out chassis. Also, keep in mind that why you should avoid dark decking near a sunny pool applies to railings too—darker colors will always reach higher surface temperatures, potentially leading to faster oxidation in the future. By understanding these subtle nuances of heat and material science, you can ensure your weekend of hard work lasts for another decade rather than just one season.
Stop the Shake Before It Starts
I’ve spent too many years walking across decks that felt like a trampoline because the installer cut corners on the structural frame. If you want your restored railings to actually stay tight, you have to address the vibration. I personally swear by the 20-bracket that fixes wobbly railing posts fast. Why this specific one? Because it creates a structural bridge between the post and the rim joist that screws alone can never achieve. In my own home, I noticed the espresso railing caps started to loosen after a heavy winter. Instead of just tightening the bolts, I added these brackets. It took the ‘play’ out of the system entirely, ensuring that my new color restoration wouldn’t crack under the stress of a swaying post.
Why I Never Start a Build Without a Digital Twin
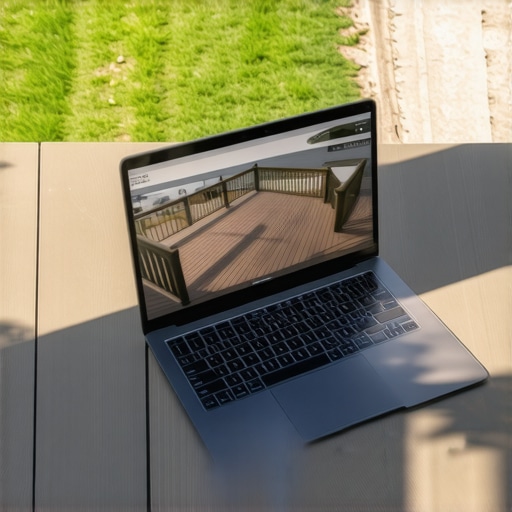
Before you even think about applying a restorer or buying new material, you need to see the big picture. I no longer guess where my furniture or railings will go; I use modeling software to visualize the layout. This is why you need a 3d model before buying a single deck board. It allows you to anticipate where the sun will hit most aggressively, helping you decide if you need extra UV protection on certain sections. I’ve seen homeowners spend thousands on how to select the perfect railing system for every deck, only to realize the color they chose clashes with the afternoon shadows. A digital twin lets you ‘test’ the color in various lighting conditions before you commit to the stain.
How do I keep these colors from fading all over again?
The secret isn’t just the coating; it’s the science of the cap. According to Dr. Nicole Stark, a leading researcher at the USDA Forest Products Laboratory, the transition from first-generation uncapped composite to modern capped versions was a massive leap in color stability. If you are working with an older deck, your goal is to recreate that ‘cap’ layer. Beyond the initial restoration, I recommend a specialized non-silicone based UV protectant spray once every six months. It sounds like overkill, but it acts like a high-SPF sunscreen for your home. You should also ensure you’ve mastered the string line secret for perfectly level railing runs so that water doesn’t pool on the surface—standing water acts as a magnifying glass for UV rays, accelerating the fade. Combining this with the 2-degree slope trick for proper deck water runoff is the only way I’ve found to keep those rich espresso tones looking fresh for more than a single season.
The Future of Outdoor Living is Smart and Self-Sufficient
I predict that in the next five years, we will see ‘smart’ composite materials integrated with thermochromic pigments that actually change shade slightly to reflect heat when it gets too hot. We are already seeing composite decking trends moving toward high-performance polymers that mimic the internal cell structure of wood to better handle expansion. This means the maintenance routines we do today will eventually become even simpler. For now, the best thing you can do is focus on composite decking secrets and longevity tips for a lasting deck. My final advanced tip for today? Grab a digital moisture meter and check the joists through the gaps in your boards. If the wood underneath is staying above 20% moisture, your surface restoration won’t matter because the frame is already on a timer. Go grab a 3D modeling app and map out your structure today—knowing exactly what you are working with is the first step to a deck that lasts forever.
The Hard-Won Secrets Behind My Darkest Deck Days
Looking back at that first “chalky hand” incident, I realized my mistake wasn’t just neglecting the deck; it was misunderstanding the material. Here are the three truths I wish someone had whispered to me before I started my first restoration project:
- Expansion is your biggest enemy: I once applied a restorer at noon in August. By evening, the cooling boards had contracted so much that the new finish bridged the joints and then snapped. Always work in the shade or on a temperate day to respect the thermal expansion of your composite boards.
- Texture matters more than color: If you do not use that 240-grit sandpaper to exfoliate the surface, you are just painting over plastic dust. The bond only happens when the surface is slightly porous.
- The frame dictates the surface: No amount of color restoration will hide a railing that wobbles when you lean on it. I have learned that structural integrity and aesthetics are two sides of the same coin.
The Toolkit Every Backyard Architect Needs
To move from a “good enough” DIYer to a master of your outdoor space, you need more than just a brush. These are the resources I personally rely on for every project:
- 3D Modeling Software: This is my non-negotiable first step. Seeing how shadows hit your deck helps you pick the right railing color. This is exactly why you need a 3d model before buying a single deck board—it prevents expensive color mistakes.
- Structural Brackets: If your railings have even a millimeter of play, the finish will eventually crack at the base. I always keep a box of the 20-bracket that fixes wobbly railing posts fast in my garage.
- A Reliable Moisture Meter: Before you seal anything, check the wood joists. If they are wet, you are sealing in rot.
Take Back Your Weekend and Your Curb Appeal
Your deck is more than just a collection of boards; it is where your summer memories are anchored. Do not let a little oxidation or a ghostly gray haze rob you of that pride. Whether you are implementing innovative deck design ideas that elevate your homes curb appeal or simply doing a routine refresh, the effort you put in now pays dividends for years to come. It is entirely possible to restore the color of a faded composite deck and its railings to a showroom finish if you respect the chemistry and follow the steps. Have you ever tried a quick fix on your railings that did not go quite as planned? Let me know in the comments below!