
I remember standing in my backyard on a crisp Saturday evening, holding a cold drink and trying to admire my brand-new outdoor oasis. The low-maintenance composite decking looked sharp, and I had finally nailed the innovative deck design ideas I’d been dreaming about for months. But as my gaze dropped to the ground, my heart sank. There they were: four massive, gray, industrial-looking concrete piers sticking out of the mulch like sore thumbs. They looked like leftover debris from a highway overpass project. It felt like I’d put on a custom-tailored tuxedo but forgotten to take off my muddy garden clogs. No matter how much I spent on high-end railings or furniture, those ‘elephant feet’ were all I could see.
Get Rid of Those Industrial Eyesores Once and for All
If you are tired of your beautiful project being undercut by raw masonry, you are in the right place. We are going to walk through exactly how to wrap those structural supports in stone veneer so they actually add value to your home instead of detracting from it. I spent years trying to ignore mine, even making the embarrassing mistake of trying to ‘camouflage’ them with a dark green outdoor paint. Trust me, that was a disaster. The moisture trapped in the concrete caused the paint to bubble and peel within weeks, leaving me with piers that looked like they had a scaly skin disease. When I finally discovered the best way to hide ugly concrete deck footings with stone, it changed the entire silhouette of my backyard. Have you ever felt like one small, ugly detail was sabotaging your entire renovation?
Does Stone Veneer Actually Last Outdoors?
I get it—the skepticism is real. You’re worried that adding weight or layers to your structural supports might cause issues or that the stones will just fall off after the first frost. However, according to the Masonry Institute of America, when properly installed with a moisture-resistant barrier and the correct mortar, manufactured stone veneer can last as long as the structure it covers. The trick isn’t just slapping some rocks on a tube; it’s about preparation. Whether you used the string line move for plumb posts or had a pro set your footings, the concrete is a stable substrate just waiting for a face-lift. Today, we are going to dive into the prep work that prevents those stones from popping off when the temperature drops, ensuring your deck looks like a million bucks from the ground up.
Scrub Away the Grime Before You Glue
Think of your concrete pier like a canvas; you wouldn’t paint over a layer of dust and expect it to stick. Most concrete footings have ‘laitance’—a milky, weak layer of cement on the surface—or worse, oily residue from the cardboard form tubes used during the pour. I learned this the hard way during a summer project where I tried to rush the job. Three days later, I nudged a stone with my boot and the whole section popped off like a loose tooth. Use a stiff wire brush and a mix of water and vinegar to scrub those piers until they are raw. If you’ve spent money on innovative deck design ideas that elevate your homes curb appeal, don’t let a five-minute cleaning oversight ruin the foundation.
The Scratch Coat Secret for a Permanent Bond
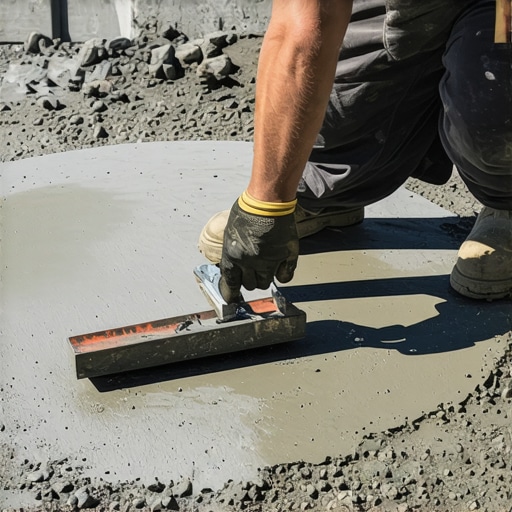
You can’t just butter a stone and slap it onto smooth concrete. You need a ‘scratch coat’—a thin layer of mortar that you literally scratch with a notched trowel to create tiny grooves. It is like the tread on a tire; those grooves give the stone’s adhesive something to bite into. I always aim for a mortar consistency similar to thick, chunky peanut butter. If it is too runny, it will slide down the pier; if it is too dry, it won’t bond. I once made the mistake of mixing a batch too thin, and by the time I got to the third pier, the first ones were already sagging. Now, I use a small margin trowel to test the ‘stick’ before I commit to the whole post.
Start at the Base to Defeat Gravity
Gravity is your biggest enemy when wrapping vertical supports. Always start your first row of stone slightly below the grade of your mulch or soil. This creates a ‘ledge’ for the subsequent rows to sit on. If you are working on a slope, you might need to use the string line method for perfectly level deck surfaces to ensure your first row isn’t crooked. When I first started doing this, I tried to start from the top down because I thought it would be easier to align with the deck beams. I ended up holding stones in place with duct tape for three hours while the mortar set. Don’t be me—stack from the bottom up and let the lower stones support the weight of the upper ones.
Why Detail Work Makes or Breaks the Look
Once your stones are set, the gap between the top of the stone and the bottom of your deck frame needs attention. If you leave a massive gap, it looks DIY in the worst way possible. On the other hand, if you jam the stone against the wood, you risk trapping moisture. This is especially dangerous because why pressure-treated wood turns gray faster than you think is often tied to poor airflow and constant dampness. Leave a small half-inch gap and fill it with a high-quality sealant or a piece of trim that matches your low-maintenance composite decking. This tiny detail is the difference between a project that looks ‘built-in’ and one that looks like an afterthought.
While the stone veneer makes the base look indestructible, let’s talk about the surface—and the myths surrounding it. Most people buy composite because they want to ‘set it and forget it.’ But here’s the contrarian truth: a composite deck is actually harder to build correctly than a wood one. Why? Because you’re marrying two materials with completely different DNA. I’ve seen homeowners drop a fortune on durable composite solutions, only to have the deck feel ‘spongy’ within three years. They blame the product, but usually, it’s because your deck joists are rotting underneath the tape or the framing wasn’t stiff enough to support the extra weight. If you’ve noticed this, you might be wondering why your composite boards feel spongy under heavy furniture, and the answer almost always lies in the joist spacing, not the board quality.
Why is your composite deck statistically likely to static shock you?
It sounds like a joke until you reach for your sliding glass door and get zapped. This is an advanced nuance many pros don’t even mention. Static buildup on composite is common in dry climates because the plastic content doesn’t ground like wood does. Research from the Journal of Applied Polymer Science suggests that the friction between rubber-soled shoes and synthetic deck fibers can generate significant electrostatic discharge. If you didn’t plan for this with anti-static treatments, you’re in for a prickly surprise every time you walk outside. It is these little ‘hidden’ physics problems that separate a high-end build from a basic DIY attempt.
Stop Blaming the Boards for Your Wobbly Deck
The real ‘oops’ factor in modern deck building is the framing mismatch. Most builders still use standard pressure-treated lumber for the skeleton, but why your pressure-treated frame is pulling your composite apart comes down to the rate of contraction. Wood shrinks as it dries; composite expands as it heats up. When you fix them together rigidly, something has to give. This is why why solid core composite is worth the extra bulk—it handles these internal stresses much better than hollow-core alternatives. If you aren’t using a high-quality flashing or tape, that friction creates moisture traps that rot the wood faster than you’d believe.
The Deadly Trap of Tight Gap Spacing
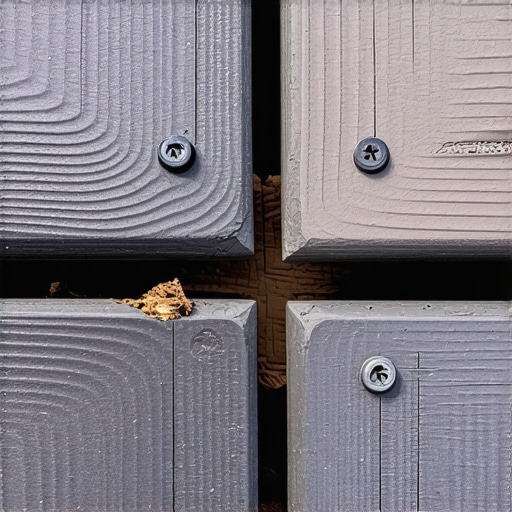
The biggest mistake I see—the one that really hurts the wallet—is people installing their boards too tight. Composite moves—a lot. If you live in a place with high temperature swings, dark composite boards need extra expansion space. I once saw a deck where the boards literally buckled and ripped the screws right out of the joists because the installer didn’t account for thermal expansion. They thought they were being ‘precise’ by having zero gaps, but they were actually building a structural disaster. It’s better to use the joist tape secret to protect the frame and give those boards room to breathe. Have you ever fallen into this trap or noticed your deck ‘growing’ in the summer sun? Let me know in the comments.
My Secret Weapon for a Professional Finish
If you want that high-end look where every fastener is perfectly recessed, you need to stop eyeballing it. I personally swear by the jig I use for consistent deck screw depth. It prevents ‘mushrooming’—that ugly plastic flare-up that happens when a screw head forces its way into composite. Even with why professional builders prefer capped composite over wood, the cap is delicate. One over-driven screw ruins the waterproofing and the aesthetic. I’ve spent years fixing ‘DIY disasters’ where homeowners thought a standard drill was enough, only to find their boards looked like they had been hit by a hail storm of metal. When you use a depth-specific tool, you’re ensuring that the fastener sits exactly 1/16th of an inch below the surface, allowing the composite to ‘self-heal’ over the hole.
Forget the Chemicals and Grab the Kitchen Pantry Staples
Maintenance shouldn’t involve a hazmat suit. I have seen countless people ruin their 20-year warranty by reaching for the wrong bottle. For instance, why you should never use bleach on composite decks comes down to the oxidative reaction that eats away at the pigment. Instead, I always recommend the vinegar and water mix that cleans composite better than chemicals. It’s acidic enough to kill mold spores but gentle enough to leave the protective cap intact. While you’re at it, put the pressure washer back in the garage. Understanding why you should never use a power washer on composite boards is crucial—the high PSI can actually delaminate the surface, creating micro-cracks that trap dirt and moisture.
How do I keep my composite deck looking brand new forever?
The longevity of your deck is actually determined by what you can’t see. It’s about substructure health. Every year, I perform a quick check-up on the joists. I’ve started using the shingle trick for protecting the top of your deck beam on all my projects. It’s a simple, low-cost layer of protection that sheds water away from the most vulnerable part of the frame. According to composite decking secrets and longevity tips, moisture management is the difference between a 10-year deck and a 30-year deck. If you notice why your composite decking is fading in patches, it’s often due to localized standing water or reflected heat from low-E windows, not a failure of the material itself.
The Future of Outdoor Living is Smarter than You Think
Looking ahead, I predict we will see a massive shift toward ‘smart substructures.’ The American Wood Council (AWC), in their technical documentation for Design for Code Acceptance (DCA) 6, highlights that lateral load connections and moisture trapped at the joist-to-board interface are the primary failure points in modern decks. I expect elevate your backyard with innovative deck design ideas for 2025 to include integrated moisture sensors and even built-in drainage systems that alert your smartphone if a leak occurs under the surface. We are moving away from just ‘building a platform’ toward creating a living, breathing structural system. For now, I strongly encourage you to try the depth-setting jig on your next repair or board replacement—it is the single fastest way to upgrade your deck’s visual quality from ‘amateur’ to ‘architectural.’
The Realities of Deck Building I Learned the Hard Way
After years of swinging a hammer, I’ve realized that the most important part of a deck is what you usually can’t see once the party starts. I’ve seen beautiful projects fail because the builder ignored why your deck joists are rotting underneath the tape. Another major insight: stone veneer on piers isn’t just about ‘hiding’ concrete; it’s about creating a visual anchor that makes the whole structure feel permanent. I also learned that choosing railing systems for safety and style is often the most time-consuming decision, but it’s the one that defines your view for the next twenty years. Don’t rush the selection process just to get the job done.
#IMAGE_PLACEHOLDER_E#
The Toolkit That Makes Me Look Like a Pro
I don’t believe in expensive gadgets, but I do believe in the right ones. For every job, I carry a specialized jig for screw depth—it’s the only way to avoid ‘mushrooming’ on expensive boards. I also never start a project without checking innovative deck design ideas for 2025 to see how structural integration is evolving. For the finishing touches, I rely on the vinegar and water mix that cleans composite better than chemicals to ensure the hand-over to the homeowner is spotless without using harsh toxins. These small choices are what separate a weekend warrior from a craftsman.
Your Foundation for a Lifetime of Memories
Taking the time to wrap those ugly concrete piers in stone and properly protecting your joists isn’t just extra work; it’s an investment in your peace of mind. When you finally sit back on your new surface, you’ll know that you didn’t just maximize outdoor living with low-maintenance composite decking, you built a sanctuary that will stand the test of time. Go ahead and start that first row of stone or lay that first roll of joist tape. The pride you’ll feel when you see the finished product is worth every ounce of effort. Have you ever discovered a hidden structural issue while trying to upgrade your deck’s appearance? Let me know in the comments below!