
I stood in my backyard three years ago, staring at a pile of wasted cedar and a corner that looked more like a jagged cliff than a smooth, architectural sweep. I’d tried to eyeball the radius with a jigsaw and a prayer, but the results were embarrassing. My neighbor walked over, took one look at my wavy mess, and handed me a simple piece of string and a pencil. That was the moment I realized that building a curve isn’t about being an artist; it’s about mastering a very specific, structural geometry. Today, I’m going to show you how to stop fighting the wood and start working with it so your deck looks like a professional crew spent a month on it.
Stop Guessing Your Radius: Why My First Curve Was a Total Disaster
I’ll be honest with you—I made the classic mistake of thinking I could just trim the edges of my joists after they were installed to create a curve. I ended up with zero structural support at the most critical point of the deck. I quickly learned that the right framing move involves blocking and doubling up your headers long before the first deck board even touches the frame. If you’re still in the dreaming phase, you should browse these innovative deck design ideas to see how a well-executed curve can completely change the silhouette of your home. The secret is in the sub-frame; if you don’t have solid meat to screw into, your boards will eventually warp and pull away.
Is the extra labor for a curved corner actually worth the headache?
Many homeowners fear that a curve is just a recipe for rot and structural failure, and they aren’t entirely wrong. According to the International Association of Certified Home Inspectors, nearly 40% of residential decks have structural deficiencies, often stemming from complex designs that ignore load-bearing basics. However, when you use a dedicated pencil and string hack to map out your radius, you ensure that every joist is supported by a solid beam. Have you ever felt that annoying ‘spongy’ feeling when walking on a custom-shaped deck? That’s usually because the builder skipped the internal blocking. We are going to solve that today by walking through the ‘pie-slice’ joist layout that gives you a rock-solid foundation for any radius.
Pack the Corner with Double Blocking Before You Cut
To get that smooth, sweeping look, you have to treat the frame like a skeleton that needs extra muscle. Standard joists spaced 16 inches on center won’t give you the fastening surface you need for a curve. I learned this the hard way on a job in a rainy suburb where I thought a single rim joist would hold. Within a month, the fascia looked like a roller coaster because there was nothing to secure the ends to. Now, I use the framing move that stops deck boards from bouncing: I install a ‘ladder’ of internal blocking between the last three joists. This creates a solid platform for the pencil and string hack to work on. Once your blocks are in, you scribe your line across the top of them. This is the only way to ensure your low-maintenance composite decking has a continuous edge to bite into without sagging over the empty air. 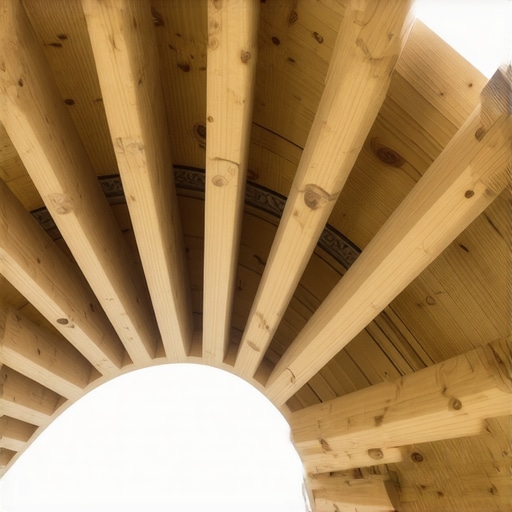
The Fan Method That Keeps Your Boards from Sagging
Think of your joists like the ribs of a hand fan. Instead of keeping them parallel, you want to angle the joists in the corner toward the center point of your radius. This is what we call ‘pie-slicing.’ If you keep the joists parallel, the distance between the support points on the outer edge of the curve becomes too wide, leading to that spongy ‘trampoline’ feel. When I built my first radial deck for a client’s hot tub, I didn’t angle the joists enough. Every time they stepped on the edge, the board dipped a quarter-inch. To avoid this, use the 3-4-5 triangle move to find your true 90-degree start point, then radiate your joists out. Don’t forget to apply the joist tape secret to these angled cuts, as the exposed end grain is a magnet for moisture rot.
Heating and Clamping Your Way to a Smooth Edge
Bending the actual fascia board is where most DIYers lose their cool. If you are using composite, you can’t just force it; you’ll snap the core or end up with ugly stress marks. I’ve found that creating a temporary ‘form’ using scrap 2x4s and heavy-duty clamps is the only way to get a consistent arc. On a particularly stubborn wrap-around project last summer, I actually used a heat blanket to soften the board for twenty minutes. It felt like wrestling a giant wet noodle until it suddenly clicked into place. While you’re at it, consider how this curve interacts with your safety features. A curved deck looks bizarre with jagged, straight railing sections, so you might need to look into how to select the perfect railing system that can handle the contour. Always pre-drill your holes in the fascia to prevent the material from mushrooming or cracking under the extreme tension of the bend.Continuing from those heat-bent edges, let’s talk about a nuance that most ‘expert’ guides gloss over: the myth of the perfectly maintenance-free deck. We’ve been conditioned to think that spending extra on composite decking secrets means the deck will stay perfect forever, but I’ve seen more composite decks fail in five years than cedar ones do in fifteen. The reason? The frame beneath is a living, breathing organism of wet, pressure-treated lumber.
Why Hidden Fasteners Aren’t Always Your Best Friend
Everyone tells you that hidden fasteners are the gold standard for a clean look, but in my experience, they are a primary cause of board ‘walking.’ Because they only grip the center of the board, they provide zero lateral resistance. If you’re using wide-profile boards, you’ll find that hidden fasteners fail on wide-profile boards because the material expands and contracts so forcefully it actually shears the clips. I now insist on face-fastening the perimeter and using a ‘picture frame’ border to lock everything down. This is especially true when your pressure-treated frame is pulling your composite apart during the initial drying phase. 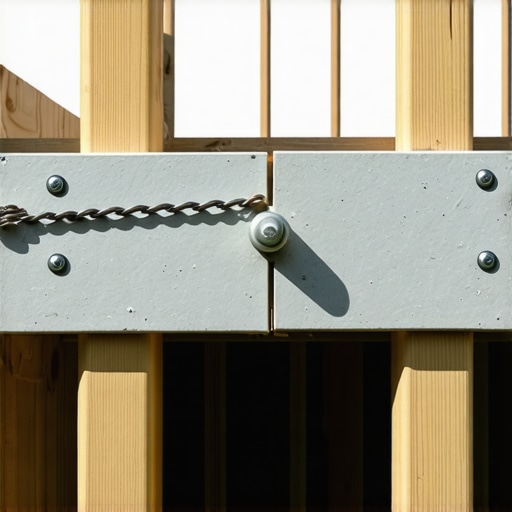
The Structural Lie We’ve All Been Sold About Railing Posts
Here is the ‘oops’ factor that keeps building inspectors up at night. Most DIYers (and unfortunately, many contractors) simply bolt their railing posts to the outside of the rim joist with two lag screws. According to the North American Deck and Railing Association (NADRA), this connection is the most common point of failure because it relies entirely on the withdrawal strength of the wood grain, which degrades over time. You need to use the blocking trick that stops railing post wobble. By installing internal tension ties and structural wood screws that pull the post into the joist network, you turn a flimsy stick into a structural monolith.
How do you stop a 42-inch railing from wobbling like a loose tooth?
If you can feel the top rail move more than a fraction of an inch when you lean on it, your leverage is working against your fasteners. The secret isn’t more screws; it’s more leverage in the opposite direction. I always use structural through-bolts and a ‘sandwich’ of 2×8 blocking behind the post. This distributes the force across three different joists instead of just one. If you’re building a complex curve, this is even more critical because the geometry of the railing often eliminates the ability to use standard corner brackets. Have you ever fallen into this trap where your beautiful new deck felt shaky after the first season? Let me know in the comments.Building a monolith requires more than just internal blocking; it requires the right application of force. I stopped using a standard drill for structural work years ago when I realized I was stripping more heads than I was seating. If you’re driving 6-inch LedgerLoks into a double-rim joist, a standard drill will either strip the head or burn out the motor. I rely on a high-torque 18V impact driver with at least 1,800 in-lbs of torque. To keep things looking clean, I always use the jig I use for consistent deck screw depth. This ensures every fastener sits exactly 1/16th of an inch below the surface, creating that professional, uniform shadow line that differentiates a DIY weekend project from a master-built retreat.
How do I keep my curved composite deck looking brand new?
The biggest mistake I see is ‘over-cleaning.’ People treat their composite like a concrete driveway, but high-pressure water is the enemy. I’ve seen homeowners literally peel the wood-grain texture off their boards because they got too close with a 3000 PSI nozzle. This is why you should never use a power washer on composite boards. Instead, I stick to the vinegar and water mix that cleans composite better than chemicals. It’s gentle enough to preserve the UV-protective cap but strong enough to lift pollen and dirt. Also, stay away from the hardware store deck ‘brighteners’—I’ve learned the hard way why you should never use bleach on composite decks, as it can cause permanent discoloration and actually accelerate the breakdown of the synthetic fibers. #IMAGE_PLACE_PLACEHOLDER_D#
Smart Pergolas Are Replacing Manual Shade Systems
Looking toward the next few years, the biggest shift we’re seeing is the integration of ‘smart’ features into traditional structures. According to the American Wood Council (AWC) DCA 6—the prescriptive guide for residential deck construction—structural integrity must always precede aesthetic additions. However, we are now seeing pergola trends moving toward motorized louvers and integrated weather sensors that automatically close at the first sign of rain. We are moving away from static wood structures toward dynamic living spaces that adapt to the environment. If you’re already investing in composite decking trends, you should be thinking about how your structure will hold up to the next generation of automated shade systems. I want you to try one thing this weekend: skip the expensive store-bought chemicals and mix up a simple vinegar solution for a small patch of your deck—you will see the difference in clarity immediately.
Lessons Taught by the Grain and the Radius
After decades on the job, I’ve realized that the most beautiful curve or the sharpest railing system means nothing if the bones of the project are neglected. Here are the lightbulb moments that changed how I work:
- Expansion Is a Law, Not a Suggestion: Composite boards can move up to 1/8th of an inch for every foot of length. If you don’t account for this in your radius, your beautiful curve will buckle by mid-July. I’ve seen many DIYers wonder why your composite deck feels spongy between joists, and it almost always traces back to a lack of structural blocking in those tricky corners.
- Fastener Choice Dictates Longevity: Using standard wood screws in composite is a recipe for heartbreak. I always warn my clients about the 3-inch screw mistake that ruins composite joists because composite needs room to breathe without the fastener shearing off.
- Hidden Details Make the Design: Following composite decking secrets for preservation—like black-painting your joist tops—ensures that the gaps required for drainage don’t reveal ugly pressure-treated lumber beneath.
#IMAGE_PLACEHOLDER_E#
The Reliable Gear for a Lifetime of Building
When you’re ready to move beyond the basics, you need blueprints and tools that respect the complexity of modern engineering. I personally recommend diving into pergola designs that turn your garden into a sanctuary to see how vertical structures can complement your ground-level curves. For structural safety, I always cross-reference my work with the North American Deck and Railing Association (NADRA) guidelines. They are the gold standard for preventing the collapses that plague under-built decks. Additionally, always keep a copy of the International Residential Code (IRC) handy; it’s the ultimate authority on what will pass inspection and what will put your family at risk.
Bring Your Masterpiece to Life
Building a curved deck or a complex pergola is a journey that transforms your home’s character. By mastering deck design and selecting the right railing systems, you’re creating more than a floor; you’re creating an experience. Don’t let the fear of a complex radius stop you—take it one joist at a time, trust your string line, and embrace the process of high-end composite decking installation. Your future self, sitting on that perfectly smooth corner with a cold drink, will thank you for the extra effort you put in today. Have you ever struggled with getting a perfect radius on a corner or dealing with a wobbly railing? Let me know in the comments below!