
Three years ago, I sat on my brand-new deck with a cold drink, only to realize I was staring directly into my neighbor’s kitchen while he flipped pancakes. It wasn’t just awkward; it was a total mood-killer. I had spent thousands on low-maintenance composite decking, yet I felt like a goldfish in a very expensive bowl. My first instinct was to put up a solid wall, but I quickly learned that solid barriers are often a disaster for airflow and aesthetics. That is when I stumbled upon the shadow-box fence move, and it completely changed how I think about outdoor boundaries. Today, I am going to show you how this simple staggered-board technique provides the perfect balance of seclusion and ventilation without making your backyard feel like a high-security prison.
That Time I Accidentally Built a Spite Wall
I will be the first to admit that my early attempts at privacy were failures. In a moment of desperation to hide from the neighbors, I installed a solid 6-foot screen right against my railing. Not only did it look like a massive eyesore, but I also ignored the fact that solid railing panels cause significant wind damage during summer storms. The wind had nowhere to go, so it hammered against the structure until my posts began to lean. It was a rookie mistake that taught me a valuable lesson: privacy shouldn’t come at the cost of structural integrity or a cooling breeze. The shadow-box method, where boards are alternated on either side of the rail, allows the wind to pass through while blocking the direct line of sight. It creates a beautiful, three-dimensional look that complements innovative deck design ideas much better than a flat, boring fence ever could.
Does a Shadow-Box Fence Actually Block the Neighbors’ View?
This is the biggest hang-up people have when I suggest this style. They worry that if there is a gap for air, there is a gap for eyes. However, because the boards overlap, you only get a glimpse through the fence if you are standing at a very specific, sharp angle—which, let’s be honest, your neighbors probably aren’t doing. According to the American Fence Association, the shadow-box design is one of the most popular ‘neighbor-friendly’ styles because it looks identical from both sides, preventing the typical ‘ugly side’ of the fence from facing the street. I even used the blocking trick for railing posts to ensure my shadow-box sections were rock solid. Have you ever felt like you were being watched while trying to relax outdoors? It is an unsettling feeling that stops you from truly enjoying your home. Let’s dive into how we can fix that together.
Master the Staggered Board Technique for Total Privacy
Building a shadow-box fence is like assembling a privacy sandwich. The central railing serves as the filling, while your vertical pickets are the bread, alternating on either side. When you transform your outdoor space with custom railing systems, the goal is to create a visual break that stops the eye but lets the wind dance through. I remember my first solo attempt at this; I thought I could just nail boards up and it would look fine. Halfway through, I realized the boards on the ‘back’ side didn’t line up with the gaps on the ‘front’ side. It looked like a broken jigsaw puzzle. I had to rip it all down and start over with a template. Don’t be like me. Use a scrap piece of wood as a consistent spacer to keep the rhythm identical across the entire run.
Set Up Your Frame for Maximum Strength
Before you even touch a fence board, your posts and rails need to be immovable. Because shadow-box designs add more weight than a standard baluster system, you cannot skimp on the skeleton. I always use the hidden bracing move for rock-solid corner posts to ensure that once those boards are attached, the whole structure doesn’t start to sag under its own gravity. Think of your posts as the anchors of a ship; if they move even a quarter-inch, the overlap of your shadow-box boards will shift, and suddenly your neighbor has a clear view of your grill. 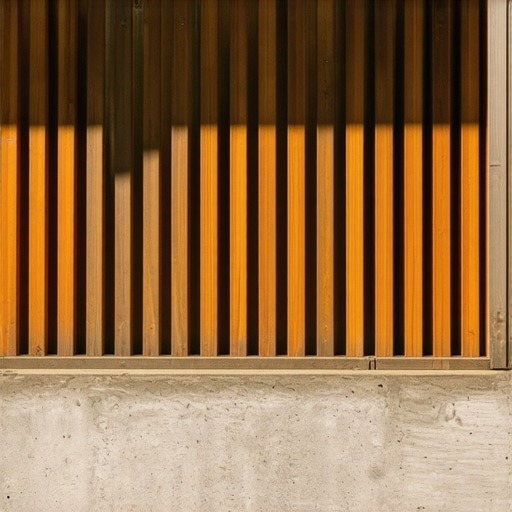
The Spacing Math That Prevents Peeping Neighbors
The ‘magic’ of the shadow-box is in the overlap. If you use 5.5-inch boards, you want a gap that is slightly smaller—roughly 4 to 5 inches. This ensures that when someone looks at the fence from an angle, the board on the opposite side is already covering the gap. I once used a 6-inch gap with 5.5-inch boards, and it was a disaster. It was basically a see-through fence with extra steps. To avoid this, I adapted the spacer hack for perfectly aligned pergola slats. By cutting a block of wood to exactly 4.5 inches, I could press it against the previous board, flush the next one against it, and know my spacing was dead-on every single time. It’s a low-tech solution for a high-precision problem.
Pick the Right Materials to Avoid Early Rot
Because shadow-box fences have overlapping surfaces, they tend to trap moisture more than open designs. If you use cheap, wet pressure-treated lumber, those boards are going to twist and warp as they dry, ruining your perfect lines. This is why I almost exclusively recommend low-maintenance composite decking for the pickets. Composite won’t swell or shrink in the rain, which is vital for maintaining that precise overlap. If you do go with wood, make sure you follow composite decking secrets and longevity tips even for your wood frames—like using joist tape on the top of the rails where water likes to sit between the boards and the frame. I also suggest using the simple jig for drilling straight holes if you are mounting the pickets with screws rather than nails, as it keeps the fastener lines perfectly vertical and professional looking.
Stop Obsessing Over Hidden Fasteners
Everyone wants that sleek, fastener-free look, but I’ve seen it backfire more times than I can count. While they are great for aesthetics, understanding why hidden fasteners are a bad idea for tropical hardwoods or high-moisture environments is a conversation we need to have. If your deck experiences extreme temperature swings, the expansion and contraction can cause those clips to snap or pop. In my experience, a color-matched face screw into a solid core board is often a more reliable long-term solution. It’s a contrarian view, I know, but I’d rather see a tiny screw head than a board that has buckled because it had no room to breathe.
The Frame Trap That Ruins New Decks
The biggest ‘oops’ factor I see in the industry is homeowners spending thousands on premium boards while leaving a rotting 20-year-old frame underneath. It is a recipe for disaster. The North American Deck and Railing Association (NADRA) emphasizes that structural integrity is the most overlooked aspect of deck safety, noting that millions of decks currently in use are reaching the end of their structural lifespan. Often, why your pressure-treated frame is pulling your composite apart comes down to the frame drying out and twisting while the composite remains stable. If you don’t address the substructure, your expensive upgrade will look like a roller coaster within three seasons. 
Why Does Your New Composite Deck Feel Spongy?
If you’ve ever walked across a brand-new deck and felt a slight ‘give,’ you aren’t imagining it. This often happens because the joist spacing wasn’t adjusted for the new material. Most old wood decks used 24-inch on-center spacing, but why your composite deck feels spongy between joists is usually because composite requires 16-inch (or even 12-inch) spacing to feel solid underfoot. To combat this, I always recommend applying composite decking secrets and longevity tips like adding mid-span blocking. And here is a pro tip: why you should paint your deck joists black under composite. It hides the light-colored wood from peeking through the gaps and makes the whole system look infinitely more high-end. Have you ever fallen into this trap of focusing on the surface while ignoring the skeleton? Let me know in the comments.Once you’ve built the structure, the real work shifts from construction to preservation. I used to think a standard bubble level was enough, but after my third pergola project, I realized that over a 20-foot span, even a tiny error becomes a glaring tilt. That is why I swear by the level and laser method for setting pergola heights alone. It’s the only way to ensure your beams are perfectly parallel without needing a three-person crew. Precision tools aren’t just for pros; they are the only thing standing between a ‘DIY special’ and a high-end architectural feature. I also keep a roll of mason’s line in my pocket for the string line move for perfectly plumb pergola posts. If your posts are even half a degree off, your shadow-box boards will eventually pull the frame into a diamond shape, and you’ll be back to square one.
How do I keep my composite deck looking brand new for decades?
The beauty of modern materials is that they don’t need staining, but they aren’t ‘set it and forget it’ either. The biggest mistake I see is people reaching for the pressure washer. I’ve seen homeowners literally peel the protective cap off their boards because they used too much PSI. Instead, use the vinegar and water mix that cleans composite better than chemicals. It’s gentle, cheap, and won’t kill your landscaping. Also, remember why you should never use bleach on composite decks; it can actually cause the color to fade in blotches over time. According to the Trex Care and Cleaning Guide, using a soft-bristle brush and a simple soap solution is the only manufacturer-approved way to maintain your warranty. If you do run into trouble, I’ve found that the soap and sponge fix for oil stains works wonders after a backyard barbecue. 
Your Deck is Going to Get Smarter Soon
Looking ahead, I predict we are moving toward ‘active’ deck systems. We are already seeing composite decking trends that include built-in heat dissipation and integrated sensors that can alert you to moisture buildup under the joists. In the next few years, your deck won’t just sit there; it will tell you when the frame needs attention. For now, focus on the fundamentals like composite decking secrets and longevity tips that stop rot before it starts.
Avoid the Cleaning Chemicals that Eat Your Screws
It’s tempting to buy those ‘oxygen-powered’ cleaners, but many of them are highly corrosive to the fasteners holding your deck together. I’ve seen stainless steel screws pitted and weakened by a single season of aggressive chemical cleaning. If you want a sanctuary that lasts, treat it with respect. Use the garden hose test for proper deck water runoff every spring to make sure water isn’t pooling in the corners of your shadow-box fence. I strongly encourage you to try the laser level trick on your next small project—even just a garden bed—to see the difference it makes in your alignment. It is a total game-changer for your confidence.
The Subtle Lessons You Only Learn After Living with a Fence
Working on these projects for years has taught me that privacy is as much about psychology as it is about physical barriers. First, I realized that a shadow-box design actually makes a small yard feel larger because the overlapping layers create visual depth that a flat wall lacks. Second, don’t underestimate the social aspect; by using a ‘neighbor-friendly’ style, you avoid that awkward conversation about who gets the ‘good side’ of the fence. Finally, remember that your screen is an extension of your home’s architecture. When you select the perfect railing system for every deck, you aren’t just blocking a view—you are defining the character of your sanctuary. It’s better to build it once with high-quality materials than to spend every other weekend fixing warped boards.
My Go-To Kit for High-Precision Outdoor Building
If you want professional results, you need more than just a hammer and a prayer. I never start a build without my self-leveling cross-line laser; it is the only way to ensure your boards stay perfectly vertical across long spans. For those looking to dive deeper into the aesthetics, pergola designs that turn your garden into a sanctuary offer incredible inspiration for mixing textures like wood, metal, and composite. To ensure the project actually lasts, I always use the joist tape secret for doubling your deck’s life. This simple addition prevents moisture from rotting out the top of your frame where the shadow-box boards are attached. I also highly recommend checking the North American Deck and Railing Association (NADRA) for their latest safety checklists, as they provide the structural benchmarks I use for every build.
Reclaim Your Peace of Mind and Your Backyard
Starting a project like this can feel daunting, but the payoff of sitting on your deck without worrying about the neighbor’s morning routine is worth every measurement. By choosing low-maintenance composite decking for your privacy slats, you are investing in years of relaxation rather than years of sanding and staining. Don’t be afraid to take it slow and focus on the details—your future self, sitting in the shade of your new sanctuary, will thank you. Are you planning on a vertical or horizontal layout for your shadow-box privacy screen? Let me know in the comments below!