
I stood there with a cold drink in one hand and a level in the other, watching as my ‘simple’ weekend project turned into a geometric nightmare. My backyard isn’t exactly a cliff, but it has just enough of a rolling wave to make a standard deck frame look like a playground slide. I made the classic mistake of thinking I could just eyeball the low spots and shim the rest later. Spoiler alert: I couldn’t. I ended up with a deck that felt like walking on a boat in a storm, and I eventually had to tear half of it out. Today, I am going to show you how to avoid that seasick feeling by mastering the art of the low-profile build on ground that refuses to stay flat. We are going to dive into grade levels, clearing out the right amount of dirt, and why innovative deck design ideas always start with a foundation that actually stays put. Have you ever tried to level a piece of furniture on a thick rug and failed? Imagine doing that with two tons of lumber. It is frustrating, but I promise we can get it done together.
Ditch the Shims and Learn to Love Ground Prep
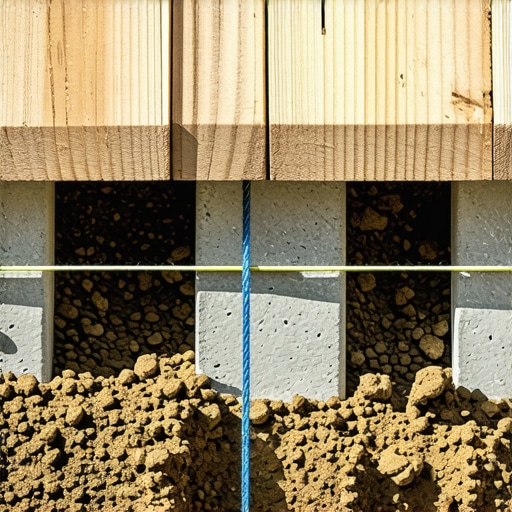
Building low to the ground means you do not have the luxury of long 4×4 posts to hide your mistakes. Every inch of slope becomes a personal enemy. When I first started, I ignored the minor dips in the soil, thinking the joists would just bridge them. I was wrong. I quickly learned that the string line method for perfectly level deck surfaces is the only way to keep your sanity. You need to identify the highest point of your ground and work your way down. If you don’t, you’ll find yourself digging out dirt from under already-installed joists just to make them fit. This ‘dig-as-you-go’ approach is a recipe for a sore back and a crooked deck. According to the International Code Council, proper soil bearing capacity and drainage are the non-negotiables that keep your structure from sinking or shifting over time. If your ground is uneven, you aren’t just building a deck; you are managing a miniature landscape. You might even need to consider the best way to hide ugly concrete deck footings with stone once you realize how much of your substructure will be visible on the downhill side. Have you ever started a project only to realize the earth beneath your feet had other plans?
Is a sloped backyard really a dealbreaker for a DIY deck?
Many homeowners fear that anything less than a perfectly flat lawn requires a professional grading crew and a five-figure budget. That is simply not true. While a slope adds a layer of math to your weekend, it actually gives you a chance to get creative with drainage and airflow. The real danger isn’t the slope itself; it’s the moisture that gets trapped when a low-profile deck sits too close to the dirt. I once built a small platform where I didn’t leave enough clearance, and within two seasons, I had mushrooms growing through the boards. By using adjustable deck pedestals or shallow concrete piers, you can conquer the unevenness while keeping your lumber high and dry. We are looking for that sweet spot where the deck looks like it’s floating just above the grass, not suffocating it.
Start by identifying the ‘summit’ of your building site. This is the highest point of the ground where the deck will sit. If you start at the low point and build toward the high point, you will inevitably run out of vertical space for your joists. I learned this the hard way while helping a neighbor with a cedar platform. We started at his patio door and worked outward, only to find the yard rose three inches about six feet out. We spent the next four hours hacking at sun-baked clay with pickaxes just to drop the frame into a trench. It looked okay eventually, but it was a drain on our time and our backs. To avoid this, use the string line trick for leveling deck joists before decking to map out the entire footprint. If you find a hump, either dig it out first or raise the entire deck height.
Find the Summit Before You Cut a Single Board
Once you have your high point, that becomes your ‘Zero.’ Every other measurement is an adjustment based on how much the ground drops away from that spot. Think of your deck frame like a table with legs of different lengths; the table top stays flat, while the legs do all the work of reaching down to the uneven floor. For a low-profile build, you often do not have room for traditional posts. Instead, you might use ‘floating’ footings or adjustable deck pedestals. These are lifesavers because they allow you to micro-adjust the height without having to pour a perfect concrete pier every time. However, even with these tools, you need to ensure the soil is compacted. If you place a footing on loose, freshly turned dirt, your deck will eventually look like a wavy potato chip.
Beat the Bounce with a Strategic Mid-Span Beam
Low-profile decks are notorious for feeling ‘bouncy.’ Because you are often trying to keep the profile as slim as possible, people tend to use 2×6 joists instead of beefier 2x8s or 2x10s. The problem is that 2x6s can feel like a trampoline if the span is too long. To solve this, you need to understand the structural reason your deck needs a mid-span beam. By adding a beam halfway through the run, you effectively cut the span in half, making a thin joist feel as solid as a concrete slab. When I built my current backyard platform, I doubled up the joists every four feet and added a hidden row of blocking. The result? You could jump on it and the water in a glass three feet away wouldn’t even ripple.
Keep Your Lumber Dry with the Two-Inch Air Gap Rule
The biggest killer of low-to-the-ground decks isn’t weight or bad math; it is rot. When wood sits close to damp soil, it acts like a sponge, sucking up ground moisture that never has a chance to evaporate. This is why composite decking secrets often revolve around airflow. Even if you use high-end composite boards, the wooden frame underneath is still vulnerable. You should aim for at least two to three inches of clearance between the bottom of your joists and the dirt. To further shield your investment, I highly recommend using the joist tape secret for doubling your decks life. This simple butyl tape creates a waterproof barrier on the top of the joists where water usually pools under the deck boards.
Choose a Railing System That Does Not Crowd the View
Just because your deck is low doesn’t mean you can skip the safety or style of a perimeter. However, a bulky wooden railing on a low platform can make the whole area feel like a cage. You need to know how to select the perfect railing system for every deck, especially those that sit close to the grass. Slim metal balusters or cable systems work best here because they disappear into the landscape. Whatever you choose, make sure the posts are anchored correctly. Use the 3-second push test for wobbly railing systems once you are done—if there is any play in the post, you need more internal blocking. A low deck is an invitation for people to lean and lounge, so that railing needs to be as sturdy as the floor itself.
Everyone says composite is ‘set it and forget it,’ but that is the first myth you need to dismantle if you want a deck that lasts thirty years. In my experience, the biggest technical failure isn’t the material itself, but how it interacts with the substructure. You might notice why your pressure-treated frame is pulling your composite apart after just one hard winter. Wood shrinks as it dries; composite expands as it heats up. When these two materials fight, the screws usually lose.
Why does my composite deck feel like walking on a sponge?
Many homeowners think that because composite is heavy, it must be structurally rigid. However, data from the Forest Products Laboratory indicates that most wood-plastic composites have a significantly lower modulus of elasticity than standard pressure-treated southern pine. This means if you stick to the standard 16-inch joist spacing, you will likely experience why your composite boards feel spongy under heavy furniture or high-traffic areas. For a truly professional feel, I always recommend a 12-inch center-to-center span. 
Stop Overestimating Your Railing Connections
People spend hours picking out the perfect baluster color but spend five minutes on the post-to-frame connection. I have seen hundreds of DIY projects fail the ‘lean test’ because they relied on lag bolts alone. You absolutely must use the blocking trick that stops railing post wobble to transfer the load into the actual floor joists. Without internal blocking, you are essentially attaching your safety system to a single piece of rim joist that can twist and pull away. Another ‘trap’ is the aesthetic of dark hardware. While it looks modern, you need to be aware why black aluminum railings get hotter than you think—in direct sunlight, they can reach temperatures that make them uncomfortable to touch without a wood top-rail.
Freestanding Pergolas Over Roof-Mounted Nightmares
Finally, if you are adding a pergola to your design, resist the urge to mount it directly to your house’s roofline. It seems like an easy way to save on posts, but it is a primary cause of structural rot. Learn why you should never bolt a pergola directly to your roof and instead opt for a freestanding design. It requires more precision during the layout, but it keeps your shingles intact and your warranty valid. Have you ever fallen into this trap? Let me know in the comments.
Stop chasing the bubble and use a laser instead
I have spent way too many hours chasing a tiny bubble inside a four-foot spirit level, only to realize that my eyes were playing tricks on me in the midday sun. If you are scaling up your project or building a large-scale structure, you need to stop relying on handheld levels for your primary heights. When I finally switched to the level and laser method for setting pergola heights alone, it was like the clouds finally parted. A rotary laser level allows you to establish a consistent ‘benchmark’ across your entire yard, ensuring that your deck surface is perfectly planar even if the ground is doing something completely different fifty feet away. I also recommend using the jig I use for consistent deck screw depth. Nothing ruins a high-end composite look faster than seeing screws driven at varying depths; it creates tiny shadows that your eyes will notice every single time you walk out of the back door. Precision is not about being a perfectionist; it is about respecting the material enough to let it perform the way it was designed.

How do I maintain my composite deck without ruining the surface?
The most common question I get is how to keep that ‘day one’ shine without spending every Saturday scrubbing on your hands and knees. The biggest mistake you can make is reaching for the high-pressure nozzle. I have seen beautiful boards scarred forever because someone thought more PSI meant a cleaner deck, which is why you should never use a power washer on composite boards. Instead, I swear by a soft-bristle brush and the vinegar and water mix that cleans composite better than chemicals. It breaks down the pollen and organic film without stripping the protective UV coating. Looking forward, as we elevate your backyard innovative deck design ideas for 2025, we are seeing a major trend toward ‘shielded’ capped composites that require even less chemical intervention, but the basic rules of gentle cleaning still apply. If you want composite decking secrets that actually work, remember that consistency beats intensity every time.
The five-minute safety check you should do every spring
Maintenance is not just about the surface aesthetics; it is about the bones of the structure. The American Wood Protection Association (AWPA) specifies in their U1 Standard that any field-cut ends of pressure-treated lumber must be treated with a copper-naphthenate preservative. If you didn’t do this during the build, you need to be extra vigilant now. Every spring, I take five minutes to perform the ice pick test for checking joist strength on older decks. You are looking for soft spots where water might have bypassed your flashing or joist tape. If the wood feels like wet cardboard, you have a problem that needs addressing before it becomes a structural failure. Before you call it a day and fire up the grill, go grab a flathead screwdriver or an ice pick and check those rim joists. It is the cheapest insurance policy you will ever ‘buy’ for your home’s outdoor space.
What I finally realized after fixing my third crooked deck
Building close to the dirt taught me more about structural physics than any textbook ever could. First, I learned that ignoring a bouncy sensation is a mistake you will regret every time you host a summer BBQ; why your composite boards feel spongy under heavy furniture usually comes down to joist spacing rather than the board quality itself. Second, I discovered that even the best pressure-treated lumber has a shelf life if you do not actively monitor moisture traps. I started using the simple spray that identifies hidden rot on old deck posts during my yearly spring inspections to catch issues before they became safety hazards. Finally, I stopped picking railing colors based solely on visual trends after realizing why black aluminum railings get hotter than you think—my kids’ hands were the ultimate litmus test for that design choice.
The gear upgrades that saved my project sanity
If you are serious about a professional finish on a low-profile build, you have to put down the bubble level for the big stuff. I now swear by the level and laser method for setting pergola heights alone because it eliminates the tiny human errors that creep in when you are exhausted at the end of a long day. I also never build a frame without high-quality butyl tape anymore, though you must be careful about the timing of the application; I have seen why pressure-treated wood still rots under joist tape when the wood is too saturated during the install. Lastly, always keep a small tub of copper-naphthenate preservative on your workbench to seal every single field cut you make. It is the only way to maintain the integrity of the chemical envelope in your lumber.
Build the space where your best memories will live
Your backyard is more than just a combination of joists, screws, and composite boards; it is a functional extension of your home. By taking the time to master these low-profile leveling techniques and focusing on a smart deck design, you are creating an outdoor sanctuary that will stand up to the elements for decades. Do not let a sloped yard or a tricky geometric layout intimidate you—the most rewarding projects are often the ones that had to overcome the toughest terrain. Have you ever faced a ‘geometric nightmare’ with your ground levels, or was your backyard actually flat for once? Let me know in the comments below!