
I remember the first time I felt it. It was July 2018, and I was hosting a massive backyard cookout under the cedar pergola I’d spent three grueling weekends building. I was proud as a peacock until my brother-in-law leaned against one of the corner posts while laughing at a joke. The whole structure—all eight hundred pounds of it—did a slow, nauseating shimmy. My heart dropped. I’d followed the plans, used hefty 6×6 posts, and even mastered the level and laser method for setting pergola heights alone, but I’d skipped the knee braces because I thought they looked a bit too ‘clunky’ for my minimalist aesthetic. Big mistake. That wobble wasn’t just a minor annoyance; it was a screaming sign of structural racking that could eventually pull the entire frame apart. Today, I want to save you from that same sinking feeling by explaining why those 45-degree pieces of lumber are the unsung heroes of your backyard. [image]
Stop the Sway and Protect Your Investment
A pergola is basically a giant sail made of heavy wood. Without diagonal support, it relies entirely on the strength of the joints at the top and the anchors at the bottom. I learned the hard way that even if you’ve used the string line move for perfectly plumb pergola posts, the leverage at the top of a ten-foot beam is immense. Think of it like a tall person standing on a moving bus; without widening their stance or grabbing a rail, they are going down. Knee braces provide that ‘wide stance.’ They create triangles in the corners of your frame, and as any engineer will tell you, the triangle is the strongest shape in construction. Without them, your structure is just a series of rectangles waiting to fold under pressure. This is especially true if you are looking into pergola designs that turn your garden into a sanctuary—you want that sanctuary to feel permanent, not like a temporary tent. Have you ever noticed your structure vibrating during a heavy thunderstorm?
Can’t I just use stronger post-base anchors instead?
It’s a fair question, and one I get from my neighbors all the time. People assume that if the feet are bolted down tight, the top won’t budge. But the reality is that the higher the structure, the more force is exerted on those joints. Even if you’ve implemented the steel bracket move for high wind pergolas, those brackets are only as good as the lateral stability of the entire frame. According to the American Wood Council’s Design for Code Acceptance (DCA) 6, diagonal bracing is essential for resisting lateral loads that can exceed several hundred pounds during a standard wind event. If you ignore this, you’ll likely see why most DIY pergolas fail the uplift test in storms first-hand. It’s not just about the wood breaking; it’s about the fasteners slowly backing out of the wood every time the structure sways. I’m here to show you how to lock it down for good.
Stop the Sway with the Two-Foot Bracing Rule
The secret to a rock-solid pergola is the 2×2 rule. This means your knee brace should extend at least 24 inches down the post and 24 inches along the beam. When you shrink these braces for the sake of ‘looks,’ you are essentially trying to hold up a falling tree with a toothpick. Think of the brace like a wide-receiver’s stance—the wider the base, the harder they are to knock over. This isn’t just theory; I once assisted a neighbor who had installed tiny 10-inch ‘decorative’ braces on a massive 12×12 cedar structure. Every time the wind picked up, the rafters would groan like a ghost in an attic. We eventually swapped them for beefy 4×4 knee braces, and the structural hum vanished instantly. This is the same principle I recommend for the diagonal bracing secret for ultra-stiff deck stairs, where triangulation kills vibration. 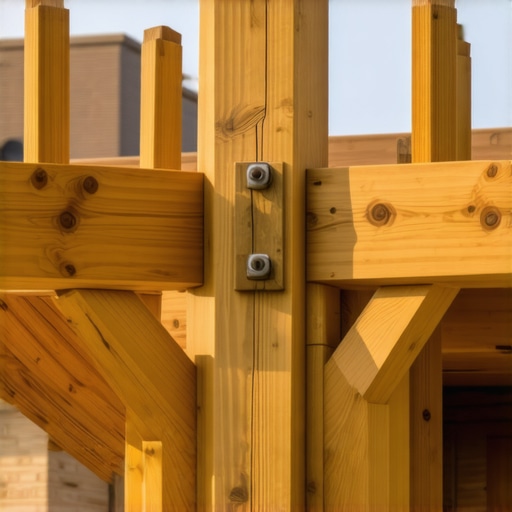
Cut Your Miters Once and Avoid the Gaps
To get that perfect 45-degree fit, you need a sharp miter saw and a steady hand. If your cuts are even a degree off, you leave a gap that allows the wood to compress over time, reintroducing that dreaded wobble. When you are working through the cedar vs pressure treated debate for pergola beams, remember that cedar is softer; a tight fit is even more critical because the wood will ‘give’ slightly under pressure. I always cut my braces just a hair long—maybe 1/16th of an inch—and tap them into place with a rubber mallet. This ‘friction fit’ ensures that the brace is active the moment a gust of wind hits the structure. It is a trick I learned while perfecting the hidden bracing move for rock-solid corner posts.
The Fastener Choice That Keeps Joints Tight
Forget about standard deck screws or nails for your knee braces. They do not have the shear strength to handle the lateral force of a heavy timber frame. You need structural timber screws—the kind with the built-in washer head. These screws pull the brace into the post with incredible force, creating a connection that won’t back out over time. While I often use the jig i use for consistent deck screw depth for floorboards, for braces, I am looking for maximum penetration. Drive two screws into the beam and two into the post for every brace. This creates a redundant system that resists both tension and compression. While you are up there, it is also the perfect time to implement the copper cap trick for extending post life on any exposed end grain to prevent the rot that eventually loosens these critical joints.
Pre-Drilling Is Not Optional
One of the messiest mistakes I ever made was skipping the pre-drill step on a dry redwood pergola project back in 2019. I drove a large structural screw in, and the wood split like a lightning bolt hit it. A split brace has zero structural integrity because the wood fibers can no longer grip the fastener. Always use a drill bit that is slightly smaller than the shank of your screw. This allows the threads to bite deep into the grain without blowing the wood apart. This attention to detail is what separates a simple DIY weekend project from the pergola trends crafting shade elegance in your outdoor space that actually add long-term value to your home. When the brace is installed correctly, the pergola should feel like part of the earth itself, not something just perched on top of it.
Building a rock-solid pergola is just the start of creating a true sanctuary. But I often see folks spend a fortune on high-end materials only to fail at the finish line because they treat every material exactly the same. Everyone says composite decking is ‘maintenance-free,’ but in my experience, that is a dangerous oversimplification. While you won’t be staining it every two years, composite requires a much higher level of engineering precision than traditional wood.
Stop Treating Composite Like Standard Pine
The most common mistake I see is using standard framing techniques for high-end composite boards. Because composite is more flexible than cedar or pressure-treated lumber, it doesn’t hide a sloppy frame. If your joists aren’t perfectly level, the composite will contour to every dip and hump, making your expensive project look like a roller coaster. This is exactly why your composite deck feels spongy between joists. To prevent this, I always recommend why you should paint your deck joists black under composite. It’s not just about aesthetics; the black paint hides the shadow lines of the gaps, but more importantly, using a solid core material like you find when exploring why solid core composite is worth the extra bulk provides the rigidity that hollow-core DIY boards simply lack.
Why is my expensive deck surface feeling spongy?
Advanced builders know that composite has zero structural ‘memory.’ If you over-span your joists by even an inch, the material will eventually sag and stay sagged. According to technical bulletins from the North American Deck and Railing Association (NADRA), serviceability issues like ‘bounce’ are the leading cause of homeowner dissatisfaction. If you are noticing a trampoline effect, you might need to look into how to fix the bounce in your over spanned deck joists before the boards take a permanent set. I’ve had to go back and add mid-span blocking to dozens of decks where the original builder thought 16-inch centers were ‘good enough’ for a 45-degree herringbone pattern. 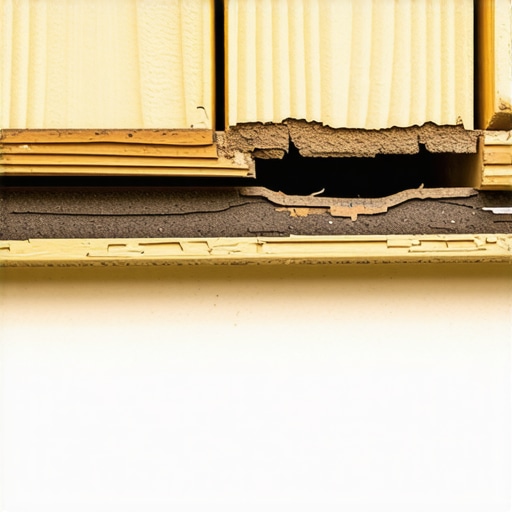
The Thermal Trap That Destroys Siding
The ‘Oops’ factor that catches almost everyone is thermal expansion. Wood expands mostly in width; composite expands in length. On a hot July day, a twenty-foot board can grow by as much as half an inch. If you butt those boards tight against your house, they will act like a slow-motion battering ram. I’ve seen beautiful homes with buckled vinyl siding because the builder didn’t know how to stop composite deck boards from expanding into your siding. It is a heartbreaking and expensive fix. This is the same reason why hidden fasteners fail on wide profile boards; the clip simply cannot handle the sheer force of the board trying to grow in the sun.
Static and the Surprise Zap
Here is a nuance most ‘pro’ guides won’t tell you: the drier the climate, the more your deck becomes a giant battery. Because of the plastic content, walking across certain boards in rubber-soled shoes can build up a massive charge. It sounds like a myth until you touch your metal railing and get a jolt that wakes the neighbors. Understanding why your composite deck is statistically likely to static shock you is the first step in choosing a board with an anti-static cap-stock. Always check the manufacturer’s spec sheet for ‘carbon black’ or other conductive additives if you live in an arid region. Have you ever fallen into this trap or experienced the ‘composite shock’ yourself? Let me know in the comments. By following composite decking secrets longevity tips for a lasting deck, you can ensure your investment remains as stable as that braced pergola we discussed earlier.
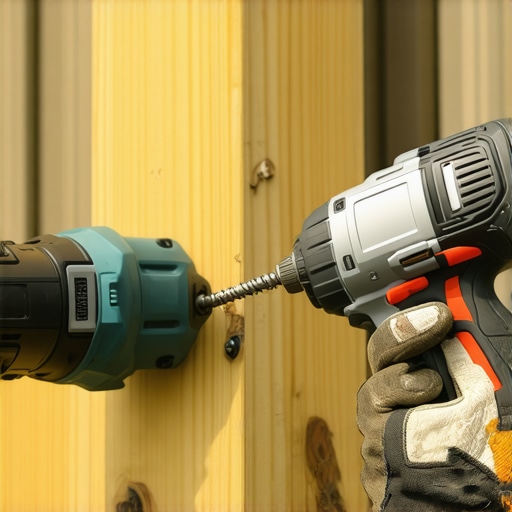
Over the years, I’ve realized that the difference between a deck that lasts ten years and one that lasts forty isn’t just the wood—it’s the precision tools you use during the build. I never step onto a job site without my high-torque impact driver and a dedicated structural screw bit set. Why? Because when you are installing heavy-duty hardware, a standard drill will often strip the heads, leaving you with a structural nightmare. I’ve seen too many DIYers get frustrated and leave screws half-driven, which is a recipe for disaster. Using the right bits for structural timber screws ensures that the head seats perfectly, creating the clamping force needed to prevent that ‘racking’ we talked about earlier. When you are deep into maximize outdoor living with low maintenance composite decking, having a dedicated composite saw blade is also non-negotiable to avoid the ‘mushrooming’ effect where the plastic curls up around the screw head.
Keep Your Outdoor Sanctuary From Looking Like a Junkyard
The biggest lie in the industry is that ‘maintenance-free’ means ‘set it and forget it.’ If you want your investment to shine, you have to fight the elements proactively. First and foremost, put down the power washer. I can’t tell you how many beautiful surfaces I’ve seen ruined because someone thought high pressure was the answer; in fact, why you should never use a power washer on composite boards is a lesson usually learned through expensive replacement costs. Instead, I always rely on gentle, pH-neutral cleaners that won’t strip the UV-resistant coating. Every spring, I also perform the garden hose test for proper deck water runoff. If water is pooling, it’s a sign that your framing has shifted or your drainage is blocked, which will lead to rot even if you used the joist tape secret for doubling your decks life.
How do I keep my composite deck looking brand new for decades?
Consistency is more important than chemicals. I recommend using the vinegar and water mix that cleans composite better than chemicals twice a year. It’s gentle enough not to etch the plastic cap-stock but effective enough to kill mold spores before they take root in the wood-flour core. According to technical bulletins from the North American Deck and Railing Association (NADRA), regular cleaning can prevent the micro-abrasions that make boards look dull over time. For the skeleton of the deck, I recommend a yearly ‘check-up’ using the structural vulnerability assessment for checking deck joist rot. As for the future, I see more ‘smart’ decking materials emerging—boards with embedded sensors that can alert your phone if moisture is trapped against the ledger board. Until then, we rely on good old-fashioned elbow grease. I challenge you to grab a bucket of that vinegar mix this weekend and give your deck the ‘spa day’ it deserves—your future self will thank you for the lack of splinters and permanent stains.
What 15 Years of Sawdust Taught Me About Structural Regret
If there is one thing I have learned, it is that the smallest shortcuts cause the biggest headaches. I used to think that beefing up the posts was enough, but I have seen 8×8 timbers twist like pretzels because they were not braced correctly. It is the interaction between the components that matters most. Another major eye-opener was the ledger board error that causes house leaks; it does not matter how pretty the wood is if your kitchen wall is rotting from the inside out. Finally, respect the seasons—wood and composite are living, breathing things that need room to move, or they will eventually tear themselves apart.
The Gear I Actually Use to Build Better Decks
[image]
You do not need a warehouse full of gear, but you do need these four essentials. First, get a high-quality laser level; it is the only way to ensure your pergola rafters do not look like a set of stairs. Second, I always keep the North American Deck and Railing Association (NADRA) guidelines bookmarked; they are the gold standard for safety. Third, if you are stuck on aesthetics, check out innovative deck design ideas that elevate your homes curb appeal for a blueprint of what actually works in the real world. Lastly, invest in structural timber screws—they are the only fasteners I trust to hold a frame together during a gale.
Build the Sanctuary Your Family Deserves
Taking the time to add those knee braces or meticulously space your joists might feel like overkill in the moment, but it is the difference between a simple project and a legacy. A truly successful deck design is not just about the surface color; it is about the peace of mind you feel when a dozen people are standing on it and nothing moves. You have the tools, the rules, and the knowledge now—it is time to stop the sway and start building something that lasts. If you ever hit a wall or need a second set of eyes on your plans, do not hesitate to contact us for expert advice.
Have you ever felt that terrifying shimmy on your own deck or pergola during a backyard party? Let me know what you did to fix it in the comments below!