
I stood there with my drill in one hand and a cold cup of coffee in the other, staring at a three-inch gap between my brand-new composite boards and the acrylic lip of the hot tub. It looked awful. I thought I could just eyeball the radius, but the result was a jagged, amateur mess that made my expensive spa look like it was sitting in a construction site. I had ignored the reality of how these materials actually behave when they get wet and hot. If you have ever felt that sinking feeling when a project looks worse after you finish it, you are not alone. That moment was my wake-up call to figure out the actual physics of deck-to-tub integration.
Get the Perfect Flush Fit Without the Headache
Most folks think they can just run the boards straight and trim them later with a jigsaw, but that is how you end up with splinters and wasted material. I learned the hard way that you need to account for the tub’s vibration and the inevitable expansion of the boards. If you are working with modern materials, the stakes are even higher because they move more than old-growth wood. I once made the mistake of pinning a board tight against the tub casing; by August, the board had buckled so badly it actually popped the screws. You need to understand composite decking secrets regarding expansion gaps, or your beautiful curve will become a wavy disaster. According to the Master Pool & Spa Professionals Association, improper deck spacing around hot tubs is one of the leading causes of perimeter rot and structural failure due to trapped moisture. Today, I am going to show you how to avoid my early failures and get a finish that looks like a high-end resort.
Won’t a Custom Surround Just Rot Out Anyway?
It is a fair question to ask. You are putting material right where water splashes every single night, and skepticism is healthy here. But the secret isn’t just the material you choose; it is the airflow and the framing integrity. When I first started, I ignored the ledger gap fix logic and applied it to the tub, thinking tighter was better. I was wrong. Air needs to move, or the underside of your boards will turn into a mushroom farm. We are going to look at the exact scribing technique and framing tricks, like how to build a deck around a hot tub without cutting joists, to make sure your deck stays level and beautiful for a decade. Have you ever tried to cut a curve into a deck board and ended up with a piece of expensive scrap wood instead? If so, tell me about it, because I have been there too. Let’s make sure that never happens again by mastering the template method.
Master the Scribe Before You Touch the Saw
To get that professional flush look, you need to treat your deck boards like a custom-tailored suit. You do not just guess the waistline, and you definitely do not just eyeball a three-thousand-dollar hot tub radius. I start by creating a physical template out of thin luan or even stiff cardboard. I once tried to skip this and trace the tub with a Sharpie, thinking I had a steady hand. The result was a wavy mess because the tub’s acrylic lip was not perfectly uniform. Instead, use the pencil and string hack for perfectly curved deck corners to establish a consistent offset from the center point of the spa. This ensures that even if the tub is not a perfect circle, your cut line remains aesthetically balanced. 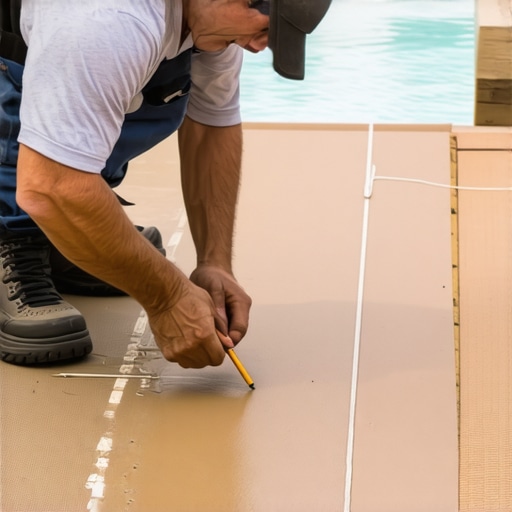
Stop the Rot with Strategic Airflow and Framing
The area where your deck meets the tub is a high-moisture combat zone. If you trap water there, you are basically inviting a colony of mold to move in. When you are setting up your substructure, do not just cram joists against the tub wall. I always employ the rubber spacer trick for better airflow under joists to create a thermal and moisture break. It acts like a gasket, allowing water to drain through instead of sitting in the junction. I remember a rebuild I did three years ago where the previous contractor had bolted the rim joist directly to the tub frame. When we pulled it apart, the wood was so soft I could put my thumb through it. To avoid that structural nightmare, consider the staggered joist trick for ultra-long deck spans to give yourself extra meat for fastening the curved boards without compromising the main frame’s integrity.
Cut Crisp Lines with the Tape Method
Composite material is notorious for mushrooming or fraying when you hit it with a jigsaw or a circular saw. Those little plastic burrs are a nightmare to sand off and usually just end up looking melted. Before I make a single cut, I apply the painters tape hack for cutting composite boards without fraying. You lay the tape down, draw your scribe line on the tape, and cut right through it. The tape holds the surface fibers in place, leaving an edge that looks like it came from a factory. While you are at it, make sure you protect the top of those joists. Even pressure-treated wood struggles with the constant splashing of chlorinated water, so applying the joist tape secret for doubling your decks life is a non-negotiable step for any spa-side project. I once skipped the tape on a small platform for a neighbor; two years later, we had to replace three boards because the screws had pulled through the softened joist tops.
The Expansion Gap that Saves Your Spa
The biggest mistake DIYers make is forgetting that composite decking is essentially a giant thermometer. It expands when it gets hot. If you cut your boards to fit snug against the tub in the cool morning, they will expand by midday and potentially crack your tub’s casing or buckle the deck. I always leave a minimum of a quarter-inch gap. It might look a bit wide at first, but once you see those boards move, you will be glad for the breathing room. If the gap bothers you, you can always use a specialized trim, but never, ever pin the boards tight. It is the fastest way to turn a beautiful build into a wavy, warped disaster.Let’s dig deeper into what happens after the boards are laid. Everyone tells you that switching to composite means you’ll never lift a finger again. That is a flat-out lie. While you won’t be sanding and staining every spring, the “maintenance-free” label is the biggest myth in the industry. If you ignore your deck, it will ignore you back by collecting pollen and tannin stains that bake into the surface. I’ve seen beautiful installs ruined because someone thought low-maintenance composite decking meant “ignore-forever decking.” In reality, you need a simple cleaning routine, but for the love of your warranty, never use bleach on composite boards. It eats the UV inhibitors right out of the plastic.
The Tug-of-War Beneath Your Feet
This is where the real physics comes in. Most contractors will tell you that standard pressure-treated lumber is the only way to go for the substructure. I disagree. The “Oops” factor here is the massive discrepancy in how these materials move. Pressure-treated wood shrinks as it dries, while your composite expands as it heats up. This creates a literal tug-of-war beneath your feet. If you’ve ever wondered why your pressure-treated frame is pulling your composite apart, it’s usually because the joists have twisted while the decking stayed straight. According to the North American Deck and Railing Association (NADRA), millions of decks suffer from structural fatigue due to these internal stresses. I now use the joist tape secret to create a moisture buffer, but if I’m building a high-end spa deck, I’m often looking at steel framing to eliminate the movement altogether. 
Why does my expensive frame feel like it is fighting the boards?
One nuanced mistake I see constantly is railing placement around the tub. People focus so much on the tub radius that they forget the railing posts. They bolt the posts to the rim joist and then wonder why the whole thing shakes when a 200-pound adult leans on it. You need to use the blocking trick that stops railing post wobble. It involves internal structural blocks that transfer the load to the joists, not just the outer rim board. When you are picking out railing systems for safety and style, remember that the “flush” look of the tub should never compromise the structural rigidity of the perimeter. Have you ever fallen into this trap of thinking the frame didn’t matter as much as the finish? Let me know in the comments. I’ve spent years fixing “pretty” decks that were structurally screaming for help. Let’s make sure yours isn’t one of them.I’ve spent thousands of hours on my knees driving screws, and if there is one thing I’ve learned, it’s that your tools determine your sanity. I used to eyeball screw depth, but now I won’t touch a board without the jig I use for consistent deck screw depth. It prevents that “volcano” effect where the composite mushroom wraps around the screw head, creating a trip hazard and an eyesore. If you are building a pergola too, throw away your bubble level and switch to the level and laser method for setting pergola heights alone. It’s the difference between a structure that looks straight and one that is straight to within a sixteenth of an inch over forty feet. When you are working with expensive materials, that precision is what separates a DIY job from a professional masterpiece. 
How do I keep my composite deck from looking like plastic in five years?
The secret isn’t a fancy sealer; it’s basic chemistry. High-end composite manufacturers often suggest simple soap and water, but for stubborn pollen or light hard water stains, I swear by the vinegar and water mix that cleans composite better than chemicals. It’s gentle enough not to strip the cap-stock but acidic enough to break down the grime that builds up in the grain. You also need to watch out for environmental factors that no one tells you about during the sale. I’ve seen homeowners confused about why your composite decking is fading in patches, only to realize their low-E windows were reflecting a “death ray” of concentrated UV light onto specific boards. According to the International Association of Certified Home Inspectors (InterNACHI), these thermal reflections can reach temperatures high enough to warp or discolor composite materials permanently, so planning your shade or window film is a critical long-term maintenance step. Looking toward 2025, I’m seeing a massive shift in composite decking trends toward “biophilic” designs that blend seamlessly with heavy vegetation. We are moving away from the industrial “gray box” look and into deep, variegated grains that mimic exotic hardwoods like Ipe or Cumaru. I predict we’ll also see more integrated smart-tech in pergola trends, with sensors that automatically adjust louvered roofs based on humidity and light levels. Before you call your project “done,” I want you to try one thing: grab a laser level and check your joist planes one last time. It’s the highest-impact “pro” move you can make to ensure your water runoff is perfect. If you want to dive deeper into the latest aesthetics, check out innovative deck design ideas for 2025 to see how these structural fixes translate into a world-class finish.
The Hard Truths I Learned While Scribing Curves
Building around a spa isn’t just about the woodworking; it’s about managing the environment. One lightbulb moment for me was realizing that ‘perfect’ is a moving target. In the dead of winter, your gaps will look wider, and in the summer heat, they’ll tighten up—that’s just the nature of composite decking secrets in action. I also learned that you can’t trust a factory edge to be perfectly square against a house wall. I always use the 3-4-5 triangle move for squaring up a new deck frame before I even think about the first row of boards. Finally, remember that while composite is tough, it’s not invincible. I’ve seen people destroy their finish in minutes, so why you should never use a power washer on composite boards is a lesson you want to learn from me, not from your own ruined deck.
Gear That Actually Makes a Difference
You don’t need a warehouse full of tools, but you do need the right ones for these high-stakes cuts. First, a high-quality jigsaw with a reverse-tooth blade is non-negotiable for those tight spa curves; it prevents the top ‘cap’ of the board from chipping. Second, if you accidentally nick a board while fitting it, don’t panic—knowing how to fix scuffs on dark composite boards with a heat gun can save you from replacing an entire 16-foot plank. I also highly recommend the NADRA deck safety guides for anyone doing their own structural work. For those looking ahead at the ‘big picture’ of their yard, I always browse innovative deck design ideas for 2025 to see how lighting and multi-level transitions are evolving.
Bring Your Dream Deck to Life
There is nothing quite like the feeling of sliding into a hot tub that looks like it was built into the landscape, rather than just dropped onto a patio. It takes patience to get those scribe lines right and discipline to leave those expansion gaps, but the result is a professional-grade sanctuary you’ll enjoy for decades. Your choice in low-maintenance composite decking is the first step toward a worry-free lifestyle, provided you respect the physics of the build. #IMAGE_PLACE_HOLDER_E#
Have you ever struggled with getting a perfectly smooth curve on a deck board, or did your first attempt end up a bit jagged? Let me know in the comments below!