
I will never forget the sound of my favorite ceramic platter shattering on the pressure-treated pine back in 2018. I was hosting a neighborhood BBQ, balancing a tray of marinated steaks, and I tripped over the awkward three-inch ‘cliff’ I had built between my kitchen floor and the deck. It was a classic rookie move. I had spent so much time worrying about the square footage that I completely ignored the threshold. That stumble was my lightbulb moment: a deck shouldn’t feel like an island you have to ‘go to’; it should feel like a room you simply walk into. Today, I am going to show you how to bridge that gap so your indoor and outdoor spaces finally start speaking the same language. We are going to tackle everything from floor heights to visual flow, ensuring your backyard feels like a genuine extension of your home.
Your Kitchen Does Not Have to End at the Back Door
When I first started exploring stunning deck design strategies, I realized that the best transitions are psychological as much as they are physical. If your eyes see a jarring change in material or a significant drop in height, your brain registers a barrier. This is why many people rarely use their outdoor spaces—it feels like a chore to move between them. By aligning your deck boards with the direction of your interior flooring, you create a visual runway that pulls people outside. I once made the mistake of running my boards perpendicular to the kitchen hardwood, and it felt like hitting a wall every time I looked out the window. According to the National Association of Realtors, a well-executed indoor-outdoor flow can offer a return on investment of over 80%, making this more than just a lifestyle choice—it is a smart financial move. You also need to know how to hide the gap between your deck and the house to make the connection look intentional rather than tacked on. Have you ever felt like your deck is just a platform stuck onto the side of your house rather than a part of your actual living space?
Is This Flush-Floor Look Actually Safe?
I hear this one a lot from skeptical neighbors. If the deck is level with the kitchen, won’t rain just wash right into the house? It is a valid fear. In my early days, I saw a DIY project where the owner ignored drainage entirely, and their kitchen subfloor turned into a literal sponge within two seasons. But you do not have to sacrifice safety for style. By using modern durable composite solutions and a clever framing trick involving a slight, nearly invisible slope, you can keep the water out while keeping the floor heights perfectly aligned. It is all about the flashing and the drainage plane, which we will dive into shortly to make sure your transition is as bone-dry as it is beautiful.
Drop Your Joists Without Dropping the Ball
To get that seamless transition, you need to master the sub-frame before the first board ever touches a screw. Most people just slap a ledger board on the house and call it a day, but that is exactly how you end up with the ledger board error that causes house leaks. When I was rebuilding a deck for a family back in 2020, they were adamant about having their kitchen floor flow perfectly onto the new composite surface. I spent four hours with a laser level and a planers tool, calculating the thickness of the interior tile versus the deck boards to adjust the joist height by exactly 1.25 inches. We used the 3-4-5 triangle move for squaring up a new deck frame to ensure the boards ran perfectly parallel to the sliding glass door. If that frame is even half an inch out of square, the human eye will catch the crooked lines immediately, and the ‘indoor room’ illusion is shattered.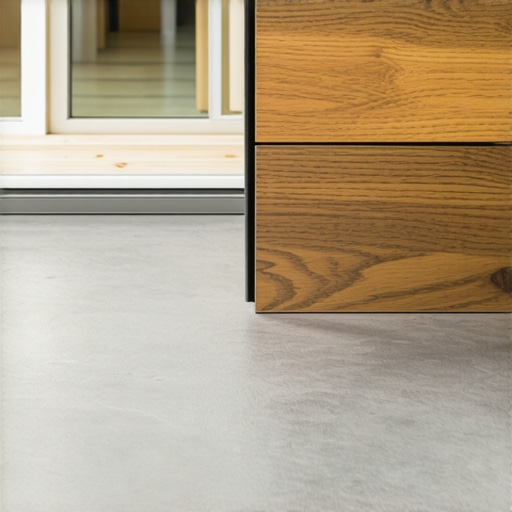
The Secret to a Bone-Dry Flush Threshold
You might be wondering how to keep the rain out if the floor is level. You have to respect the 2-degree slope rule for drainage under second-story decks, or in this case, ground-level transitions. By pitching the joists slightly away from the threshold—just enough to be invisible to the foot but obvious to a bead of water—you create a natural gutter. In that same 2020 project, we also implemented the drainage secret for decks built close to the ground, which involved a hidden gravel trench directly beneath the ledger area. It rained for three days straight after we finished, and the homeowner called me just to say the area was bone dry. That is the peace of mind you get when you plan for physics instead of fighting it.
Pick a Material That Mimics Your Interior Style
Choosing the right material is the next pillar of a successful transition. Natural wood moves, warps, and splinters, which eventually ruins that polished indoor feel. If you want the transition to remain tight over a decade, you need composite decking secrets: longevity tips for a lasting deck. High-quality boards have minimal thermal expansion, so your gaps stay consistent and professional. I once saw a DIYer use pressure-treated pine right up against a mahogany interior floor; within a single summer, the outdoor wood had shrunk so much there was a gap big enough to swallow a car key. Avoid that heartbreak by matching the tone and grain of your indoor flooring with a stable composite.
Railing Choices That Don’t Block the Magic
Finally, don’t build a visual cage around your view. If the point of a flush transition is to make the room feel twice as large, a chunky wooden railing is your worst enemy. I almost always recommend the stainless cable trick for views that never get blocked. It makes the perimeter of your deck virtually disappear, tricking your brain into thinking the backyard is just another corner of the living room. It’s truly the secret to making your deck feel like a living room rather than a fenced-in utility platform. When you stand in your kitchen and your eyes travel straight to the trees without hitting a baluster, you’ve succeeded.While everyone is chasing the ‘seamless’ look, I’ve seen some absolute disasters caused by an obsession with aesthetics over physics. For instance, the industry has pushed hidden fasteners as the ultimate luxury, but in my experience, why hidden fasteners can be a maintenance nightmare is a topic that doesn’t get enough play at the showroom. If a single board in the center of your layout warps or gets gouged, you essentially have to dismantle half the deck to get to it. I prefer a high-quality color-matched screw with a plugging system; it gives you the same clean finish with ten times the repairability. Have you ever had to pull up an entire section of decking just to fix one board? Let me know in the comments, because I’ve been there and it’s a soul-crushing weekend. Another trap is the ‘zero-gap’ myth. People want their deck to look like a hardwood floor, but composite decking expands and contracts significantly with temperature swings. A study by the American Wood Council highlights that synthetic materials can expand up to 1/16th of an inch for every 10 feet with just a 50-degree temperature change. If you don’t know how to stop composite deck boards from expanding into your siding, you’ll end up with buckled boards or, worse, damaged house flashing. I always use the cardboard spacer trick for consistent board gaps to ensure there is breathing room.#IMAGE_PLACE_HOLDER_C#
Does a rock-solid frame really prevent that ‘spongy’ composite feel?
A lot of pros will tell you that 16-inch on-center joist spacing is fine for composite. They are technically right according to the code, but they are wrong according to your feet. Because composite is more flexible than natural timber, why your composite deck feels spongy between joists usually comes down to that spacing. I always bump it down to 12 inches on center. It adds a bit to the lumber bill, but it eliminates the ‘trampoline’ effect that makes a high-end deck feel cheap. To take it a step further, I use the double joist trick for perfectly flush picture frame borders. This ensures the perimeter of your ‘outdoor room’ is as rigid as the kitchen floor you just walked off of. Lastly, don’t ignore the thermal reality of your perfect railing system. Black aluminum is the king of curb appeal right now, but why your black aluminum railing gets too hot to touch is a serious consideration if your deck faces south. I’ve seen railings reach 140 degrees in the July sun. If you have kids or pets, consider a wood-top ‘drink rail’ over the metal frame. It breaks up the heat and provides a practical spot for those BBQ plates I’m so fond of.I’ve learned that your deck is only as good as the tools you use to calibrate it. When I’m working with dark charcoal or deep brown boards, I swear by the pencil trick for marking dark composite boards—using a white carpenter’s pencil is the only way to stay sane. For the railings, I never eye-ball the hardware; I always use the drill guide hack for centered baluster holes to ensure every single spindle is perfectly vertical. It’s that obsessive attention to detail that makes a guest ask, “Who did you hire?” even if you did it yourself. 
How do I keep my composite deck looking brand new for decades?
The biggest mistake I see is the “set it and forget it” mentality. While we love low-maintenance composite decking, it isn’t “no-maintenance.” Every spring, I pull out the garden hose—never a high-pressure stream. Seriously, why you should never use a power washer on composite boards is because the pressure can actually etch the surface and trap dirt permanently. If I see a grease spot from the grill, I stick to the soap and sponge fix for oil stains on composite decking. For long-term peace of mind, you need to know how to test your deck for structural fatigue. I make it a habit to crawl underneath once a year with the simple spray that identifies hidden rot on old deck posts. It sounds paranoid until you realize that according to the American Wood Council’s DCA 6 standards, structural failure is often invisible from the surface until it’s too late. These are the composite decking secrets: longevity tips for a lasting deck that actually work.
What the Next Decade of Deck Building Looks Like
Looking ahead, I see pergola trends shifting toward total automation. We’re already seeing motorized louvers that close the moment a rain sensor detects moisture. In 2025 and beyond, your deck won’t just be a platform; it will be a “smart” ecosystem. I expect we’ll see more integrated solar technology within the railing caps and even “cool-deck” coatings that actively repel UV rays to keep the surface barefoot-friendly. If you want to stay ahead of the curve, start by perfecting the basics. Try the cardboard spacer trick for consistent board gaps on your next board replacement or small repair. It’s the easiest way to see immediate, professional-grade results without spending a dime.
Hard Lessons from a Decade on My Knees
Building a flush-mount transition is more of an art than a science, and I have learned that the little things often cause the biggest headaches. For instance, I used to think a perfectly flat deck was the goal until I realized why your composite boards are crowning and how to fix it—it is almost always about trapped moisture and lack of ventilation. I also discovered that if you do not use the 2-degree slope secret for dry under-deck storage, that beautiful flush threshold will eventually allow moisture to wick into your house framing. My lightbulb moment came when I stopped treating the deck as a separate entity and started treating it as a flooring project that just happens to be outside. If you respect the expansion gaps and the drainage planes, the ‘magic’ of a seamless room transition becomes permanent rather than a one-season wonder.
The Tool Bag That Makes the Difference
If you are serious about achieving these innovative deck design ideas that elevate your homes curb appeal, you need more than just a hammer and a saw. I never step onto a job site without a high-quality laser level for setting my joist heights; being off by even an eighth of an inch at the door will haunt you every time you walk across it. I also swear by the jig i use for consistent deck screw depth to ensure every fastener is perfectly flush, which is crucial for that indoor-room aesthetic. Finally, make it a habit to perform the 10-minute flashlight test for finding hidden ledger rot once a year. Keeping your structure sound is the only way to protect the investment you have made in your home flow.
Take the First Step Toward Your New Living Room
Do not let the technical details paralyze you. The most beautiful decks I have ever built started with a simple sketch and a realization that the backyard is just a room waiting for a floor. By focusing on a level transition, choosing materials that complement your interior, and ensuring your drainage is bulletproof, you are creating a space where memories are made. Whether you are hosting a summer BBQ or enjoying a quiet morning coffee, that seamless flow will change how you experience your home every single day. Have you ever attempted to level a deck with your interior floor and run into unexpected drainage issues? Share your experience in the comments below!