
I remember the smell most of all—the pungent, damp scent of mildewed patio cushions and a lawnmower that refused to turn over because its spark plug was drowned in a slow, steady drip. I’d just finished a beautiful project using composite decking trends and honestly, I thought the space underneath was a ‘free’ shed. I was dead wrong. I had built everything perfectly level, thinking that was the mark of a pro, but all I’d done was create a ceiling that leaked like a sieve. It wasn’t until I sat out there during a thunderstorm, watching water pool on top of my joists and then soak into my storage bins, that I realized my mistake. Gravity is a relentless roommate, and if you don’t give water a clear exit strategy, it will find its own—usually right through your expensive gear.
Why Your Level Deck is Actually a Water Trap
Most of us were taught that ‘level’ is the gold standard for building. While that’s true for your kitchen floor, it’s a recipe for disaster when it comes to innovative deck design ideas that involve dry storage. If you’re looking to maximize outdoor living with low-maintenance composite decking, you have to think like a roofer, not just a carpenter. The secret I stumbled upon after that soggy summer is the 2-degree slope. It sounds technical, but it’s really just a slight tilt—about a quarter-inch of drop for every foot of run. When I first heard about the 2-degree slope rule for drainage under second-story decks, I was skeptical. I worried my deck would feel like a funhouse floor where marbles would roll away. But the truth is, you can’t even feel it underfoot. What you *can* feel is the dry concrete beneath you. According to the International Code Council, properly integrated drainage systems must facilitate water flow away from the building envelope to prevent structural rot, yet so many DIYers skip this step entirely. I was one of them, and I paid for it with a ruined set of power tools.
Can two degrees actually stop the mold?
It sounds too simple to work, doesn’t it? You might be thinking that such a subtle angle wouldn’t make a dent in a heavy downpour. I thought so too, until I performed the garden hose test for proper deck water runoff. The difference was night and day. Without that pitch, water sits on the joists, eventually bypassing any ‘waterproof’ system you’ve installed. By following the pitch rule for keeping your under-deck dry, you’re ensuring that moisture never has the chance to stagnate. Have you ever pulled a storage box out from under your deck only to have the bottom fall out because of the damp? It’s a heartbreaking moment that usually ends in an expensive trip to the hardware store. Today, we’re going to fix that once and for all, making sure your under-deck area is as functional as the beautiful boards on top.
Start Your Build with the Perfect Pitch
The first time I tried to retrofit a drainage system, I thought I could just staple some heavy-duty plastic sheets under the joists and call it a day. I was treating the symptom, not the cause. Within six months, those sheets were sagging like heavy water balloons, ready to burst over my lawnmower. To get it right, you have to treat your deck frame like a roof. You start at the ledger board—the point where the deck meets the house. If you don’t account for the ledger board error that causes house leaks, your slope is doomed before you drive the first screw. I learned this the hard way on a project in humid North Carolina; I was so focused on innovative deck design ideas that I ignored the math. I had to rip up three rows of boards because the water was tracking back toward the siding instead of away from it.
Calculate the Drop Before You Cut
The rule is simple: one-quarter inch of drop for every horizontal foot of deck. If your deck is twelve feet deep, your outer beam needs to be three inches lower than the ledger. I use the string line trick for leveling deck joists before decking to visualize this before I commit to the hangers. Think of it like pitching a tent; if the top is flat, the rain pools and collapses the fabric. On a deck, that ‘collapse’ is just slow-motion wood rot. If you are working with an existing frame that is perfectly level, you might need to use furring strips or plane down the joists at an angle to create that artificial slope. It’s tedious work, but it’s the difference between a damp cave and a functional outdoor room.
Seal Every Gap to Stop the Slow Rot
Once you’ve established the pitch, the battle moves to the tops of the joists. Even with a perfect slope, water loves to ‘wick’—it will cling to the underside of your deck boards and sit on top of the joist like a parasite. This is where most people fail. I used to think the wood could handle a little dampness until I did the structural vulnerability assessment for checking deck joist rot on a ten-year-old frame and watched my screwdriver sink two inches into ‘solid’ timber. Now, I never build without using the-joist-tape-secret-for-doubling-your-decks-life. It creates a waterproof cap that forces water to stay in the drainage channel rather than soaking into the grain.
Don’t Ignore the House Connection
The most dangerous point of failure isn’t out in the yard; it’s where the deck touches your kitchen wall. If you don’t implement the ledger gap fix that prevents house siding rot, you are essentially funneling rainwater into your home’s foundation. While you’re obsessing over how to select the perfect railing system for every deck, make sure you’ve also checked your flashing. When I was starting out, I once skipped the Z-flashing because ‘the siding overlapped enough.’ Two years later, I was replacing a section of the rim joist and a chunk of the customer’s drywall. It was an expensive lesson in physics: water doesn’t care about your schedule; it only cares about the path of least resistance. By combining the 2-degree slope with proper flashing and the drip edge trick for protecting deck ledger boards, you turn that ‘path’ into a one-way street away from your house.Most people buy composite thinking it’s a ‘set it and forget it’ material, but that’s the first myth we need to bust. While the surface won’t rot, the physics of the material are actually more complex than cedar or pressure-treated pine. In my experience, the biggest headache isn’t the boards themselves, but how they interact with the skeleton beneath them. Because composite is dense, it holds heat and expands linearly. If you don’t follow composite decking secrets for longevity, those boards will expand in the summer heat and have nowhere to go but up. I’ve seen entire ‘picture frame’ borders pop off because the installer didn’t account for how to stop composite deck boards from expanding into your siding.
Can your pressure-treated frame handle the stress?
This is a question most homeowners never ask. You are mounting a dimensionally unstable plastic-wood hybrid onto a wood frame that shrinks as it dries. This tug-of-war is why your pressure-treated frame is pulling your composite apart. Experts at the North American Deck and Railing Association (NADRA) emphasize that structural fatigue often stems from these conflicting material movements. If you’ve ever noticed your boards looking wavy, you’re likely seeing why your composite boards are crowning. 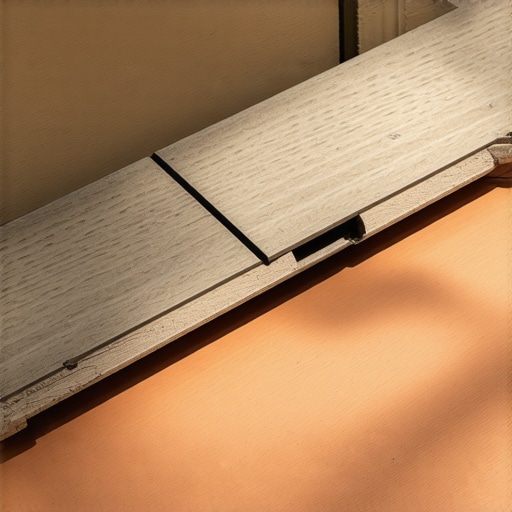
Brace Your Pergola for the Next Big Storm
Moving from the floor to the ceiling, let’s talk about those ‘simple’ garden structures. I see it every year: a homeowner spends thousands on pergola trends for shade and elegance, only to have the whole thing lean like the Tower of Pisa after the first heavy wind. The ‘Oops’ factor here is usually the connection points. Many DIYers assume the weight of the structure will keep it pinned down. In reality, a pergola is basically a giant sail. Without the right hardware, it’s why most DIY pergolas fail the uplift test in storms. You need more than just vertical strength; you need lateral stability. I always recommend why your pergola needs knee braces to prevent that swaying that eventually loosens your post bases.
Avoid the Hidden Fastener Trap on Wide Boards
We all want that clean, screw-free look. But if you’re using wider profile boards, those little clips can become your worst enemy. I’ve gone back to jobs where I had to explain why hidden fasteners fail on wide profile boards. They just don’t have the ‘clamping force’ needed to keep a heavy board from cupping in direct sunlight. If you’re building a masterpiece, you have to choose between the aesthetic of no screws and the structural reality of board movement. Have you ever fallen into this trap where you prioritized looks over the long-term physics of the build? Let me know in the comments below.After years of crawling around on my hands and knees, I’ve realized that the difference between a deck that lasts ten years and one that lasts thirty isn’t just the lumber—it’s the precision of the installation. One specific piece of gear that changed everything for me is the jig I use for consistent deck screw depth. If you drive a screw even an eighth of an inch too deep into composite, you create a tiny crater that acts as a reservoir for standing water and organic debris. If it’s too shallow, you’ve created a toe-stubbing hazard. I personally swear by the Smart-Bit Depth Setter; it’s the only one that doesn’t mar the board surface when the clutch engages. According to technical studies by the Forest Products Laboratory, the micro-environment at the fastener interface is the primary site for fungal colonization even in ‘rot-resistant’ materials, so getting those screws flush is actually a structural necessity, not just an aesthetic choice. #IMAGE_PLACE_HOLDER_D#
How do I keep my deck looking fresh over the years?
If you want to maximize outdoor living with low-maintenance composite decking, you have to resist the urge to get aggressive. I see so many neighbors ruin their expensive finishes because they think ‘more power’ equals ‘more clean.’ You have to understand why you should never use a power washer on composite boards; the high pressure can actually open up the pores of the plastic-wood blend, making it even more susceptible to staining later. Instead, I use the vinegar and water mix that cleans composite better than chemicals for general grime. For the inevitable greasy spill during a BBQ, I rely on the soap and sponge fix for oil stains on composite decking. It’s all about gentle, consistent care rather than a yearly ‘deep scrub’ that does more harm than good. I even have a specific routine for how to stop your dog from scratching your composite boards by keeping their nails trimmed and using a protective sealant in high-traffic areas.
Future-Proof Your Backyard Space
Looking ahead, I suspect we are moving toward ‘smart decks’ where moisture sensors integrated into the joists will alert homeowners to leaks before rot even starts. But until that tech is standard, you need to rely on the composite decking secrets for longevity we have now. This means doing a walkthrough every spring and checking the underside of your frame. If you notice even a hint of green, address it immediately. I want you to try one specific advanced tip this weekend: try the vinegar and water mix on a small patch of your deck. You will be shocked at how it cuts through the winter film without the harsh chemical smell or the risk of bleaching your boards. It’s a small move that pays massive dividends in how your space feels during that first warm sunset of the year.
Three Myths About Composite Decking That Cost Me Thousands
Looking back at my early years, I wish someone had pulled me aside and debunked the ‘maintenance-free’ promise before I started my first major project. First, thinking that composite boards don’t need airflow is a fast track to trouble; I’ve seen firsthand why your composite deck feels spongy between joists because the dampness stayed trapped in the structure underneath. Second, skipping joist tape was a major oversight in my early builds. Even the best pressure-treated wood eventually fails, and understanding why pressure-treated wood still rots under joist tape is usually down to moisture being trapped on the flat surface. Finally, I used to think ‘level’ was the ultimate mark of quality, but I’ve learned that a subtle 2-degree slope is the true hallmark of a professional who respects the power of drainage.
The Gear I Trust to Build It Right the First Time
If you want to move beyond basic DIY and create a space that lasts, you have to invest in precision. I never step onto a job site without the jig I use for consistent deck screw depth. It ensures that every fastener is perfectly flush, preventing those tiny water reservoirs that lead to early decay. When I’m looking for inspiration, I often revisit innovative deck design ideas that elevate your home’s curb appeal to make sure my structural choices complement the architectural style of the house. For long-term care, I’ve moved away from harsh industrial cleaners in favor of the vinegar and water mix that cleans composite better than chemicals, which protects the boards while being safe for my garden.
Your Next Backyard Masterpiece Starts Today
Building a deck or a pergola isn’t just about increasing your property value; it’s about creating a functional sanctuary where you can truly relax. When you take the time to maximize outdoor living with low-maintenance composite decking, you are prioritizing quality time over seasonal chores. Don’t be discouraged by the complexity of the math or the precision of the pitch. Every master builder started with a single board and a few lessons learned the hard way. Take it one joist at a time, keep your lines straight, and soon you’ll be enjoying the best view in the neighborhood from your own custom-built retreat. Have you ever discovered an unexpected rot patch while renovating your outdoor space? Let me know in the comments below!