
Last July, I found myself squinting through a sunset while sitting on my brand-new deck, feeling like a total failure. I had spent weeks obsessing over pergola designs that turn your garden into a sanctuary, only to realize that between 4:00 PM and 7:00 PM, the overhead rafters did absolutely nothing. The sun didn’t care about my beautiful woodwork; it just zipped right under the beams and hit me straight in the eyes. I tried those bulky patio umbrellas, but they just blew over, and the high-end motorized screens were quoted at a price that made my eyes water more than the glare did. That is when I stumbled upon the low-cost shade sail hack that changed everything. Today, I am going to show you how to stop hiding indoors and actually use your outdoor space when the sun is at its most aggressive.
The Afternoon Sun Is the Great Pergola Irony
It is the ultimate design flaw we rarely talk about. We build these structures for shade, but we only account for the sun when it is directly overhead. I made a huge mistake early on by trying to solve this with extra lumber. I thought if I just added more slats, I would get more shade. Instead, I just created a massive wind sail that made me worry about why your pergola shakes when the wind blows. It was heavy, expensive, and didn’t even solve the angle problem. The real secret is flexibility, not more wood. According to the Skin Cancer Foundation, up to 80% of the sun’s UV rays can pass through clouds and even some structures, making vertical shade just as critical as overhead protection for long-term health.
Won’t a Cheap Sail Just Look Like a Tarp?
This was my biggest fear. I didn’t want my custom-built deck to look like a construction site. But the beauty of this hack is in the hardware. By using stainless steel turnbuckles and specific mounting points, you can make a twenty-dollar piece of fabric look like a high-end architectural feature. Have you ever felt like you built a beautiful outdoor space you can’t actually use during dinner time?
Stop Fighting the Sun and Start Blocking It Sideways
Most people think shade sails have to be horizontal. They don’t. By mounting a sail at a 45-degree angle or even vertically along one side of your rafters, you create a barrier that intercepts the low-angle light. It is one of the most effective ways for the simple way to extend a pergola for more shade without needing a permit or a contractor. I started looking at pergola trends and noticed the smartest designs are now incorporating these soft-textured elements to break up the hard lines of the wood. It provides a breezy, Mediterranean vibe while serving a purely functional purpose. Before we get into the nuts and bolts of the installation, you need to understand the tension rules that keep these sails from sagging and looking sloppy.
Build a Tension System That Actually Lasts
Most people fail with shade sails because they treat them like blankets draped over a bed. If it isn’t tight, it will sag, collect water, and eventually rip your hardware out of the wood. To avoid this, you need to think like a sailor. I always recommend using marine-grade stainless steel hardware—specifically 316-grade—because it resists the rust that often plagues cheaper kits. When you are investing time into composite decking secrets for longevity, the last thing you want is rusty streaks running down your beautiful structure.
Hardware That Won’t Snap Under Pressure
Skip the plastic clips and go straight for turnbuckles. A turnbuckle allows you to twist the center body to pull the sail incredibly taut. I remember the first time I tried this; I used cheap bungee cords because I was impatient. It was a disaster. Within an hour, a slight breeze turned my shade sail into a flapping trap that whipped against my face while I was trying to eat a burger. It looked pathetic. Switching to stainless steel turnbuckles was the moment it went from ‘tarp’ to ‘architectural feature.’ 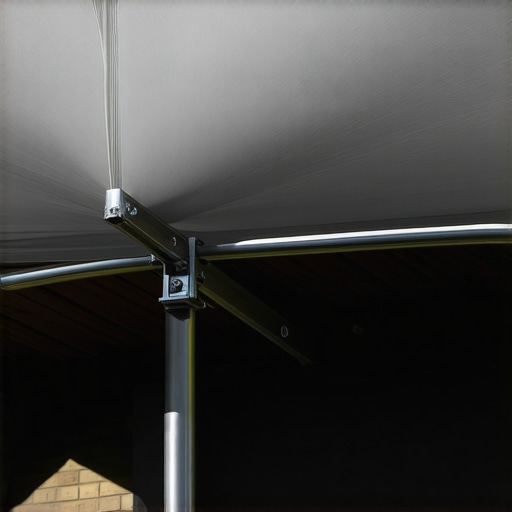
The 45-Degree Angle for Maximum Low-Sun Protection
This is the core of the hack. Instead of mounting the sail flat across the top, you mount one side to the top of your rafters and the other side halfway down the posts or along a lower support beam. This creates a vertical barrier that intercepts the sun when it is low on the horizon. If you are worried about the structural impact, you should look into the steel bracket move for high wind pergolas. This ensures that when the wind catches that angled sail, your posts stay exactly where they belong.
Find the Sweet Spot on Your Rafters
Use a simple 15-degree angle logic for water runoff if you are mounting it semi-permanently. If you have already mastered the 15-degree cut that keeps water off your pergola beams, you know how crucial it is to keep moisture from pooling. When you mount the sail, ensure the high point is at the ‘sun side’ of the pergola. This way, the shadow is cast directly onto your seating area.
Anchor Into Solid Meat Not Just Trim
You must anchor your eye bolts into the structural heart of the pergola rafters or the 6×6 posts. Never anchor into decorative trim or thin slats. If your hardware feels loose, it is likely because you hit a soft spot or a knot in the wood. If you are noticing wind issues, it might be related to why your railing post caps keep blowing off; high-altitude wind currents can be much stronger than what you feel on the ground. By using 3-inch lag eye bolts, you ensure that the sail stays put during a summer thunderstorm. It is about creating a system that works with your existing architecture rather than fighting against it.But once you have solved the sun problem, you often notice the deck itself isn’t performing the way the glossy brochures promised. We need to talk about the maintenance-free lie. Most homeowners are told that composite is a set it and forget it material, but in my experience, that mindset leads to the most expensive mistakes.
The Maintenance-Free Lie You Shouldn’t Believe
Everyone says composite is indestructible, but I have seen more failed composite decks than rotting wood ones lately. The biggest myth is that you can treat it like a sidewalk. People blast their boards with a 3000 PSI stream, not realizing why you should never use a power washer on composite boards. It etches the protective cap and turns your investment into a porous sponge that traps mold. If you want the real composite decking secrets for longevity, you have to accept that low maintenance still means annual cleaning with nothing more than a soft brush and mild soap.
Why does your expensive composite floor feel like a trampoline?
If you walk across your deck and feel a slight give or bounce, your builder probably followed the standard 16-inch joist spacing rule. While that is fine for traditional lumber, it is often a mistake for composite. Because composite is inherently more flexible, you really need 12-inch spacing to eliminate that bouncy sensation. I have seen homeowners spend a fortune on premium materials only to wonder why your composite deck feels like a trampoline. It is an advanced nuance that many contractors skip to save on lumber costs, but it makes the difference between a deck that feels like a permanent floor and one that feels like a temporary stage. According to research from the Forest Products Laboratory, the thermal expansion and flexural modulus of wood-plastic composites require specific structural support to avoid long-term sagging and fastener fatigue. 
Don’t Let Your Deck Buckle Under the Pressure
Another oops factor I see constantly is ignoring the physics of heat. I have walked onto decks where the boards are literally popping up or appearing wavy. This usually happens because someone ignored the expansion gap rule that stops boards from buckling. Composite moves significantly more than wood when the temperature shifts. If you butt them tight against each other during a cool morning, they will have nowhere to go by the heat of noon. You might also notice why your composite decking is fading in patches if you use rubber-backed mats or let standing water sit too long in high-traffic areas. Have you ever fallen into this trap? Maybe you noticed a spongy spot or a board that started to warp after a hot summer? Let me know in the comments. We can troubleshoot it together before you call in the expensive pros.
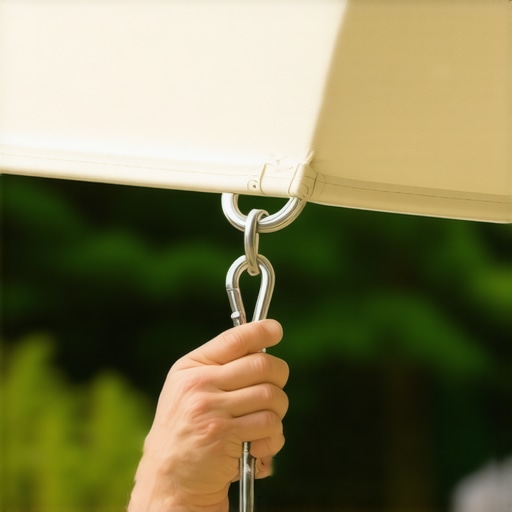
To actually stay ahead of those repairs, you need a kit that goes beyond a standard hammer and screwdriver. Stop buying those ‘magic’ deck cleaners at the big-box stores; most are just overpriced bleach that eventually dries out wood fibers or degrades the polymer cap on your boards. I have found that the vinegar and water mix that cleans composite better than chemicals is not just cheaper, but it actually preserves the finish of high-end materials. For the hardware, keep a small bottle of marine-grade lubricant in your drawer. Every spring, I give my shade sail turnbuckles a tiny drop. It prevents the threads from seizing up after a winter of salt and moisture, ensuring that I can always achieve that drum-tight tension without fighting the metal.
How Do I Maintain My Outdoor Structure Over Time?
Real maintenance is about consistency, not intensity. I set a calendar alert for the first Saturday of May to do a full walk-through. If you opted for a sleek look during your build, you might find that why hidden fasteners can be a maintenance nightmare becomes apparent when one board starts to creak or shift. You cannot just tighten a surface screw; you have to work from underneath or use specialized tools. I also keep a close eye on the overhead timber. If you notice a beam starting to move, knowing how to fix a pergola rafter that is starting to twist early on can save you from having to replace the entire span. A simple sistering technique or a heavy-duty structural screw can usually pull it back into alignment before the wood develops a permanent memory of the warp.
The Ten Minute Safety Check No One Does
Structural failure rarely happens overnight; it is a slow crawl of rot and fatigue. I always perform the 10-minute flashlight test for finding hidden ledger rot at least once a year. I crawl under the deck and poke the wood where it meets the house. If it feels soft like a ripe peach, you have a problem. While you are down there, check your vertical supports. Using the simple tool for making sure your railing posts are plumb—a basic four-foot level—can tell you if your footings are shifting. According to data from the North American Deck and Railing Association (NADRA), over 40 million decks in the US are over 20 years old and many are past their safe life expectancy. Staying proactive is the only way to ensure your sanctuary doesn’t become a liability.
Where Backyard Design Goes From Here
The next five years are going to be wild for outdoor living. We are moving away from simple wood platforms and into fully integrated living rooms. I am already seeing composite decking trends shifting toward smart-decking—boards with built-in sensors that can alert your phone if the internal temperature exceeds a certain threshold or if structural moisture levels are rising. We are also seeing a massive surge in automated shading. While my low-cost sail hack is perfect for today, the future involves pergolas with louvers that track the sun automatically via GPS. My advice? Start with the high-quality basics now so your structure is ready for those tech upgrades later. Go grab a flashlight right now and check your ledger board; it is the single most important thing you can do for your deck this season.
The Hard Lessons I Learned While Watching My First Deck Warp
I used to think that a deck was just a platform, but after a few seasons of trial and error, I realized it is an ecosystem that reacts to every bit of weather. One of the biggest surprises was how heat affects different materials; I learned the hard way that why black composite decking burns your feet and how to fix it becomes a top priority when you cannot step outside without shoes in July. I also discovered that texture matters just as much as color; many high-end finishes look great in a catalog, but why wood-look composite often fails the barefoot test is something you only feel once it is installed in your backyard. Lastly, I stopped skimping on the bones of the structure. I found that why 6×6 posts look better than 4x4s on any outdoor structure is not just about strength, but about the visual scale that makes a deck feel like a permanent part of the home rather than a flimsy addition.
My Essential Kit for Outdoor Longevity
If you want your pergola and deck to look as good in year five as they did on day one, you need more than just a garden hose. I swear by three specific resources. First, the NADRA (North American Deck and Railing Association) safety checklists are the gold standard for structural peace of mind. Second, for the hardware on your shade sails, always use a high-quality Tef-Gel or marine-grade anti-seize lubricant; it prevents the stainless steel threads from ‘galling’ or locking up permanently in the salt air. Third, skip the harsh chemicals and stick to the basics for your boards. A simple soft-bristle brush combined with the right solution will keep the surface clean without stripping the UV protection that keeps your colors vibrant.
Your New Favorite View Is Just a Project Away
Taking control of your outdoor environment is incredibly rewarding. Whether you are installing a shade sail to block that blinding 5:00 PM sun or tightening up your joist spacing for a firmer walk, every small adjustment adds to the value and enjoyment of your home. By integrating innovative deck design ideas that elevate your homes curb appeal, you are not just building a structure; you are crafting a sanctuary where you can actually relax. Do not let the complexity of modern materials intimidate you—start with the small fixes, and the rest will fall into place. Have you ever noticed your deck boards getting uncomfortably hot or noticed a strange bounce when you walk? Let me know in the comments below!