
I still remember the first time I tried to wrap a joist layout around a three-sided bump-out. I was standing in my backyard, a circular saw in one hand and a look of pure confusion on my face, wondering why I hadn’t just stuck to a boring rectangular platform. I had this beautiful bay window that offered a stunning view of the garden, but on the outside, it was a framing nightmare. I made the classic rookie mistake: I tried to treat it like a straight wall. I ignored the complexity of the angles and ended up with a gap so large it could swallow a smartphone, not to mention I nearly committed [the ledger board error that causes house leaks](https://deckforgebuilders.com/the-ledger-board-error-that-causes-house-leaks) by failing to flash the transition points correctly. It was a frustrating, expensive lesson in architectural humility. But here is the good news: you don’t have to repeat my failures. Today, we are going to dive into how to embrace those angles to [transform your home with stunning deck design strategies](https://deckforgebuilders.com/transform-your-home-with-stunning-deck-design-strategies) that look like they were pulled straight from an architect’s portfolio. We will solve the drainage puzzles, the joist hanging headaches, and the aesthetic challenges that come with ‘the bump.’ Have you ever felt like your house’s layout was actively fighting against your dream of a backyard oasis?
Stop Treating Your Bay Window Like a Roadblock
Let’s get one thing straight: that bay window isn’t in your way; it’s actually the best design prompt you’ve ever been given. When you learn to flow your [innovative deck design ideas](https://deckforgebuilders.com/innovative-deck-design-ideas-that-elevate-your-homes-curb-appeal) around existing features, the result looks custom and high-end rather than a DIY afterthought. The key is in the framing. Most people try to build a deck *to* the window, but the real pros build the deck *with* the window. This means thinking about how your [composite decking](https://deckforgebuilders.com/maximize-outdoor-living-with-low-maintenance-composite-decking) lines will meet the glass and ensuring you have a solid structural foundation that doesn’t rely on the window’s framing for support. According to the International Residential Code (IRC) Section R507, a deck must be positively anchored to the primary structure, and protruding windows require specialized flashing and lateral load connections to prevent moisture from rotting your sill plate. It’s a lot to think about, but getting this right is the difference between a deck that lasts thirty years and one that sags in three.
Is Custom Framing Around a Bump-out Worth the Extra Effort?
I get it—the skepticism is real. You’re looking at the extra lumber, the weird 45-degree cuts, and the potential for wasted material and wondering if it wouldn’t just be easier to stop the deck a few feet short. But a deck that ignores the house’s shape always looks like a temporary attachment. By wrapping the structure, you create a seamless transition. You might even consider how [pergola designs that turn your garden into a sanctuary](https://deckforgebuilders.com/pergola-designs-that-turn-your-garden-into-a-sanctuary) can be integrated to follow that same bay window silhouette, creating a layered, professional look. In my early days, I was terrified of these angles because I didn’t have a plan. Now, I see them as the secret to a deck that actually adds five figures to your property value. We’re about to break down exactly how to bridge that gap between your siding and your joists without the dreaded ‘bounce.’
Fix the Foundation First with a Broken Ledger Strategy
The most common mistake when dealing with a bay window is trying to force a single, straight ledger board across the entire span. This creates a pocket where water and debris collect, virtually guaranteeing rot. Instead, think of your ledger like a tailored suit; it needs to follow the contours of your home. You must install the ledger in three distinct sections that mirror the angles of the bump-out. This is where [the ledger board error that causes house leaks](https://deckforgebuilders.com/the-ledger-board-error-that-causes-house-leaks) often happens because people forget that every single break in the ledger requires meticulous flashing. I learned this the hard way on a job in Jersey where I rushed the flashing on the inner corners. Two seasons later, I was back on my own dime peeling off siding to fix a soggy rim joist. Now, I always use [the flashing tape move that doubles the life of your joists](https://deckforgebuilders.com/the-flashing-tape-move-that-doubles-the-life-of-your-joists) at every transition point. When you break the ledger, you are essentially creating three mini-decks that must be unified by the primary beam.
Build a Sub-Frame for the Angle Gaps
Once your ledgers are anchored, you face the challenge of the joists. If you run them straight out from the angled walls, they won’t be parallel to your main deck joists, making your [maximize outdoor living with low-maintenance composite decking](https://deckforgebuilders.com/maximize-outdoor-living-with-low-maintenance-composite-decking) look like a chaotic jigsaw puzzle. The pro move is to maintain a consistent joist direction across the entire deck and use a ‘header’ joist that runs parallel to the angled ledger. To get the strength you need without the bounce, I highly recommend [the double joist trick for perfectly flush picture frame borders](https://deckforgebuilders.com/the-double-joist-trick-for-perfectly-flush-picture-frame-borders). This provides a massive surface area for your fasteners and ensures that those tricky 45-degree cuts have plenty of ‘meat’ to grab onto. 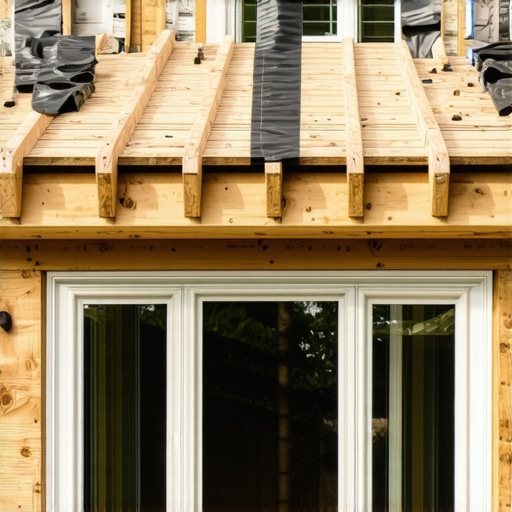
Bridging the Gap Without the Aesthetic Eyesore
Even with a perfect frame, you’ll often find a small triangular gap between the straight joist run and the angled house wall. Don’t just fill this with scraps. This gap is the perfect place to implement [the secret to a perfectly square deck frame](https://deckforgebuilders.com/the-secret-to-a-perfectly-square-deck-frame) by using blocking that allows for a ‘picture frame’ border. This border serves two purposes: it looks incredible and it hides the raw ends of your boards. I remember one client who was obsessed with a seamless look, so we used [the expansion gap rule that stops boards from buckling](https://deckforgebuilders.com/the-expansion-gap-rule-that-stops-boards-from-buckling) to precisely calculate how much space to leave at the siding. By doing this, the deck looked like it grew out of the house rather than being slapped onto it.
Ensure Your Railings Don’t Block the View
The last piece of the ‘bump-out puzzle’ is the transition of your perimeter. If your deck is high enough to require safety barriers, [the complete-guide-to-choosing-railing-systems-for-safety-style](https://deckforgebuilders.com/the-complete-guide-to-choosing-railing-systems-for-safety-style) will tell you that angles are the enemy of standard kits. When your railing hits that 45-degree turn around the window, standard brackets won’t work. You’ll need to use adjustable angle adapters. I once spent four hours trying to ‘custom-grind’ a plastic bracket before realizing that buying the right pivoting hardware saves both your sanity and the warranty on your [transform-your-outdoor-space-custom-railing-systems-for-safety-and-style](https://deckforgebuilders.com/transform-your-outdoor-space-custom-railing-systems-for-safety-and-style). If you’re struggling to hide the transition between the deck surface and the house siding, check out [how to hide the gap between your deck and the house](https://deckforgebuilders.com/how-to-hide-the-gap-between-your-deck-and-the-house) for techniques that keep the bugs out and the style in.
Most homeowners approach their backyard project with the idea that composite decking is a ‘set it and forget it’ miracle. I am here to tell you that this mindset is exactly how you end up with a structure that looks great for two years and then begins a slow, painful descent into structural failure. The industry loves the term ‘maintenance-free,’ but true experts know that durability is earned through thermal management and moisture mitigation, not just material choice. If you don’t account for the way heat affects these materials, you are building a ticking time bomb.
Why Your Composite Deck Feels Like a Trampoline
One of the most common complaints I hear from people who did their own install is a ‘spongy’ or ‘bouncy’ feel underfoot. Everyone assumes it is the boards, but in my experience, it is almost always an issue with joist spacing or improper fastener selection. While 16-inch on-center is the standard for wood, many high-end composites actually perform significantly better at 12-inch centers, especially when installed on a diagonal. This is the structural reason your deck feels bouncy and how to fix it before the boards start to permanently warp. According to research by the North American Decking and Railing Association (NADRA), structural fatigue often begins at the fastener points where thermal expansion exerts thousands of pounds of pressure on the joist. If you used the 3-inch screw mistake that ruins composite joists, you are likely shearing the very support you rely on.
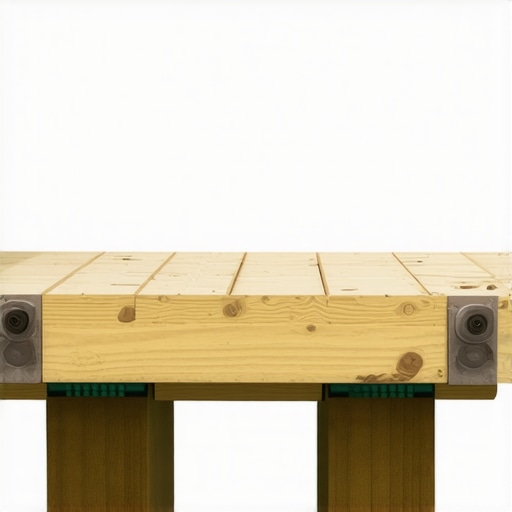
Let’s talk about the ‘Hidden Fastener’ trap. They look incredible, giving you that smooth, interior-flooring vibe, but why hidden fasteners can be a maintenance nightmare is a reality you’ll face the moment a single board gets scratched or a joist settles. Replacing a middle board with hidden clips is like trying to change a flat tire without a jack—it requires dismantling massive sections of the deck. I always advise my clients to use a ‘picture frame’ border with color-matched face screws in high-traffic areas for easier access later.
The Critical ‘Oops’ Factor in Perimeter Design
Another nuance people miss is the interaction between the deck and your home’s environmental micro-climate. I once saw a beautiful wrap-around deck where the owner used black composite decking around a white bay window that acted like a magnifying glass. By July, the boards were expanding so aggressively they actually buckled against the house siding because they ignored the expansion gap rule that stops boards from buckling. It’s not just about the look; it’s about physics. Similarly, when it comes to shade, many think a pergola is just for aesthetics. However, failing to use knee braces on an angled structure means your beautiful shade feature will start to lean the first time a heavy wind hits those 45-degree joints. Have you ever fallen into this trap of prioritizing looks over structural physics? Let me know in the comments. We can all learn from those ‘expensive’ design lessons together.
If you are serious about wrapping a deck around a complex bump-out or installing a massive pergola, you need to stop guessing at your angles. I have reached a point where I won’t even unload my truck without my Bosch GLL3-330CG laser level. Why? Because a bubble level is only as good as the person holding it, but a green beam doesn’t lie about a 45-degree ledger being off by an eighth of an inch. I also keep a stash of specialized jigs because the simple tool for making sure your railing posts are plumb saves me hours of frustration when I am dealing with the complete guide to choosing railing systems for safety style. It is these small investments in accuracy that prevent the ‘callback’ phone calls every builder dreads and ensure you are actually following innovative deck design ideas that elevate your homes curb appeal without the structural wonkiness.
How do I maintain my composite deck for the long haul?
Most homeowners think ‘low maintenance’ means ‘no maintenance,’ but that is a dangerous fallacy. To keep your boards looking pristine, you need a routine that doesn’t involve heavy machinery. I have seen people destroy their warranty in ten minutes because they didn’t know why you should never use a pressure washer on composite. The high pressure can actually open up the pores of the material, inviting permanent staining and mold. Instead, I stick to the vinegar and water mix that cleans composite better than chemicals. It is cheap, effective, and won’t eat through your hardware. For the structural side, I perform the 15-minute deck inspection every homeowner should do every single spring. I am looking for signs of distress and checking that the drainage move that saves your deck from mold is still clear of organic debris like pine needles or leaves. According to the Simpson Strong-Tie Deck Connection and Fastening Guide, lateral load connectors should be inspected annually for corrosion, especially in high-moisture zones where the ledger meets the siding.

Ditch the Harsh Chemicals and Embrace Smarter Layouts
We are moving into an era where deck design is becoming as technical as interior architecture. I predict that in the next few years, we will see ‘self-healing’ polymers become the standard for high-end projects, potentially ending the scratch test how different brands handle dog claws debate forever. But until that tech is affordable, you have to be the primary advocate for your structure’s health. If you are planning a new build or a major renovation, why you need a 3d model before buying a single deck board is no longer an optional luxury; it is the only way to visualize how your pergola designs that turn your garden into a sanctuary will actually interact with the sun’s path. Don’t wait for a board to buckle or a railing to wobble. Grab a bottle of white vinegar this weekend and give your deck the gentle scrub it deserves. It is the easiest way to protect your investment and keep your outdoor living space looking as sharp as the day it was framed.
What I Wish I Knew Before Cutting My First Angled Joist
Looking back at my first few attempts at wrapping a layout around a bay window, the biggest lesson wasn’t about the wood—it was about the geometry of a settling home. Houses are rarely as square as the blueprints suggest, and those 45-degree angles are often 43 or 47 degrees in reality. I learned that trying to force a perfect angle into an imperfect space is a recipe for gaps. Now, I always build a small scrap-wood template of the house’s actual angle before I touch my expensive composite decking secrets longevity tips for a lasting deck materials. This small step has saved me thousands in wasted lumber and hours of frustration.
Another ‘lightbulb moment’ was realizing that the deck doesn’t have to be physically tied to the bump-out to look like it belongs there. Sometimes, using the staggered joist trick for ultra long deck spans to create a cantilevered section near the window provides a much cleaner look than trying to bolt a dozen small ledger segments into a foundation that might be brittle. It’s about working with the house, not against it.
Tools That Actually Saved My Sanity on the Job
If you are tackling a complex layout, your standard tape measure isn’t enough. I personally rely on a few specific resources to ensure my work stands the test of time. First, the Simpson Strong-Tie Deck Connection and Fastening Guide is my structural bible; it takes the guesswork out of lateral loads and ledger attachments. For the physical build, a sliding T-bevel is non-negotiable for capturing those odd house angles and transferring them to your miter saw.
I also highly recommend using a string line and a laser level in tandem. A laser tells you where the ledger should be, but a string line helps you visualize the flow of the entire perimeter. Finally, don’t overlook the importance of aesthetics; knowing how to match your railing to your house siding can make the difference between a project that looks like an addition and one that looks like it was born with the house.
Build a Structure That Outlasts the Mortgage
At the end of the day, your backyard project is more than just a collection of boards and screws—it is the stage for your future summer BBQs and quiet morning coffees. Embracing a complex deck design might feel intimidating at first, but the architectural interest it adds to your home is well worth the extra afternoon of planning. Take it one joist at a time, respect the physics of moisture, and don’t be afraid to ask for help when the angles get weird. Your home deserves a transition that is as sturdy as it is beautiful.
Have you ever faced a framing angle that made you want to walk away from the project? Let me know in the comments below!