
I stood there, neck craned back, squinting through safety goggles that were rapidly becoming opaque with brown droplets. My favorite old t-shirt was ruined, and my wife’s patio set now featured a ‘custom’ speckled finish I hadn’t planned on. I thought staining the belly of my second-story deck would be a quick Saturday morning chore. Instead, it was a messy, dripping nightmare that left me frustrated and covered in oil-based finish. We often obsess over the top-down view, but if you have a walk-out basement or a lower-level patio, those raw, weathered joists are an eyesore you can’t ignore. Today, I’m going to share exactly how I turned that disaster around and the method I now use to get a professional look without the personal bath in chemicals. We’re going to make sure your innovative deck design looks just as good from the patio chair below as it does from the grill above.
My First Attempt Was a Total Disaster
I made the classic rookie mistake of underestimating gravity. I figured a thick brush and a ladder were all I needed. I didn’t realize that pressure-treated wood feels wet even when it looks bone-dry on the surface. Because I didn’t check the moisture levels or use the right application tool, the stain just sat on the surface and eventually started peeling. According to the USDA Forest Products Laboratory, wood should ideally have a moisture content below 20% to allow a stain to penetrate the fibers effectively. I was essentially painting over water, and the result was a blotchy mess that I had to sand off a year later. It was a hard lesson in patience and prep work. You also need to consider the flashing tape move to protect those joists before you even think about the aesthetics.
Is this project really worth the backache?
You might be tempted to leave the underside raw, but the benefits go beyond just looks. When you treat the underside, you’re creating a uniform barrier against the elements. This is especially vital if you’ve invested in low-maintenance composite decking on top but kept a wood frame underneath. Protecting that structure ensures your entire investment lasts decades rather than years. Have you ever started an overhead project and immediately regretted your life choices? I’d love to hear your DIY horror stories. Let’s get into the gear and the technique that will save your neck and your sanity while you transform your home with these strategies.
Clean the Joists Like Your Finish Depends on It
Before you pick up a brush, you have to realize that the underside of your deck is a magnet for spider webs, dust, and dried-up mud. If you apply stain over that grime, you’re just creating a temporary mask that will flake off by next season. I learned this the hard way on a project in 2019 when I rushed the job; six months later, the stain was hanging in ribbons. This is exactly why your deck stain is peeling after only six months. Use a stiff-bristled brush to knock down the debris, followed by a light wash with a wood cleaner. You aren’t trying to flood the wood, just remove the surface layer of oxidation. If you notice dark spots in the corners, address them immediately with the drainage move that saves your deck from mold.
Testing for Dryness Without Fancy Gadgets
Gravity is your biggest enemy when staining overhead. If the wood is even slightly damp, the stain won’t penetrate; it will simply drip back down onto your face. I use the ‘splash test.’ Flick a few drops of water onto the joists. If the water beads up, the wood is still too wet or has an old sealer blocking the way. If it soaks in within a minute, you’re clear to proceed. This is particularly important for those tricky areas around the stairs, where water tends to collect if you haven’t used the stringer notch hack for squeak-free deck stairs to keep things tight and ventilated.
Stop the Drip with a Pump Sprayer and a Brush
I once tried to use a long-nap roller to coat the underside of a twelve-foot deck. By the third joist, stain was running down the handle, past my elbows, and literally pooling in my armpits. It was a sticky, oil-smelling disaster. Now, I use a pump-up garden sprayer set to a fine mist. This allows you to apply a controlled amount of product without the ‘splatter’ effect of a roller. The trick is to follow the sprayer with a ‘back-brushing’ motion. Use a wide, high-quality brush to work the misted stain into the vertical grain of the joists. This ensures the wood actually drinks the finish rather than just letting it sit on the surface. 
Seal the Gaps Where Mold Loves to Hide
The underside of a deck is a microclimate. It’s often shaded and damp, which is the perfect breeding ground for rot. While you’re up there, pay close attention to the tops of the joists and the rim board. If you see water pooling, it might be time to rethink your board layout or check for the 2-degree slope trick for proper deck water runoff. You also want to make sure your support structure is up to the task; I always tell people why 6×6 posts look better than 4x4s on any outdoor structure, not just for the looks, but for the stability they provide when you’re hanging heavy deck furniture or under-deck ceiling systems. Treating the wood where it meets the hardware is the most tedious part, but it’s the difference between a deck that looks good and one that stays structurally sound for twenty years.
Why ‘Maintenance-Free’ Usually Ends in a Costly Repair
Most people buy into the marketing hype that high-end materials require zero effort. They spend thousands on durable composite decking solutions and then assume the entire structure is now immortal. This is a massive mistake. In my experience, the more ‘maintenance-free’ the surface is, the more likely you are to ignore the skeletal wood underneath. You might have the best high-quality capped decking on the market, but if those pressure-treated joists aren’t protected from the underside, they will eventually succumb to dry rot. This is exactly why pressure-treated wood still needs maintenance under composite boards. If you ignore the frame because the ‘top’ looks pretty, you’re just building a beautiful house on a crumbling foundation.
Does sealing the underside actually trap rot inside the wood?
This is the number one question I get from homeowners who have done their homework. They worry that by staining or sealing the bottom of the joists, they are preventing the wood from ‘breathing’ and essentially locking moisture in. While that sounds logical, it’s actually a myth when dealing with vertical surfaces. The American Wood Protection Association (AWPA) notes that wood in ‘Use Category 3B’—which includes deck joists—experiences frequent wetting and drying cycles. By sealing the underside, you aren’t creating an airtight vacuum; you are slowing down the rate of moisture absorption during rain. This prevents the wood from swelling and shrinking violently, which is what causes those deep checks and cracks. It’s all about consistency, not total isolation. For even better protection, I always combine staining with the flash and tape method for protecting deck joists to keep the top grain dry.
The Expansion Gap Mistake That Ruins a Perfect Finish
One of the biggest ‘traps’ I see DIYers fall into occurs when they switch from wood to composite. They apply the same rules to both, and it fails every time. If you’re staining your joists and then installing boards, you have to account for thermal expansion. I’ve seen beautiful decks buckle because the owner ignored the expansion gap rule that stops boards from buckling. In the heat of the afternoon, those boards will grow; if you haven’t left room, they’ll push against your railing posts or pop their fasteners. 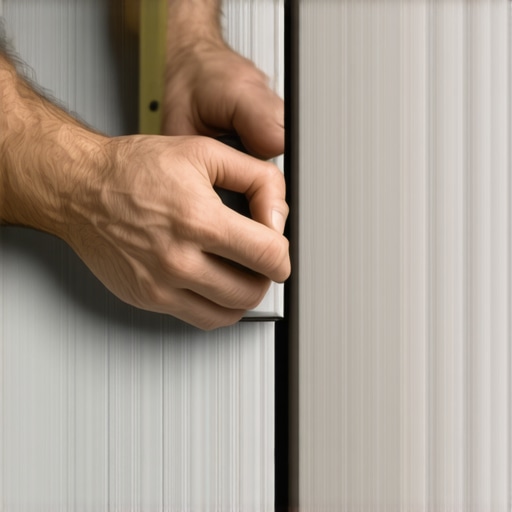 Speaking of fasteners, be wary of the ‘clean look’ obsession. While they look great, hidden fasteners can be a maintenance nightmare if you don’t use the right ones for your climate. If you’re in an area with high temperature swings, the stress on those hidden clips can be immense. Follow the longevity tips for a lasting deck and don’t be afraid to use a few face-screws in high-stress areas. Have you ever fallen into the ‘maintenance-free’ trap or had a board pop up unexpectedly? Let me know in the comments below.
Tools That Saved My Knees and My Time
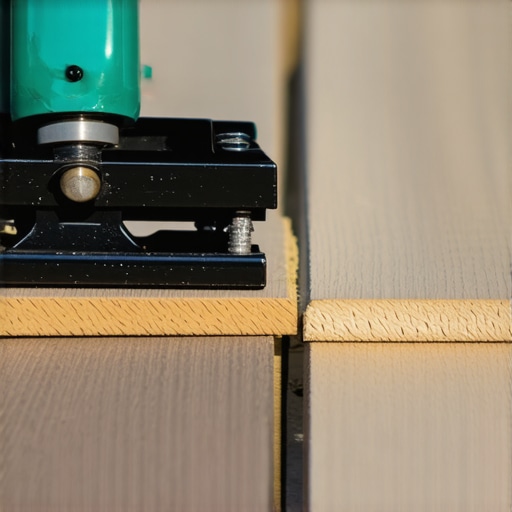
After years of wrestling with warped boards and manual drills, I finally realized that the right gear isn’t just a luxury—it is a necessity for anyone serious about transforming their home without ending up in physical therapy. If you are laying down hundreds of square feet of low-maintenance composite decking, do yourself a favor and rent or buy a stand-up fastening tool. It allows you to drive screws from a standing position, turning a grueling day of crawling into a brisk walk. For those stubborn boards that just will not sit straight, I rely on a heavy-duty board straightener. It provides the leverage you need to close gaps without damaging the delicate edges of the boards, especially when you are applying the soap slippage method for pulling composite boards tight.
How do I maintain my deck’s integrity over time?
Maintenance is less about hard labor and more about consistent observation. According to the North American Deck and Railing Association (NADRA), the most common cause of deck failure is neglected hardware and rot at the ledger board. I personally set a recurring alert on my phone for a 15-minute deck inspection every homeowner should do once every spring. I look for rusted bolts, check the structural integrity of the posts, and listen for the dreaded squeak that signals a loosening fastener. If you catch a loose rail early, you can often solve it with the 5-minute fix for rattling balusters before it becomes a safety hazard.
The Future of Deck Planning is Already Here
I predict that within the next five years, the standard paper blueprint will be completely replaced by augmented reality. We are already seeing the massive benefits of digital pre-visualization. I never start a build anymore without a digital twin; you really need to see why you need a 3d model before buying a single deck board. It allows you to catch spacing issues with your pergola design or railing heights before the first hole is even dug. This level of precision is how you achieve those magazine-ready looks that stay perfectly aligned for years.
Don’t Wait for the Wood to Fail
My final piece of advice for the long-term is to be obsessive about plumbing. Use the simple tool for making sure your railing posts are plumb during every phase of the build. A post that is off by even a fraction of an inch will create tension that eventually snaps screws or cracks your composite fascia. If you really want to level up your DIY game, try this advanced tip: apply a bead of high-quality construction adhesive to the top of your joists before laying down the boards. It creates a secondary bond that virtually eliminates board-creep and ensures a silent, rock-solid surface for the next twenty years.
Hard Truths from the Under-Deck Trenches
Looking back at my first staining attempt, I realize that I was treating the symptom rather than the cause. The biggest lightbulb moment came when I stopped viewing the underside as a separate entity and started seeing it as the structural heart of my outdoor living space. If you ignore the runoff, you are just waiting for rot to take hold, regardless of how much stain you slap on. This is why mastering the 2-degree slope trick for proper deck water runoff is just as important as the finish itself. I also learned that patience with moisture is non-negotiable; if you rush the application while the wood is damp, you are simply wasting money on premium products. Finally, never underestimate the power of protection where the sun doesn’t shine. Combining a quality sealer with the flash and tape method for protecting deck joists creates a defense system that survives the harshest seasons.
The Gear That Actually Earns Its Keep
I have wasted plenty of money on gimmicks, but these three things are staples in my workshop for any project involving longevity tips for a lasting deck. First, a high-quality semi-transparent oil stain is vital—avoid the cheap hardware store house brands that peel like sunburnt skin. Second, a heavy-duty pump sprayer with a brass nozzle is a lifesaver; plastic ones clog and drip far too often when working overhead. Third, I cannot recommend digital planning enough. Seeing a digital twin of your project is a total game-changer, and you should definitely check out why you need a 3d model before buying a single deck board before you commit to a major overhaul. It saves you from those painful ‘oh no’ moments when structural elements don’t align during the build.
Your Backyard Legacy Starts Beneath the Surface
A deck is not just a platform; it is the stage for your family’s summer memories. Taking the time to care for the structure—from the staining of the joists to the final board placement—ensures that stage stays rock-solid for decades. Don’t let the scale of the project intimidate you. Whether you are installing a new sanctuary-style pergola or simply refreshing your existing frame, the effort you put in now pays off in peace of mind later. Your innovative deck design deserves a foundation as beautiful as the view it provides. Go out there, grab your sprayer, and give your deck the protection it needs to stand the test of time. Have you ever had a DIY project turn into a ‘splatter disaster’ like my first attempt? Let me know about your deck maintenance wins or woes in the comments below!