
I remember the smell first. It was a musky, damp odor that definitely shouldn’t have been wafting through my kitchen window on a crisp October morning. I’d spent the previous summer obsessing over innovative deck design ideas, only to realize I’d inadvertently built a five-star hotel for the local raccoon population. I stepped out with my coffee, heard a low chittering from beneath the boards, and saw a fuzzy, masked face peering out from behind a joist. That was the moment I realized my beautiful outdoor sanctuary had become a maternity ward for trash pandas. It wasn’t just annoying; it was a structural and sanitary nightmare that I wasn’t prepared to handle.
The Night My Dream Deck Turned Into a Trash Panda Hotel
When I first started building, I made the classic rookie mistake of focusing entirely on the surface. I was so worried about longevity tips for a lasting deck that I completely ignored the dark, inviting void underneath. I left a gap near the stairs where the ground sloped slightly, thinking nothing larger than a squirrel could fit through. I was wrong. Raccoons are essentially liquid when they want to be, and once they find a dry spot near a food source, they aren’t leaving without a fight. My failure to install proper skirting or hardware cloth early on turned my weekend retreat into a battleground. If you’ve ever spent a night listening to heavy thumping and scratching right under your feet, you know exactly the frustration I’m talking about. Have you ever looked at your backyard and wondered if you’re actually the one in charge, or if the local wildlife has already claimed squatter’s rights?
Is it actually possible to keep raccoons out without building a fortress?
I used to think the only way to win was to encase the entire perimeter in ugly concrete, but that’s just not true. You can maintain a high-end look while still making your deck a ‘no-vacancy’ zone. The key is understanding that these animals are looking for three things: security, warmth, and easy access. If you remove even one of those, they’ll move on to your neighbor’s place.
Why Your Current Deck Setup is Basically an Open Invitation
Most people don’t realize that standard construction often leaves wide-open highways for critters. For instance, if you didn’t use a stringer notch hack or specialized blocking, you likely have gaps behind your stairs that serve as perfect front doors. According to the Cary Institute of Ecosystem Studies, raccoons are remarkably intelligent and can remember solutions to complex tasks for up to three years, meaning once they know how to get under your deck, they won’t forget. We need to stop thinking about this as a one-time fix and start looking at it as part of our regular 15-minute deck inspection routine. Today, I’m going to show you how to seal those gaps and use non-toxic deterrents that actually work, so you can go back to enjoying your morning coffee in peace.To start, we have to look below the surface—literally. The only way to stop a raccoon that is already eyeing your crawlspace is to create a physical barrier that extends into the soil. If you just tack some lattice to the rim joist, you’re just giving them a decorative door to rip off. You need to trench.
Build an Underground Wall They Can’t Breach
When I first tried to solve my ‘trash panda’ problem, I bought some cheap plastic lattice thinking it looked nice. Within two days, I found a hole the size of a bowling ball chewed right through the center. I felt like I’d just bought them a better front door. Now, I always recommend galvanized hardware cloth with a half-inch or quarter-inch mesh. It’s tough enough to break a tooth and won’t rust out in the damp soil.
Galvanized Mesh Beats Plastic Every Time
Staple the mesh to the back of your rim joist or the bottom of your fascia. If you’ve invested in composite decking secrets for a long-lasting finish, you don’t want to ruin the look, so hide the mesh behind your decorative skirting. I suggest using a heavy-duty stapler and then covering the top edge with a trim piece. This is also a great time to apply the joist tape secret to any exposed framing members you encounter while you’re down there. 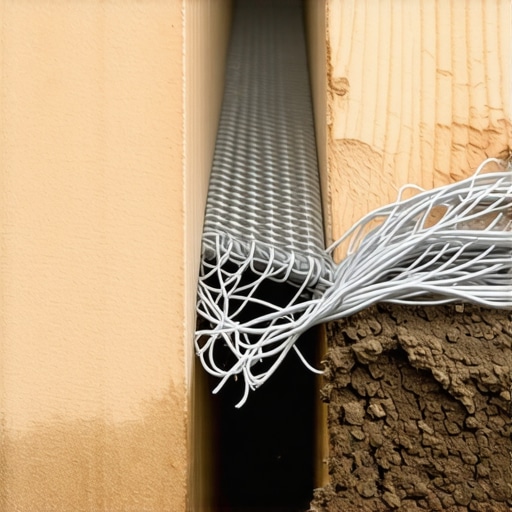
Stop the Diggers with a Hidden L-Footer
Raccoons are world-class excavators. If they hit a wall, they’ll just try to go under it. To stop this, dig a trench about 6 to 12 inches deep. Bend the bottom of your mesh outward at a 90-degree angle to create an ‘L’ shape facing away from the deck. When a critter tries to dig down, they hit the horizontal mesh and give up. I did this on a job last spring where the homeowner had three generations of woodchucks living under their wrap-around. We backfilled the trench with crushed stone, and haven’t had a single breach since. It’s a lot of sweat, but it’s cheaper than a structural repair.
Seal the Stairs with Precise Notching
The area where your stairs meet the ground is basically a neon ‘Open’ sign for wildlife. Most builders leave a massive gap behind the stringers. This is where you should use the stringer notch hack not just for stability, but to ensure your riser boards sit flush against the ground. If you have a significant gap, don’t just fill it with dirt—it’ll wash away. Use solid blocking or a piece of pressure-treated lumber cut to the exact profile of the slope. If you’re already performing your 15-minute deck inspection, check these contact points for signs of scratching or hair.
Visual Barriers and Airflow Balance
You can’t just box the whole thing in airtight, or you’ll end up with rot and mold. You need airflow to keep your joists dry. A clever way to handle this is to integrate the mesh into a structure similar to how you would build a privacy screen that does not block the breeze. Use horizontal slats with 1/2-inch gaps, but back them with that same hardware cloth. It keeps the raccoons out while allowing the cross-breeze to pull moisture away from your house’s ledger board.Once you’ve secured the perimeter from the local wildlife, you have to look at what’s actually holding you up. I’ve walked onto too many ‘professional’ decks that felt like a trampoline, and it’s usually because the builder focused on the pretty boards while ignoring the structural physics. Let’s dig deeper into the nuances that separate a weekend DIY project from a lifetime investment.
Stop Trusting Your Rim Joist to Keep You Safe
The most common mistake I see in railing installations is the ‘surface mount’ trap. Most people believe that if they use enough long structural screws through the post into the rim joist, the railing is solid. This is a dangerous myth. In reality, the rim joist itself can rotate or pull away from the main structure under pressure. According to the North American Deck and Railing Association (NADRA), many deck failures occur at the connection points rather than the wood failing itself. To truly secure your system, you need to use the hidden bracket trick for perfectly rigid railing posts. By tying the post directly into the internal joist system with tension ties, you’re creating a continuous load path that can actually withstand the 200-pound lateral force required by the International Residential Code. 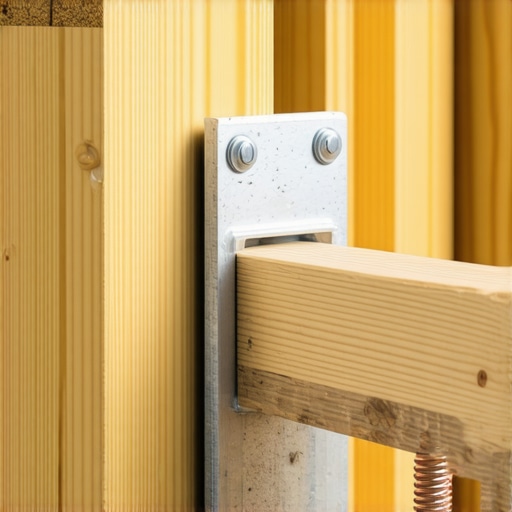
Why does my composite deck look like a wavy ocean in the summer heat?
Everyone tells you that composite is ‘maintenance-free,’ but they forget to mention that it has a massive thermal expansion coefficient. If you butt those boards tight against each other on a 60-degree morning, they will have nowhere to go when the sun hits 90 degrees in July. This is why your composite decking is expanding more than the manual says. I’ve seen boards buckle and pop fasteners because the builder didn’t follow the expansion gap rule that stops boards from buckling. The nuance here is that dark-colored boards absorb more heat and expand even further, making precise gapping at the butt joints and miters critical for a flat surface.
The 6×6 Post Secret for Real Stability
Another contrarian view I hold is that 4×4 posts are a structural lie for anything higher than a few feet off the ground. While the math might say they can carry the weight, they look spindly and lack the mass to prevent lateral swaying. This is why 6×6 posts look better than 4x4s on any outdoor structure and provide a significantly more stable feel underfoot. If your deck currently feels like it’s shimmying when you walk, you likely need the simple blocking move that stops your deck from shaking when you walk. It’s these small, internal adjustments—the ones no one sees—that prevent issues like why your railing post sleeves are cracking at the base or the $20 bracket that fixes wobbly railing posts fast. Have you ever fallen into this trap of focusing on the surface rather than the structure? Let me know in the comments.Building a deck is a sprint, but keeping it standing for twenty-five years is a marathon. I’ve learned the hard way that the best way to avoid a structural disaster is to invest in the right gear early on and stop treating maintenance like a once-a-decade chore. If you’re still using a standard drill for your ledger bolts, your forearms are probably screaming at you by noon. I never step onto a job site without my high-torque brushless impact driver. It provides the consistent, percussive force needed to drive those 6-inch structural screws without stripping the heads—a common nightmare when you’re working with dense pressure-treated lumber.
The Gear I Actually Carry on Every Job
Beyond power tools, my ‘secret weapon’ for longevity is something most homeowners overlook: flashing tape. I’ve started using the flashing tape move that doubles the life of your joists on every single project. It creates a waterproof seal over the top of your framing, preventing the screws from pulling moisture into the wood fibers. It might add an hour to your build, but it saves you a five-figure teardown later. For those finishing touches on a high-end composite project, I swear by the pvc glue trick for gap-free composite miters. Standard wood glue won’t bond to plastic, but a specialized PVC adhesive creates a chemical weld that prevents those ugly gaps from opening up during the winter freeze. 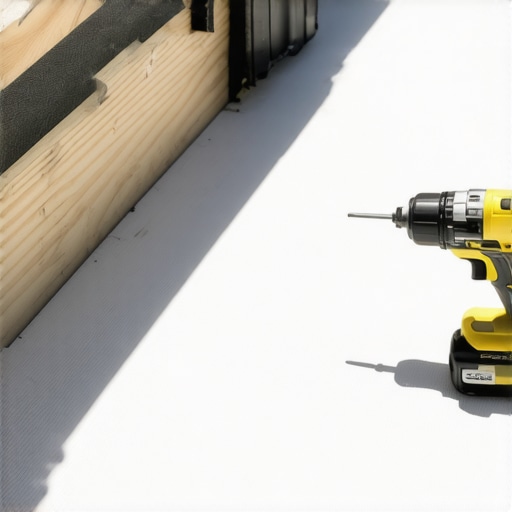
How do I maintain my deck’s finish without a pressure washer?
Many people think the only way to clean a deck is to blast it with high-pressure water, but that’s a fast track to splintering wood and damaging the protective cap on composite boards. Instead, I recommend a simple soft-bristle brush and a pH-neutral cleaner. You should also perform the simple spray test to see if your wood deck needs sealing every spring. If the water doesn’t bead up, the wood is thirsty and vulnerable. Also, a word of warning for the composite crowd: why you should never use bleach on your composite deck is a lesson you don’t want to learn through faded spots and brittle surfaces.
The Shift Toward Digital Precision
Looking ahead, the industry is moving away from ‘eyeballing it.’ I predict that within the next five years, augmented reality and 3D modeling will be the standard for every backyard build. This is why you need a 3d model before buying a single deck board today; it identifies structural clashes and sun-path issues before you waste a dime on materials. The American Wood Council (AWC) highlights in their DCA 6 guide that precise load-path connections are non-negotiable for safety. Don’t leave your family’s security to guesswork. I challenge you to go out this weekend and perform the 15-minute deck inspection every homeowner should do—it might just be the most valuable quarter-hour you spend all year.I remember the smell first. It was a musky, damp odor that definitely shouldn’t have been wafting through my kitchen window on a crisp October morning. I’d spent the previous summer obsessing over innovative deck design ideas, only to realize I’d inadvertently built a five-star hotel for the local raccoon population. I stepped out with my coffee, heard a low chittering from beneath the boards, and saw a fuzzy, masked face peering out from behind a joist. That was the moment I realized my beautiful outdoor sanctuary had become a maternity ward for trash pandas. It wasn’t just annoying; it was a structural and sanitary nightmare that I wasn’t prepared to handle.
The Night My Dream Deck Turned Into a Trash Panda Hotel
When I first started building, I made the classic rookie mistake of focusing entirely on the surface. I was so worried about longevity tips for a lasting deck that I completely ignored the dark, inviting void underneath. I left a gap near the stairs where the ground sloped slightly, thinking nothing larger than a squirrel could fit through. I was wrong. Raccoons are essentially liquid when they want to be, and once they find a dry spot near a food source, they aren’t leaving without a fight. My failure to install proper skirting or hardware cloth early on turned my weekend retreat into a battleground. If you’ve ever spent a night listening to heavy thumping and scratching right under your feet, you know exactly the frustration I’m talking about. Have you ever looked at your backyard and wondered if you’re actually the one in charge, or if the local wildlife has already claimed squatter’s rights?
Is it actually possible to keep raccoons out without building a fortress?
I used to think the only way to win was to encase the entire perimeter in ugly concrete, but that’s just not true. You can maintain a high-end look while still making your deck a ‘no-vacancy’ zone. The key is understanding that these animals are looking for three things: security, warmth, and easy access. If you remove even one of those, they’ll move on to your neighbor’s place.
Why Your Current Deck Setup is Basically an Open Invitation
Most people don’t realize that standard construction often leaves wide-open highways for critters. For instance, if you didn’t use a stringer notch hack or specialized blocking, you likely have gaps behind your stairs that serve as perfect front doors. According to the Cary Institute of Ecosystem Studies, raccoons are remarkably intelligent and can remember solutions to complex tasks for up to three years, meaning once they know how to get under your deck, they won’t forget. We need to stop thinking about this as a one-time fix and start looking at it as part of our regular 15-minute deck inspection routine. Today, I’m going to show you how to seal those gaps and use non-toxic deterrents that actually work, so you can go back to enjoying your morning coffee in peace.To start, we have to look below the surface—literally. The only way to stop a raccoon that is already eyeing your crawlspace is to create a physical barrier that extends into the soil. If you just tack some lattice to the rim joist, you’re just giving them a decorative door to rip off. You need to trench.
Build an Underground Wall They Can’t Breach
When I first tried to solve my ‘trash panda’ problem, I bought some cheap plastic lattice thinking it looked nice. Within two days, I found a hole the size of a bowling ball chewed right through the center. I felt like I’d just bought them a better front door. Now, I always recommend galvanized hardware cloth with a half-inch or quarter-inch mesh. It’s tough enough to break a tooth and won’t rust out in the damp soil.
Galvanized Mesh Beats Plastic Every Time
Staple the mesh to the back of your rim joist or the bottom of your fascia. If you’ve invested in composite decking secrets for a long-lasting finish, you don’t want to ruin the look, so hide the mesh behind your decorative skirting. I suggest using a heavy-duty stapler and then covering the top edge with a trim piece. This is also a great time to apply the joist tape secret to any exposed framing members you encounter while you’re down there. #IMAGE_PLACE_HOLDER_B#
Stop the Diggers with a Hidden L-Footer
Raccoons are world-class excavators. If they hit a wall, they’ll just try to go under it. To stop this, dig a trench about 6 to 12 inches deep. Bend the bottom of your mesh outward at a 90-degree angle to create an ‘L’ shape facing away from the deck. When a critter tries to dig down, they hit the horizontal mesh and give up. I did this on a job last spring where the homeowner had three generations of woodchucks living under their wrap-around. We backfilled the trench with crushed stone, and haven’t had a single breach since. It’s a lot of sweat, but it’s cheaper than a structural repair.
Seal the Stairs with Precise Notching
The area where your stairs meet the ground is basically a neon ‘Open’ sign for wildlife. Most builders leave a massive gap behind the stringers. This is where you should use the stringer notch hack not just for stability, but to ensure your riser boards sit flush against the ground. If you have a significant gap, don’t just fill it with dirt—it’ll wash away. Use solid blocking or a piece of pressure-treated lumber cut to the exact profile of the slope. If you’re already performing your 15-minute deck inspection, check these contact points for signs of scratching or hair.
Visual Barriers and Airflow Balance
You can’t just box the whole thing in airtight, or you’ll end up with rot and mold. You need airflow to keep your joists dry. A clever way to handle this is to integrate the mesh into a structure similar to how you would build a privacy screen that does not block the breeze. Use horizontal slats with 1/2-inch gaps, but back them with that same hardware cloth. It keeps the raccoons out while allowing the cross-breeze to pull moisture away from your house’s ledger board.Once you’ve secured the perimeter from the local wildlife, you have to look at what’s actually holding you up. I’ve walked onto too many ‘professional’ decks that felt like a trampoline, and it’s usually because the builder focused on the pretty boards while ignoring the structural physics. Let’s dig deeper into the nuances that separate a weekend DIY project from a lifetime investment.
Stop Trusting Your Rim Joist to Keep You Safe
The most common mistake I see in railing installations is the ‘surface mount’ trap. Most people believe that if they use enough long structural screws through the post into the rim joist, the railing is solid. This is a dangerous myth. In reality, the rim joist itself can rotate or pull away from the main structure under pressure. According to the North American Deck and Railing Association (NADRA), many deck failures occur at the connection points rather than the wood failing itself. To truly secure your system, you need to use the hidden bracket trick for perfectly rigid railing posts. By tying the post directly into the internal joist system with tension ties, you’re creating a continuous load path that can actually withstand the 200-pound lateral force required by the International Residential Code. #IMAGE_PLACE_HOLDER_C#
Why does my composite deck look like a wavy ocean in the summer heat?
Everyone tells you that composite is ‘maintenance-free,’ but they forget to mention that it has a massive thermal expansion coefficient. If you butt those boards tight against each other on a 60-degree morning, they will have nowhere to go when the sun hits 90 degrees in July. This is why your composite decking is expanding more than the manual says. I’ve seen boards buckle and pop fasteners because the builder didn’t follow the expansion gap rule that stops boards from buckling. The nuance here is that dark-colored boards absorb more heat and expand even further, making precise gapping at the butt joints and miters critical for a flat surface.
The 6×6 Post Secret for Real Stability
Another contrarian view I hold is that 4×4 posts are a structural lie for anything higher than a few feet off the ground. While the math might say they can carry the weight, they look spindly and lack the mass to prevent lateral swaying. This is why 6×6 posts look better than 4x4s on any outdoor structure and provide a significantly more stable feel underfoot. If your deck currently feels like it’s shimmying when you walk, you likely need the simple blocking move that stops your deck from shaking when you walk. It’s these small, internal adjustments—the ones no one sees—that prevent issues like why your railing post sleeves are cracking at the base or the $20 bracket that fixes wobbly railing posts fast. Have you ever fallen into this trap of focusing on the surface rather than the structure? Let me know in the comments.Building a deck is a sprint, but keeping it standing for twenty-five years is a marathon. I’ve learned the hard way that the best way to avoid a structural disaster is to invest in the right gear early on and stop treating maintenance like a once-a-decade chore. If you’re still using a standard drill for your ledger bolts, your forearms are probably screaming at you by noon. I never step onto a job site without my high-torque brushless impact driver. It provides the consistent, percussive force needed to drive those 6-inch structural screws without stripping the heads—a common nightmare when you’re working with dense pressure-treated lumber.
The Gear I Actually Carry on Every Job
Beyond power tools, my ‘secret weapon’ for longevity is something most homeowners overlook: flashing tape. I’ve started using the flashing tape move that doubles the life of your joists on every single project. It creates a waterproof seal over the top of your framing, preventing the screws from pulling moisture into the wood fibers. It might add an hour to your build, but it saves you a five-figure teardown later. For those finishing touches on a high-end composite project, I swear by the pvc glue trick for gap-free composite miters. Standard wood glue won’t bond to plastic, but a specialized PVC adhesive creates a chemical weld that prevents those ugly gaps from opening up during the winter freeze. #IMAGE_PLACE_HOLDER_D#
How do I maintain my deck’s finish without a pressure washer?
Many people think the only way to clean a deck is to blast it with high-pressure water, but that’s a fast track to splintering wood and damaging the protective cap on composite boards. Instead, I recommend a simple soft-bristle brush and a pH-neutral cleaner. You should also perform the simple spray test to see if your wood deck needs sealing every spring. If the water doesn’t bead up, the wood is thirsty and vulnerable. Also, a word of warning for the composite crowd: why you should never use bleach on your composite deck is a lesson you don’t want to learn through faded spots and brittle surfaces.
The Shift Toward Digital Precision
Looking ahead, the industry is moving away from ‘eyeballing it.’ I predict that within the next five years, augmented reality and 3D modeling will be the standard for every backyard build. This is why you need a 3d model before buying a single deck board today; it identifies structural clashes and sun-path issues before you waste a dime on materials. The American Wood Council (AWC) highlights in their DCA 6 guide that precise load-path connections are non-negotiable for safety. Don’t leave your family’s security to guesswork. I challenge you to go out this weekend and perform the 15-minute deck inspection every homeowner should do—it might just be the most valuable quarter-hour you spend all year.
What I Learned After Three Total Deck Rebuilds
Looking back at my original mistakes, I’ve realized that a great deck is actually a system of layers rather than just a pile of wood. First, the ‘critter problem’ is never truly solved by poison or traps; physical exclusion with galvanized mesh is the only permanent answer. Second, the cost of high-quality structural hardware is peanuts compared to the cost of a catastrophic collapse. I’ve seen too many DIYers save fifty bucks on brackets only to lose thousands when the rim joist starts to sag. Finally, treat your substructure with more care than your surface boards. Composite decking will outlast the framing 100% of the time unless you take steps like using the flashing tape move that doubles the life of your joists. The bones are what keep you safe while you’re enjoying the view.
My Trusted Toolkit for Weatherproof Outdoor Living
To duplicate these results, you need the right resources in your corner. I always recommend starting with a digital plan because why you need a 3d model before buying a single deck board is a lesson best learned before the lumber truck arrives. For physical materials, I never skip the butyl tape on top of the joists to prevent rot at the screw holes. I also suggest bookmarking the North American Deck and Railing Association (NADRA) for their safety checklists; they are the gold standard for residential inspections. Finally, keep a ph-neutral cleaner and a soft-bristled brush handy—skip the pressure washer if you want your finish to last more than two seasons.
Your Sanctuary is Waiting for You
Taking the step from a simple backyard platform to a high-performance outdoor sanctuary is incredibly rewarding. When you know your deck is secured against both the weather and the local wildlife, you can finally relax and enjoy the fruits of your labor. Use these composite decking secrets to build something that isn’t just a place to sit, but a structure that stands as a testament to your craftsmanship and foresight. Don’t wait until you hear the scratching of paws to start your upgrades; a proactive build is a peaceful build. Have you ever struggled with a persistent pest under your porch or a railing that just wouldn’t stay still? Let me know in the comments below.