
I was leaning against my railing last July, watching the sunset, when I felt that tell-tale, sickening give. It wasn’t just a loose bolt. It was the sound of wood fibers surrendering to years of moisture. My heart sank because I immediately saw dollar signs and weeks of construction dust. I had put so much work into my [innovative deck design](https://deckforgebuilders.com/elevate-your-backyard-innovative-deck-design-ideas-for-2025) only to find the very foundation was turning into mush. But here is the good news: you don’t have to call the demolition crew just yet. I’ve been in those mud-covered boots, and I’ve learned that a single rotting post doesn’t have to mean the death of your entire outdoor sanctuary. Today, I’m going to show you exactly how to surgically remove that rot and restore your deck’s integrity without the nightmare of a total rebuild.
Stop the Panic and Put Down the Sledgehammer
I remember my first “repair” job years ago. I was naive and thought a bit of wood filler and a thick coat of paint would stop the spread. I was wrong. That mistake actually trapped the moisture and accelerated the decay, leading to [why your pressure-treated joists are rotting faster than usual](https://deckforgebuilders.com/why-your-pressure-treated-joists-are-rotting-faster-than-usual). It was a hard lesson in structural physics. The reality is that deck posts usually rot at the base or where they meet the rim joist because of poor drainage and constant contact with wet soil or debris. According to the structural experts at the American Wood Council, wood decay fungi require moisture, oxygen, and favorable temperatures to thrive, and once they move in, they don’t leave voluntarily unless you remove their food source. This isn’t just about aesthetics; it’s about the safety of every person who steps onto your property. A compromised post can lead to a catastrophic failure, yet homeowners often ignore the warning signs because the prospect of a full renovation is so daunting. We are going to bypass that fear by focusing on a targeted, effective fix that respects both your time and your wallet.
Is this repair actually safe and worth the effort?
You might be wondering if a patched post can really hold up your family during a summer BBQ. It’s a fair question. The secret isn’t “patching”—it’s temporary shoring and structural replacement. We aren’t just putting a bandage on a wound; we are performing a structural transplant. If you follow the right steps, the repaired section will be just as strong, if not stronger, than the original. Have you ever poked a screwdriver into your deck post only to have it sink in like it was hitting butter? Tell me about your “oh no” moment in the comments below. Whether you are dealing with [railing systems](https://deckforgebuilders.com/how-to-select-the-perfect-railing-system-for-every-deck) that feel wobbly or a corner of the deck that’s starting to sag, the process starts with stabilization. We’ll use temporary supports to take the weight off the damaged area, allowing us to cut out the rot and install a new, secure base that’s built to last. This method is the same one used by pros to save historic porches and [pergola designs](https://deckforgebuilders.com/pergola-design-inspiration-from-modern-to-classic-looks) that have stood for decades. By the time we’re done, you’ll have a deck that feels solid underfoot again, and you won’t have spent your entire vacation fund on a contractor.
Take the Pressure Off with Temporary Shoring
Before you even touch a saw, you have to play the role of the support crew. Think of shoring like using a jack to change a flat tire; you aren’t fixing the wheel while the car is resting on it. I learned this the hard way years ago when I tried to prop up a sagging corner with a stack of leftover bricks and a prayer. The bricks shifted mid-cut, the deck groaned, and I nearly lost a finger when the joist dropped an inch. Now, I always use a heavy-duty screw jack and a solid 4×4 ‘mother’ post to take the load. Position your temporary support about two feet away from the damaged post, ensuring it rests on a solid footer or a thick piece of plywood to distribute the weight across the ground. Once the deck is slightly—and I mean slightly—elevated, you’ll feel the tension release from the hardware. This is also a great time to check for other stability issues, like the simple blocking move that stops your deck from shaking when you walk.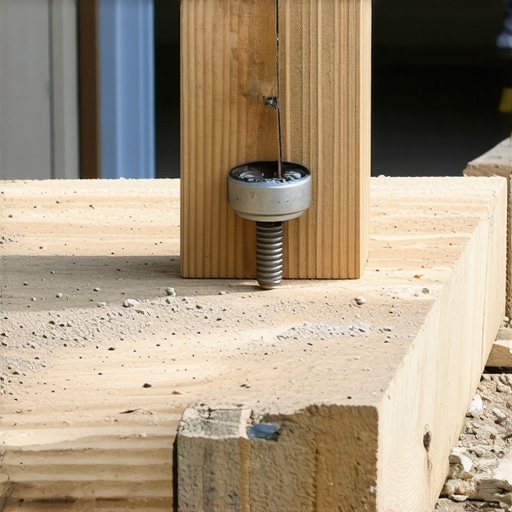
The Precision Cut That Saves Your Frame
With the weight safely transferred, it’s time for the surgery. Use a reciprocating saw with a long demolition blade to cut the rotten post. Don’t just cut at the rot line; go at least two to three inches into healthy wood. Rot is like an iceberg; what you see on the surface is only a fraction of the fungus living inside the fibers. When I did my first major repair, I was surprised to find that even though the outside looked fine, the core was as soft as a sponge. If you find the wood still feels damp or ‘punky,’ keep cutting higher until you hit solid, dry timber. This is often why your pressure-treated wood feels wet even after weeks because the chemicals didn’t penetrate deep enough to stop internal decay.
Rebuild the Base to Defy Gravity
You aren’t just putting wood back in a hole; you are upgrading the engineering. The biggest mistake homeowners make is putting the new post directly back into the dirt or flat against wet concrete. You need a standoff base. These metal brackets keep the wood an inch off the concrete, allowing air to circulate and water to drain. Without this gap, your new post is just a vertical wick waiting to soak up ground moisture. Make sure you use heavy-duty galvanized hardware because why your post bases are rusting and the fix usually involves poor-quality metal reacting with the chemicals in treated lumber.
Seal the Connection Points Forever
Once the new post is cut to size and wedged into place, focus on the ‘scar tissue’—the areas where the new wood meets the old frame. This is the prime entry point for future rot. Use a high-quality butyl tape to cover the top of the post and the surrounding joists. I swear by the joist tape secret for doubling your decks lifespan because it creates a waterproof gasket that screws can bite into without inviting leaks. If the post is near the edge of the structure, consider adding the drip edge hack for preventing deck rim joist rot to guide rain away from the vulnerable end-grain. Finally, when bolting everything back together, remember that why your railing posts should be bolted not nailed applies to structural posts too—friction from nails won’t hold up against the seasonal expansion and contraction of the wood.
The Maintenance-Free Myth That Might Ruin Your Frame
The common wisdom is that switching to modern materials means you can ‘set it and forget it.’ But in my experience, the biggest trap homeowners fall into is believing that composite decking is indestructible. While the boards themselves don’t rot, they behave very differently than organic wood under the sun. Everyone says composite is the easy way out, but if you don’t account for thermal expansion, your expensive new boards will buckle and warp. I have seen beautiful projects ruined because the builder didn’t realize why your composite decking is expanding more than the manual says. Wood shrinks as it dries; composite grows as it heats up. If you butt those boards tight against your house or a railing post, they have nowhere to go but up.
The Thermal Movement Trap Most Pros Ignore
It isn’t just about the gaps between the boards. The hidden nuance that separates a DIY job from an expert installation is the ‘crawling’ effect. According to the North American Deck and Railing Association (NADRA), temperature fluctuations can cause a twelve-foot composite board to expand by as much as 3/16 of an inch. If you are using hidden fasteners without a dedicated locking screw in the center of the board, the entire deck surface can shift over a single summer, leading to why your hidden fasteners are popping up in heat. I once spent three days on a client’s deck just resetting boards that had migrated two inches to the left because they weren’t pinned correctly. Have you ever fallen into this trap? Let me know in the comments. 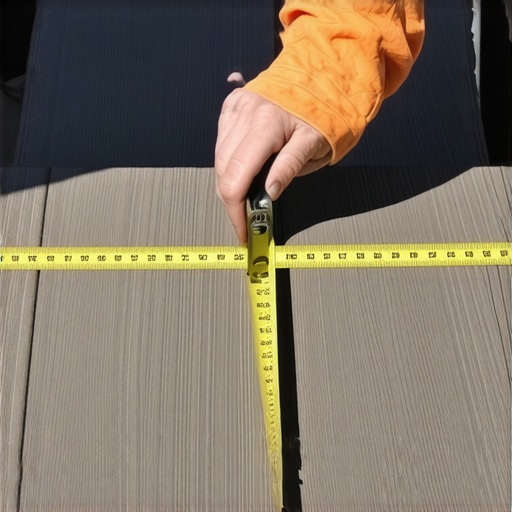
How do you stop composite boards from moving without restricted fasteners?
The secret is ‘pinning’ the board at its midpoint. By driving a single screw through the side of the board into the joist at the center of its length, you force the expansion to happen equally toward both ends. This keeps your perimeter lines straight and prevents your the pvc glue trick for gap-free composite miters from opening up into ugly gashes. If you are aiming for composite decking secrets longevity tips for a lasting deck, you must respect the physics of plastic and wood flour.
Protect the House Before You Protect the Deck
While we’ve talked a lot about the post and the boards, the most dangerous ‘oops’ factor is the ledger board—where the deck meets your home. I see people spend thousands on innovative deck design ideas for 2025 while completely ignoring the flashing behind the ledger. If you don’t follow the 2 inch gap rule for preventing rot behind your deck ledger, you are essentially inviting termites and rot into your home’s rim joist. It doesn’t matter how pretty the pergola design is if the structural connection to your kitchen is turning into mulch. Whether you are troubleshooting why your composite decking is static shocking your family or reinforcing a wobbly rail, the nuance is always in the moisture management. Don’t just fix the symptom; kill the cause by ensuring air can flow behind every piece of wood you install.I’ve spent too many Saturdays fighting with a standard drill and a bubble level, only to find my joists were off by half an inch. Now, I never start a project without my 12V compact impact driver and a self-leveling cross-line laser. Why the 12V? Because when you are reaching into the tight corners of innovative deck design ideas that elevate your homes curb appeal, you don’t want a heavy battery weighing you down. The laser is the real hero, though; I use it to verify the string line secret for perfectly level railing runs before I even think about drilling a single hole. It’s about achieving precision that the naked eye just cannot match, ensuring your lines are crisp enough to look professional. 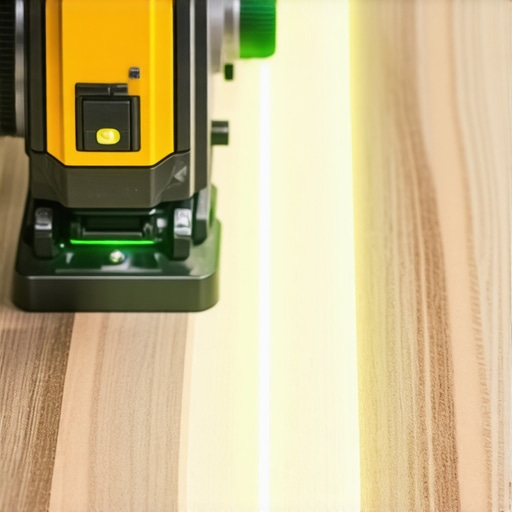
How do I keep my deck from aging faster than I do?
The secret to composite decking secrets longevity tips for a lasting deck isn’t just a seasonal hose-down. It’s about checking the hidden hardware every spring. I use a torque wrench to ensure my ledger bolts haven’t vibrated loose due to the house settling or heavy foot traffic. If you have custom railing systems for safety and style, specifically cable ones, you’ll notice they sag slightly as the temperature drops and the wood frame contracts. I always keep a dedicated tensioning tool in my kit—it’s the only way to master the tensioner secret for tight cable railings without stripping the delicate threads on the fittings. For those of you with metal or vinyl components, keep an eye on the finish; knowing how to fix fading in older composite railing caps can save you from a full, expensive replacement. When it comes to your overhead structures, do not ignore the rafter connections. I’ve seen beautiful pergola designs that turn your garden into a sanctuary start to dip because the owner used standard wood screws instead of structural lags. According to the Simpson Strong-Tie tech bulletin on fastener corrosive resistance (T-C-CORRWS24), using the wrong coating in ACQ-treated lumber can lead to rapid failure inside the timber. This is why I only use 316-grade stainless steel for anything within 20 miles of the coast to ensure the coastal deck materials that survive salt air and sand actually do their job. Looking ahead, I predict we are going to see ‘Smart Decks’ become the new gold standard. We are already seeing pergola trends crafting shade elegance in your outdoor space integrating automated sensors that retract canopies when wind speeds hit dangerous levels. In the next five years, I expect joist-mounted moisture sensors to alert your phone before rot even starts. For now, grab a high-quality impact driver and go tighten every structural bolt on your frame this weekend. You’ll be amazed at how much ‘deck squeak’ is really just a loose washer waiting for a quick turn.
What Most Contractors Won’t Tell You About Deck Decay
I’ve spent years looking at deck frames, and the biggest lesson I’ve learned is that moisture is a patient enemy. It doesn’t just happen overnight; it’s the result of tiny oversights that compound over time. One lightbulb moment for me was realizing that just because a board looks dry on top doesn’t mean the underside isn’t a breeding ground for rot. If you aren’t using the flash and tape method for protecting deck joists, you’re essentially leaving your frame’s life to chance. I also learned that structural integrity isn’t just about the vertical posts. Sometimes the wobble you feel is actually a lateral stability issue that requires the double rim joist secret for rock-solid deck edges. My biggest ‘aha’ moment? Realizing that a repair today is ten times cheaper than a total collapse tomorrow.
Tools That Saved My Sanity on the Job
If you’re going to dive into these repairs, don’t handicap yourself with cheap gear. My first recommendation is a self-leveling laser—it takes the guesswork out of finding the perfect height for your new post bases. Secondly, never underestimate the power of a structural screw over a standard lag bolt; they bite deeper and hold faster. For those moving toward modern aesthetics, keep an eye on composite decking trends durable solutions for modern outdoor living as you plan your upgrades. I always keep 316-grade stainless hardware on hand because I’ve seen too many ‘galvanized’ bolts crumble in five years. Finally, before you drive a single nail, remember the 3-4-5 rule for squaring your deck frame every time—it’s the simplest way to ensure your new layout doesn’t look crooked from the street.
Your Deck Is Waiting for Its Second Life
Restoring a rotting post might feel like a chore, but it’s actually an opportunity to implement transform your home with stunning deck design strategies that weren’t available when your house was first built. You aren’t just fixing a safety hazard; you are reclaiming your sanctuary. This is your chance to turn a neglected corner into the centerpiece of your backyard. Don’t let the fear of a big project stop you from making those first, small, strategic cuts. Your future self—the one lounging on a solid, safe deck next summer—will thank you for the work you did today. Have you ever discovered rot in a place you totally didn’t expect? Let me know about your discovery in the comments below!