
I’ll never forget the feeling of my foot sinking slightly as I walked across my five-year-old ‘forever’ deck. I had done everything by the book, or so I thought. I bought the high-end pressure-treated lumber, spent a fortune on those rolls of black butyl tape, and meticulously covered every horizontal surface of the frame. I was convinced my substructure would outlive me. But when I pulled up a single composite board to investigate that soft spot, my heart dropped. The wood underneath the tape wasn’t just damp; it was mushy, dark, and smelled like a swamp. It was a total failure of the very system I’d installed to prevent it. We often think that wrapping our wood in a waterproof layer is the ultimate win, but as I learned the hard way, water is a sneaky adversary that loves a good hiding spot. Today, I want to peel back the layers—literally—and show you exactly why that expensive tape might be failing you and how to ensure your deck actually reaches its full potential. Have you ever found a surprising patch of rot on a deck you thought was protected? Drop a comment and tell me your story!
Stop Assuming Your Joist Tape is a Magic Shield
It’s a bitter pill to swallow, but simply slapping tape on a joist doesn’t make it invincible. My biggest mistake early on was thinking that more tape meant more protection. I didn’t realize that if you don’t apply it with surgical precision, you’re basically creating a tiny greenhouse for rot-inducing fungi. [IMAGE_PLACEHOLDER] When I performed the ice pick test on my own project, the tool slid in like it was hitting warm butter. The problem isn’t the tape itself, but rather how it interacts with the chemicals in modern wood treatments and the physics of moisture. If water finds even the smallest entry point—like a screw hole or a wrinkled edge—it gets trapped between the tape and the wood with no way to evaporate.
Does joist tape actually trap moisture against the wood?
This is the big worry for many DIYers, and honestly, they aren’t wrong to be skeptical. If your application isn’t perfect, you are essentially sealing the doom of your frame. According to research from the Forest Products Laboratory, wood decay fungi thrive once moisture content hits that 20% threshold, and trapped water under a non-breathable membrane is the fastest way to get there. You see, why your deck joists are rotting underneath the tape often comes down to the ‘tenting’ effect, where the tape lifts slightly and creates a reservoir. If you want to avoid this, you need to understand the joist tape secret for doubling your decks life, which involves more than just sticking it down and hoping for the best. It’s about managing the micro-climate of your deck frame.
Get the Surface Bone-Dry and Clean Before You Start
Tape is like a high-end bandage; it won’t stick to a muddy knee. I once rushed a build after a light drizzle, thinking the sun would dry the pressure-treated lumber out. By the time I reached the third joist, the tape was already curling at the edges. I had to waste three rolls of expensive butyl. You need a stiff brush to clear sawdust and a heat gun if there’s even a hint of moisture. If the wood isn’t clean, you’re just trapping air and dirt. This is critical because why your deck joists are rotting underneath the tape often starts with poor adhesion.
The Roller Technique for a Vacuum Seal
Most people just smooth the tape with their palms. That’s a recipe for disaster. You need a J-roller. Think of it like rolling out dough for a perfect pie—you want every air bubble squeezed out. When I started using a roller, the tape looked like it was painted on. It creates a mechanical bond that resists the ‘tenting’ effect where water pools. This simple step is part of the joist tape secret for doubling your decks life. 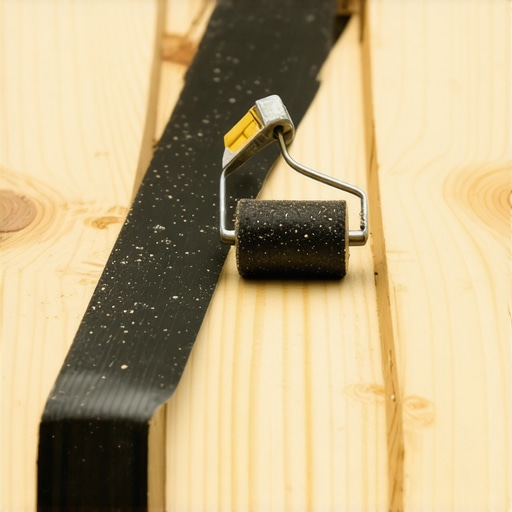
Stop Water at the Source with Better Flashing
If your tape ends right at the edge of the joist, you’re missing the point. You need to wrap the sides slightly or use the drip edge trick for protecting deck ledger boards. It’s like putting an umbrella over the wood rather than just a raincoat on its back. This technique ensures that gravity works for you, not against you. If you are working on a pergola, the same logic applies to your top beams.
Fix Your Ledger Before the Rot Spells Trouble
The connection to the house is the most vulnerable spot. Avoid the ledger flashing mistake that causes interior house mold by ensuring your flashing goes under the house wrap. When I inspected a neighbor’s deck, the joist tape was fine, but the house-to-deck transition was a waterfall during storms. Always pair your tape with the ledger gap fix that prevents house siding rot to allow air to circulate. This is a common oversight in modern deck design strategies.
Check Your Work with the Hose
Before laying down your composite decking, run the garden hose test for proper deck water runoff. If you see water pooling on top of the tape for more than a few minutes, your joists aren’t level. Use the string line trick for leveling deck joists before decking to find the high spots and plane them down. A flat surface prevents the small valleys where rot begins.
Let’s dig deeper into the actual marriage between your frame and the boards. Everyone tells you that composite is the ultimate ‘set and forget’ solution, but in my experience, that mindset is exactly what leads to structural failure. You see, while your boards are synthetic, the skeleton underneath is a living, breathing organism. We treat them like a static pair, but they are actually in a constant tug-of-war. Pressure-treated lumber shrinks as it dries, while your composite boards expand and contract with the sun. If you don’t account for this, why your pressure-treated frame is pulling your composite apart becomes a painful reality rather than a theory. I’ve seen beautiful $30,000 installs warp within two seasons because the builder didn’t respect the physics of the materials. 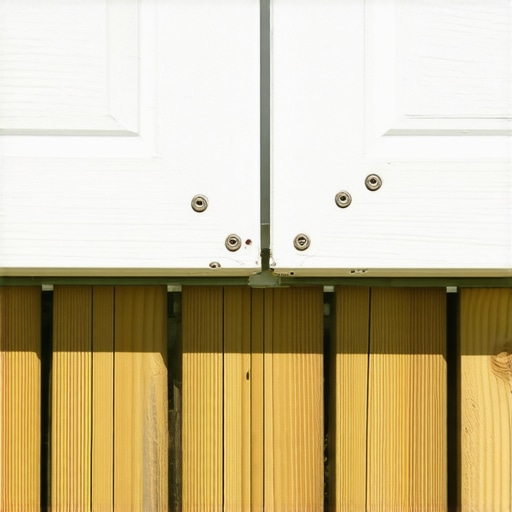
Your Frame is a Living Organism That Hates Your Composite
The biggest trap is thinking that a tight fit is a good fit. When you butt a board tight against the house siding, you aren’t being precise; you’re being dangerous. Research from the American Wood Council (AWC) notes that pressure-treated lumber can shrink significantly as it reaches its equilibrium moisture content. If you’ve ever wondered how to stop composite deck boards from expanding into your siding, the answer is often giving the wood room to move. When the frame shrinks and the boards expand, the tension has to go somewhere. Usually, it results in snapped fasteners or ‘mushrooming’ around the screw holes. It is one of the most overlooked composite decking secrets for longevity.
Why do my expensive deck boards feel like they’re shifting?
This is the question I get most from homeowners who opted for high-end materials. The ‘shift’ is usually the result of thermal movement. If you chose a dark grey or deep brown, you need to realize that why dark composite boards need extra expansion space is a matter of heat absorption. On a 90-degree day, that board can reach 160 degrees, growing by as much as a quarter-inch over a twenty-foot span. If those boards are locked down too tight, something has to give. This is also why hidden fasteners pop up in extreme summer heat; they simply weren’t designed to be anchors against the sheer force of thermal expansion.
The Myth of the Maintenance-Free Promise
We need to stop using the word ‘maintenance-free’ and start using ‘low-maintenance.’ I once talked to a homeowner who was furious that their deck was ‘spongy.’ It turned out they had used thin, hollow-core boards on a frame with 16-inch centers. I always tell people that why solid core composite is worth the extra bulk comes down to that structural rigidity. A thinner board will telegraph every single imperfection in your joist leveling. If you don’t get the substructure perfect using the string line trick for leveling deck joists, you will feel it underfoot every single time you walk to your grill. Have you ever fallen into this trap of assuming the boards would hide a bad frame? Let me know in the comments!
The Tool That Finally Fixed My Inconsistent Screw Depths
I’ve spent years experimenting with different setups, and I’ve realized that the ‘eye-balling’ method for screw depth is the fastest way to ruin a premium finish. I strictly use a depth-setting bit tip now. It’s a small, adjustable collar that stops the screw the millisecond it’s flush with the board. Before I integrated the jig I use for consistent deck screw depth into my workflow, I was constantly dealing with ‘mushrooming’—that ugly plastic flare that happens when a screw goes too deep. To get the cleanest possible look on your perimeter, I highly recommend the painters tape hack for cutting composite boards without fraying. It sounds like a small detail, but it prevents those micro-shards of plastic from catching the light and making a $20,000 project look like a DIY disaster. If you do happen to scuff a board during installation, don’t panic; you can learn how to fix scuffs on dark composite boards with a heat gun to blend them back into the original texture.
Stop Using Bleach Before You Ruin Your Warranty
When it comes to maintenance, there is one cardinal sin: using chlorine bleach. I’ve seen homeowners try to blast away pollen with a heavy bleach solution, only to find their boards fading in patches six months later. This is why you should never use bleach on composite decks; it eats away at the UV inhibitors in the capping material. Instead, keep it simple. For most spills, the soap and sponge fix for oil stains on composite decking is all you need. The American Wood Protection Association (AWPA) U1 Standard highlights that while the boards themselves are rot-resistant, the surface is still susceptible to chemical degradation if you aren’t careful. 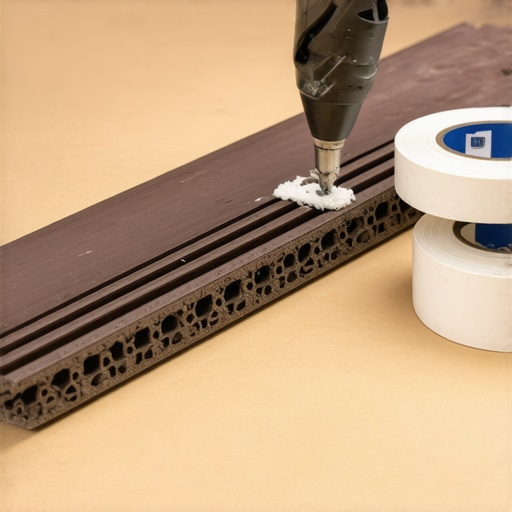
How do I maintain my composite deck over time?
Long-term success isn’t about daily scrubbing; it’s about quarterly inspections. I set a calendar reminder every three months to walk the perimeter and perform the 3-second push test for wobbly railing systems. If there is any movement in the posts, it’s usually a sign that the framing underneath has shifted or the fasteners have loosened. While you’re at it, review the complete guide to choosing railing systems for safety and style to ensure your hardware is still meeting modern standards. Maintenance also includes keeping the gaps clear of debris to prevent the moisture traps I talked about earlier.
What the Next Decade of Decking Looks Like
As we look toward the future, I predict we are going to see a massive shift toward fully integrated smart frames. I’m already seeing prototypes for moisture sensors that can be embedded in your joists to alert your phone the moment water breaches your tape layer. In terms of design, elevate your backyard with innovative deck design ideas for 2025 by looking into heat-reflective polymers that stay cool even in direct sunlight. The industry is moving away from just ‘durability’ and toward ‘climatized comfort.’ If you want to stay ahead of the curve, I challenge you to try the painter’s tape trick on your very next board cut—you’ll be amazed at how much more professional the finish looks immediately.
Hard-Won Realities from the Bottom of a Joist Bay
Looking back at my first few builds, I realize I was obsessed with the surface and ignored the skeleton. I’ve since learned that your deck is only as good as the air that moves under it. One lightbulb moment for me was realizing that the framing move that stops deck boards from bouncing isn’t just about adding more wood; it’s about strategic blocking that lets the wood breathe. I also learned that you can’t fight physics—trying to lock a board into place without accounting for thermal expansion is a battle you will lose every time. My biggest takeaway? Invest your time and money into the substructure now, or you’ll be spending it on a total teardown in seven years. Understanding why solid core composite is worth the extra bulk changed my entire perspective on structural integrity. It’s not just about weight; it’s about how that board resists the internal stresses of the frame.
The Field-Tested Gear That Separates Amateurs From Pros
If you want a professional-grade finish, you have to stop relying on standard construction tools. Here are the three things currently in my truck that I won’t build without. First, a high-quality J-roller is non-negotiable for making sure the joist tape secret for doubling your decks life actually works. Second, a dedicated depth-setting bit ensures every fastener is perfectly flush, avoiding those ugly ‘volcano’ mushrooms in the plastic. Finally, I always keep a bottle of high-UV protectant for any exposed wood ends. I trust these because they address the small points of failure—moisture intrusion and fastener shear—that usually kill a deck. These are the practical composite decking secrets for longevity that I’ve gathered over a decade of trial and error. [IMAGE_PLACEHOLDER]
Build a Space That Lasts as Long as Your Memories
At the end of the day, we aren’t just building a platform; we are building a stage for family dinners, quiet morning coffees, and summer birthdays. Don’t let the fear of ‘doing it wrong’ stop you from starting. If you focus on protecting the frame and respecting the movement of your materials, you are already ahead of 90% of the DIY projects out there. By applying these stunning deck design strategies, you are ensuring that your outdoor sanctuary remains safe and beautiful for the next twenty years. Your future self will thank you every time you step out onto a rock-solid, squeak-free surface. Have you ever discovered a hidden patch of rot during a renovation that completely changed your build plan? Let me know in the comments below!