
I stood there on my brand-new deck, coffee in hand, feeling like a master builder until I heard that first sickening ‘crack.’ It wasn’t the sound of the house settling; it was a three-inch screw splitting the heart of a joist I’d just spent three weekends installing. I used to think that bigger was always better—that a longer screw meant a tighter grip and a sturdier frame. I was dead wrong. That extra inch of steel became a high-speed wedge that turned my joist tops into kindling, inviting rot into the very core of my outdoor sanctuary. If you are planning to elevate your backyard this year, you need to hear why your choice of fastener can make or break your entire investment.
The Day My Over-Engineering Backfired
When I first started tinkering with deck design strategies, I assumed structural integrity was a game of brute force. I grabbed a box of three-inch deck screws for everything. I figured they’d bite deep and never let go. But here is the reality: those long fasteners create massive internal pressure. Pressure-treated lumber is often wet when it arrives, and as it dries, those oversized screws cause the grain to separate. Once that split starts, water hitches a ride down the screw shaft, bypassing the surface and rotting the joist from the inside out. This is a huge reason why your pressure-treated frame is pulling your composite apart before its time. Today, I’m going to show you why shorter, specialized fasteners are actually the ‘heavy lifters’ and how you can save your frame from a premature grave. [image]
Are You Accidentally Inviting Rot Into Your Frame?
It sounds like a stretch, doesn’t it? You’d think a piece of pressure-treated 2×10 could handle a bit of steel. However, experts at the American Wood Council emphasize that improper fastener sizing and spacing lead to wood shear and create moisture pockets that chemical treatments can’t always reach. I learned this the hard way when I had to pull up boards after only three years because my deck felt ‘soft.’ It turns out, I had created a series of vertical straws that sucked rainwater straight into the untreated center of the wood. This often explains why your composite deck feels spongy between joists even when the boards themselves look perfect. I eventually found the joist tape secret for doubling your decks life, but even the best tape can’t fix a joist that’s been split wide open from the start. I’ve since mastered the jig i use for consistent deck screw depth to ensure I never over-drive a fastener again. I remember the smell of the cedar and the pride of seeing everything lined up perfectly with my laser level, but that pride turned to anxiety when I saw the hairline fractures radiating from every screw head. It’s the kind of thing you don’t notice until the first winter thaw. Most folks focus on the safety and style of their railings, but if the skeleton is failing, the rest is just window dressing. Have you ever noticed your joists splitting right where you drove your screws? Tell me in the comments, because I bet I’m not the only one who’s made this mistake. Now, let’s look at the physics of why this happens and what you should be using instead.
Kill the Wedge Effect Before It Kills Your Deck
Think of a screw not as a simple pin, but as a tiny, threaded axe. When you drive a fastener into the top of a joist, you are essentially hammering a wedge into the wood’s cellular structure. If the wood is too dry, it shatters; if it is too wet, it compresses and then splits as it seasons. This mechanical stress is the primary reason why your pressure-treated frame is pulling your composite apart. To avoid this, you need to transition from a ‘brute force’ mindset to a ‘precision’ mindset. I remember building a wrap-around porch for a client who insisted on ‘over-building’ everything. We initially used heavy-duty 3.5-inch screws for the decking, thinking it would be rock solid. By the time we finished the third course, I could see the ends of the joists weeping moisture from the fresh internal splits. We had to stop, sister every single damaged joist, and start over with the correct 2.5-inch stainless steel fasteners. That mistake cost us two days of labor and a few hundred dollars in wasted material. 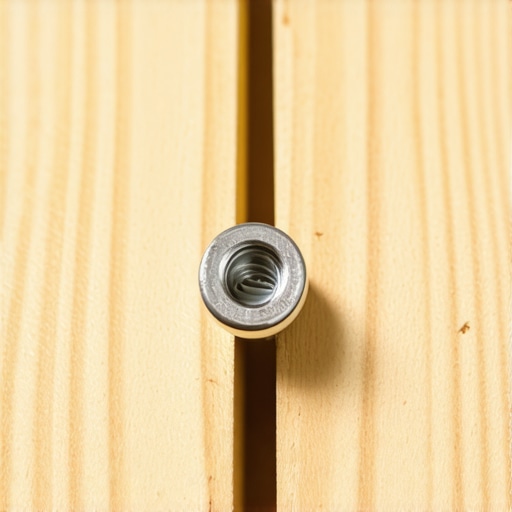
Why 2.5 Inches is the Magic Number
For standard 5/4 or 1-inch composite boards, a 2.5-inch screw is the industry gold standard for a reason. It provides enough ‘bite’ to secure the board against lateral movement while leaving the bottom two-thirds of the joist intact. When you use longer screws, you are piercing the ‘neutral axis’ of the wood beam—the area that handles the most tension. By keeping your fasteners shorter, you preserve the structural integrity of the lower half of the joist, which prevents the ‘spongy’ feeling people often complain about. This is one of the most important composite decking secrets for a lasting deck. If you find your boards are still shifting, focus on the framing move that stops deck boards from bouncing rather than reaching for a longer screw.
Pre-Drill Like Your Warranty Depends On It
Most modern deck screws claim to be ‘self-tapping,’ but in the world of high-density composites and pressure-treated southern yellow pine, that is often a marketing myth. Pre-drilling is the only way to ensure the wood fibers are actually removed rather than just pushed aside. Use a tapered drill bit that matches the profile of your screw. This creates a clean channel for the screw shaft while allowing the threads to engage the wood safely. I always use the jig i use for consistent deck screw depth to ensure that every pilot hole is uniform. This prevents the screw head from mushrooming the composite surface, which is a common eyesore.
Seal the Entry Point to Stop Internal Rot
Every screw hole is a potential straw that sucks water into the heart of the timber. Even if you use the joist tape secret for doubling your decks life, the screw still has to pierce that tape. To add an extra layer of defense, I’ve started a habit where I hit the tops of the joists with a quick coat of black exterior-grade paint or a specialized sealer before the boards go down. This is why you should paint your deck joists black under composite—it hides the light-colored wood in the gaps and adds a chemical barrier against moisture at the most vulnerable point. When you combine this with the string line trick for leveling deck joists before decking, you ensure that water doesn’t pool around the screw heads in the first place. If you are building something more vertical, like pergola designs that turn your garden into a sanctuary, these same rules for pre-drilling and fastener length apply to your rafters to prevent unsightly end-grain checking.I stood there on my brand-new deck, coffee in hand, feeling like a master builder until I heard that first sickening ‘crack.’ It wasn’t the sound of the house settling; it was a three-inch screw splitting the heart of a joist I’d just spent three weekends installing. I used to think that bigger was always better—that a longer screw meant a tighter grip and a sturdier frame. I was dead wrong. That extra inch of steel became a high-speed wedge that turned my joist tops into kindling, inviting rot into the very core of my outdoor sanctuary. If you are planning to elevate your backyard this year, you need to hear why your choice of fastener can make or break your entire investment.
The Day My Over-Engineering Backfired
When I first started tinkering with deck design strategies, I assumed structural integrity was a game of brute force. I grabbed a box of three-inch deck screws for everything. I figured they’d bite deep and never let go. But here is the reality: those long fasteners create massive internal pressure. Pressure-treated lumber is often wet when it arrives, and as it dries, those oversized screws cause the grain to separate. Once that split starts, water hitches a ride down the screw shaft, bypassing the surface and rotting the joist from the inside out. This is a huge reason why your pressure-treated frame is pulling your composite apart before its time. Today, I’m going to show you why shorter, specialized fasteners are actually the ‘heavy lifters’ and how you can save your frame from a premature grave. [image]
Are You Accidentally Inviting Rot Into Your Frame?
It sounds like a stretch, doesn’t it? You’d think a piece of pressure-treated 2×10 could handle a bit of steel. However, experts at the American Wood Council emphasize that improper fastener sizing and spacing lead to wood shear and create moisture pockets that chemical treatments can’t always reach. I learned this the hard way when I had to pull up boards after only three years because my deck felt ‘soft.’ It turns out, I had created a series of vertical straws that sucked rainwater straight into the untreated center of the wood. This often explains why your composite deck feels spongy between joists even when the boards themselves look perfect. I eventually found the joist tape secret for doubling your decks life, but even the best tape can’t fix a joist that’s been split wide open from the start. I’ve since mastered the jig i use for consistent deck screw depth to ensure I never over-drive a fastener again. I remember the smell of the cedar and the pride of seeing everything lined up perfectly with my laser level, but that pride turned to anxiety when I saw the hairline fractures radiating from every screw head. It’s the kind of thing you don’t notice until the first winter thaw. Most folks focus on the safety and style of their railings, but if the skeleton is failing, the rest is just window dressing. Have you ever noticed your joists splitting right where you drove your screws? Tell me in the comments, because I bet I’m not the only one who’s made this mistake. Now, let’s look at the physics of why this happens and what you should be using instead.
Kill the Wedge Effect Before It Kills Your Deck
Think of a screw not as a simple pin, but as a tiny, threaded axe. When you drive a fastener into the top of a joist, you are essentially hammering a wedge into the wood’s cellular structure. If the wood is too dry, it shatters; if it is too wet, it compresses and then splits as it seasons. This mechanical stress is the primary reason why your pressure-treated frame is pulling your composite apart. To avoid this, you need to transition from a ‘brute force’ mindset to a ‘precision’ mindset. I remember building a wrap-around porch for a client who insisted on ‘over-building’ everything. We initially used heavy-duty 3.5-inch screws for the decking, thinking it would be rock solid. By the time we finished the third course, I could see the ends of the joists weeping moisture from the fresh internal splits. We had to stop, sister every single damaged joist, and start over with the correct 2.5-inch stainless steel fasteners. That mistake cost us two days of labor and a few hundred dollars in wasted material.
Why 2.5 Inches is the Magic Number
For standard 5/4 or 1-inch composite boards, a 2.5-inch screw is the industry gold standard for a reason. It provides enough ‘bite’ to secure the board against lateral movement while leaving the bottom two-thirds of the joist intact. When you use longer screws, you are piercing the ‘neutral axis’ of the wood beam—the area that handles the most tension. By keeping your fasteners shorter, you preserve the structural integrity of the lower half of the joist, which prevents the ‘spongy’ feeling people often complain about. This is one of the most important composite decking secrets for a lasting deck. If you find your boards are still shifting, focus on the framing move that stops deck boards from bouncing rather than reaching for a longer screw.
Pre-Drill Like Your Warranty Depends On It
Most modern deck screws claim to be ‘self-tapping,’ but in the world of high-density composites and pressure-treated southern yellow pine, that is often a marketing myth. Pre-drilling is the only way to ensure the wood fibers are actually removed rather than just pushed aside. Use a tapered drill bit that matches the profile of your screw. This creates a clean channel for the screw shaft while allowing the threads to engage the wood safely. I always use the jig i use for consistent deck screw depth to ensure that every pilot hole is uniform. This prevents the screw head from mushrooming the composite surface, which is a common eyesore.
Seal the Entry Point to Stop Internal Rot
Every screw hole is a potential straw that sucks water into the heart of the timber. Even if you use the joist tape secret for doubling your decks life, the screw still has to pierce that tape. To add an extra layer of defense, I’ve started a habit where I hit the tops of the joists with a quick coat of black exterior-grade paint or a specialized sealer before the boards go down. This is why you should paint your deck joists black under composite—it hides the light-colored wood in the gaps and adds a chemical barrier against moisture at the most vulnerable point. When you combine this with the string line trick for leveling deck joists before decking, you ensure that water doesn’t pool around the screw heads in the first place. If you are building something more vertical, like pergola designs that turn your garden into a sanctuary, these same rules for pre-drilling and fastener length apply to your rafters to prevent unsightly end-grain checking.
The Hidden Fastener Trap That Ruins Wide Boards
Pros often push hidden fasteners because they look sleek, but for wider profiles, they can be a nightmare. I’ve seen beautiful decks turn into wavy messes because the clips couldn’t handle the natural leverage and torque of a 6-inch or 8-inch board. This is actually one of the main 7 reasons your composite decking looks like plastic and eventually acts like it, too. If you are working with wide-profile boards, you have to be careful; there is a documented reality regarding why hidden fasteners fail on wide profile boards. They simply don’t have the clamping power to keep those edges from cupping in the heat of July. 
Can You Really Stop Your Composite Boards From Growing in the Sun?
Composite isn’t wood; it is a thermodynamic sponge that expands and contracts significantly more than most DIYers realize. I once saw an installation where the boards were pinned tight against the siding during a July afternoon. By February, the gaps were wide enough to lose a car key. If you don’t account for this movement, the force can actually buckle your boards or, worse, pull your rim joists away from the frame. This is why learning how to stop your composite deck boards from expanding into your siding is a non-negotiable step in the planning phase.
The Ledger Error That Turns a Deck Into a Giant Lever
Most homeowners worry about the posts sinking, but the real structural danger is often at the house. I have seen countless DIY jobs skip the 1/2-inch air gap or fail to use a proper Z-flashing. This is the ledger board error that causes house leaks and, eventually, total structural collapse. According to the North American Deck and Railing Association (NADRA), over 90% of deck collapses are related to ledger failure. If you are building over an old frame, always perform the ice pick test for checking joist strength on older decks before you spend a dime on new decking. You might find that why pressure-treated wood still rots under joist tape is due to moisture trapped behind that ledger where no tape can reach. Have you ever fallen into this trap or noticed your boards shifting more than they should? Let me know in the comments below.
The Tool That Actually Makes You a Better Builder
I spent years struggling with traditional spirit levels and physical strings, only to realize I was fighting a losing battle against gravity and tired eyes. If you want to achieve pro-level results without the professional price tag, you need to invest in a self-leveling rotary laser. I personally swear by the level and laser method for setting pergola heights alone because it eliminates the margin for human error when you are working solo. When I am setting posts for complex pergola designs that turn your garden into a sanctuary, a laser ensures my beams are dead-on across a twenty-foot span. It isn’t just about speed; it’s about the peace of mind that comes from knowing your structure isn’t fighting itself. Beyond the laser, my impact driver is my most used tool, but I have learned to back off the trigger. Over-torquing is the quickest way to ruin your hardware. I now use a dedicated torque setting to ensure I never snap a head off or strip a pilot hole.
How do I keep my outdoor space from aging prematurely?
Maintaining a deck isn’t about a once-a-year power wash; in fact, I’ll be the first to tell you that high-pressure water is the enemy of composite fibers. Instead, I rely on the vinegar and water mix that cleans composite better than chemicals. It’s gentle enough to preserve the UV-protective cap while being acidic enough to break down the pollen and organic matter that lead to mold. For the structural side, you should be performing a the structural vulnerability assessment for checking deck joist rot at least every two seasons. According to the Forest Products Laboratory’s Wood Handbook, wood-decay fungi thrive when moisture content stays above 20% for extended periods. By catching those damp spots early—especially around the post bases—you can apply a borate-based preservative and stop the rot in its tracks. 
Expect a Smarter Skeleton in the Coming Years
Looking ahead, the industry is moving toward ‘smart’ framing. We are already seeing composite decking trends shifting toward integrated sensors that can alert a homeowner to excessive joist deflection or moisture buildup behind the ledger. I predict that within the next five years, high-end deck design strategies will include built-in diagnostic tools as standard features. Until that becomes affordable, we have to rely on manual precision. Whether you are using the string line trick for perfectly plumb pergola beams or high-tech lasers, the goal is the same: eliminate the variables that lead to failure. If you want to ensure your current project lasts thirty years instead of ten, I strongly encourage you to stop what you are doing and perform a quick structural check. Use my guide on the structural vulnerability assessment to find the hidden weak points before they become expensive repairs.I stood there on my brand-new deck, coffee in hand, feeling like a master builder until I heard that first sickening ‘crack.’ It wasn’t the sound of the house settling; it was a three-inch screw splitting the heart of a joist I’d just spent three weekends installing. I used to think that bigger was always better—that a longer screw meant a tighter grip and a sturdier frame. I was dead wrong. That extra inch of steel became a high-speed wedge that turned my joist tops into kindling, inviting rot into the very core of my outdoor sanctuary. If you are planning to elevate your backyard this year, you need to hear why your choice of fastener can make or break your entire investment.
The Day My Over-Engineering Backfired
When I first started tinkering with deck design strategies, I assumed structural integrity was a game of brute force. I grabbed a box of three-inch deck screws for everything. I figured they’d bite deep and never let go. But here is the reality: those long fasteners create massive internal pressure. Pressure-treated lumber is often wet when it arrives, and as it dries, those oversized screws cause the grain to separate. Once that split starts, water hitches a ride down the screw shaft, bypassing the surface and rotting the joist from the inside out. This is a huge reason why your pressure-treated frame is pulling your composite apart before its time. Today, I’m going to show you why shorter, specialized fasteners are actually the ‘heavy lifters’ and how you can save your frame from a premature grave. [image]
Are You Accidentally Inviting Rot Into Your Frame?
It sounds like a stretch, doesn’t it? You’d think a piece of pressure-treated 2×10 could handle a bit of steel. However, experts at the American Wood Council emphasize that improper fastener sizing and spacing lead to wood shear and create moisture pockets that chemical treatments can’t always reach. I learned this the hard way when I had to pull up boards after only three years because my deck felt ‘soft.’ It turns out, I had created a series of vertical straws that sucked rainwater straight into the untreated center of the wood. This often explains why your composite deck feels spongy between joists even when the boards themselves look perfect. I eventually found the joist tape secret for doubling your decks life, but even the best tape can’t fix a joist that’s been split wide open from the start. I’ve since mastered the jig i use for consistent deck screw depth to ensure I never over-drive a fastener again. I remember the smell of the cedar and the pride of seeing everything lined up perfectly with my laser level, but that pride turned to anxiety when I saw the hairline fractures radiating from every screw head. It’s the kind of thing you don’t notice until the first winter thaw. Most folks focus on the safety and style of their railings, but if the skeleton is failing, the rest is just window dressing. Have you ever noticed your joists splitting right where you drove your screws? Tell me in the comments, because I bet I’m not the only one who’s made this mistake. Now, let’s look at the physics of why this happens and what you should be using instead.
Kill the Wedge Effect Before It Kills Your Deck
Think of a screw not as a simple pin, but as a tiny, threaded axe. When you drive a fastener into the top of a joist, you are essentially hammering a wedge into the wood’s cellular structure. If the wood is too dry, it shatters; if it is too wet, it compresses and then splits as it seasons. This mechanical stress is the primary reason why your pressure-treated frame is pulling your composite apart. To avoid this, you need to transition from a ‘brute force’ mindset to a ‘precision’ mindset. I remember building a wrap-around porch for a client who insisted on ‘over-building’ everything. We initially used heavy-duty 3.5-inch screws for the decking, thinking it would be rock solid. By the time we finished the third course, I could see the ends of the joists weeping moisture from the fresh internal splits. We had to stop, sister every single damaged joist, and start over with the correct 2.5-inch stainless steel fasteners. That mistake cost us two days of labor and a few hundred dollars in wasted material.
Why 2.5 Inches is the Magic Number
For standard 5/4 or 1-inch composite boards, a 2.5-inch screw is the industry gold standard for a reason. It provides enough ‘bite’ to secure the board against lateral movement while leaving the bottom two-thirds of the joist intact. When you use longer screws, you are piercing the ‘neutral axis’ of the wood beam—the area that handles the most tension. By keeping your fasteners shorter, you preserve the structural integrity of the lower half of the joist, which prevents the ‘spongy’ feeling people often complain about. This is one of the most important composite decking secrets for a lasting deck. If you find your boards are still shifting, focus on the framing move that stops deck boards from bouncing rather than reaching for a longer screw.
Pre-Drill Like Your Warranty Depends On It
Most modern deck screws claim to be ‘self-tapping,’ but in the world of high-density composites and pressure-treated southern yellow pine, that is often a marketing myth. Pre-drilling is the only way to ensure the wood fibers are actually removed rather than just pushed aside. Use a tapered drill bit that matches the profile of your screw. This creates a clean channel for the screw shaft while allowing the threads to engage the wood safely. I always use the jig i use for consistent deck screw depth to ensure that every pilot hole is uniform. This prevents the screw head from mushrooming the composite surface, which is a common eyesore.
Seal the Entry Point to Stop Internal Rot
Every screw hole is a potential straw that sucks water into the heart of the timber. Even if you use the joist tape secret for doubling your decks life, the screw still has to pierce that tape. To add an extra layer of defense, I’ve started a habit where I hit the tops of the joists with a quick coat of black exterior-grade paint or a specialized sealer before the boards go down. This is why you should paint your deck joists black under composite—it hides the light-colored wood in the gaps and adds a chemical barrier against moisture at the most vulnerable point. When you combine this with the string line trick for leveling deck joists before decking, you ensure that water doesn’t pool around the screw heads in the first place. If you are building something more vertical, like pergola designs that turn your garden into a sanctuary, these same rules for pre-drilling and fastener length apply to your rafters to prevent unsightly end-grain checking.
The Hidden Fastener Trap That Ruins Wide Boards
Pros often push hidden fasteners because they look sleek, but for wider profiles, they can be a nightmare. I’ve seen beautiful decks turn into wavy messes because the clips couldn’t handle the natural leverage and torque of a 6-inch or 8-inch board. This is actually one of the main 7 reasons your composite decking looks like plastic and eventually acts like it, too. If you are working with wide-profile boards, you have to be careful; there is a documented reality regarding why hidden fasteners fail on wide profile boards. They simply don’t have the clamping power to keep those edges from cupping in the heat of July.
Can You Really Stop Your Composite Boards From Growing in the Sun?
Composite isn’t wood; it is a thermodynamic sponge that expands and contracts significantly more than most DIYers realize. I once saw an installation where the boards were pinned tight against the siding during a July afternoon. By February, the gaps were wide enough to lose a car key. If you don’t account for this movement, the force can actually buckle your boards or, worse, pull your rim joists away from the frame. This is why learning how to stop your composite deck boards from expanding into your siding is a non-negotiable step in the planning phase.
The Ledger Error That Turns a Deck Into a Giant Lever
Most homeowners worry about the posts sinking, but the real structural danger is often at the house. I have seen countless DIY jobs skip the 1/2-inch air gap or fail to use a proper Z-flashing. This is the ledger board error that causes house leaks and, eventually, total structural collapse. According to the North American Deck and Railing Association (NADRA), over 90% of deck collapses are related to ledger failure. If you are building over an old frame, always perform the ice pick test for checking joist strength on older decks before you spend a dime on new decking. You might find that why pressure-treated wood still rots under joist tape is due to moisture trapped behind that ledger where no tape can reach. Have you ever fallen into this trap or noticed your boards shifting more than they should? Let me know in the comments below.
The Tool That Actually Makes You a Better Builder
I spent years struggling with traditional spirit levels and physical strings, only to realize I was fighting a losing battle against gravity and tired eyes. If you want to achieve pro-level results without the professional price tag, you need to invest in a self-leveling rotary laser. I personally swear by the level and laser method for setting pergola heights alone because it eliminates the margin for human error when you are working solo. When I am setting posts for complex pergola designs that turn your garden into a sanctuary, a laser ensures my beams are dead-on across a twenty-foot span. It isn’t just about speed; it’s about the peace of mind that comes from knowing your structure isn’t fighting itself. Beyond the laser, my impact driver is my most used tool, but I have learned to back off the trigger. Over-torquing is the quickest way to ruin your hardware. I now use a dedicated torque setting to ensure I never snap a head off or strip a pilot hole.
How do I keep my outdoor space from aging prematurely?
Maintaining a deck isn’t about a once-a-year power wash; in fact, I’ll be the first to tell you that high-pressure water is the enemy of composite fibers. Instead, I rely on the vinegar and water mix that cleans composite better than chemicals. It’s gentle enough to preserve the UV-protective cap while being acidic enough to break down the pollen and organic matter that lead to mold. For the structural side, you should be performing a the structural vulnerability assessment for checking deck joist rot at least every two seasons. According to the Forest Products Laboratory’s Wood Handbook, wood-decay fungi thrive when moisture content stays above 20% for extended periods. By catching those damp spots early—especially around the post bases—you can apply a borate-based preservative and stop the rot in its tracks.
Expect a Smarter Skeleton in the Coming Years
Looking ahead, the industry is moving toward ‘smart’ framing. We are already seeing composite decking trends shifting toward integrated sensors that can alert a homeowner to excessive joist deflection or moisture buildup behind the ledger. I predict that within the next five years, high-end deck design strategies will include built-in diagnostic tools as standard features. Until that becomes affordable, we have to rely on manual precision. Whether you are using the string line trick for perfectly plumb pergola beams or high-tech lasers, the goal is the same: eliminate the variables that lead to failure. If you want to ensure your current project lasts thirty years instead of ten, I strongly encourage you to stop what you are doing and perform a quick structural check. Use my guide on the structural vulnerability assessment to find the hidden weak points before they become expensive repairs.
The One Detail That Separates Pros from Weekend Warriors
After decades of building, I’ve realized that the most skilled builders aren’t those with the biggest hammers, but those who respect the natural physics of wood and composite. My biggest lightbulb moment was realizing that a deck isn’t a static object; it’s a living structure that reacts to every rainstorm and heatwave. If you fight the movement of your materials, you will eventually lose. Whether you are implementing innovative deck design ideas that elevate your homes curb appeal or just building a simple platform, you must account for thermal expansion and grain tension. Another hard truth: those ‘self-drilling’ screws are often the enemy of a clean finish. Taking thirty extra minutes to pre-drill your entire field might feel tedious, but it is the difference between a surface that looks flawless and one riddled with ‘mushroomed’ composite and hairline cracks. Remember that your frame is the foundation of your investment; spending a little extra on joist tape and proper fasteners today will save you thousands in structural repairs a decade from now.
Gear I Never Step Onto a Job Site Without
To get professional results, you need a few non-negotiable tools that provide accuracy where human eyes and steady hands fail. I always start with the level and laser method for setting pergola heights alone, which is equally vital for ensuring a perfectly flat deck surface across large spans. I also rely on the composite decking secrets for a lasting deck found in manufacturer installation guides rather than relying on neighborhood myths. For my fasteners, I trust a high-quality impact driver with adjustable torque settings to prevent over-driving, paired with a specialized counter-sink bit. Finally, for maintenance, I skip the expensive hardware store chemicals and stick to simple, effective solutions that preserve the protective cap of the board.
Ready to Build Your Outdoor Legacy?
Building a deck is about more than just adding square footage; it is about creating a space where your family will gather for years to come. Don’t let a simple mistake like an oversized screw or a missed flashing detail ruin the sanctuary you are working so hard to create. By focusing on the small details now—like proper fastener length and structural moisture protection—you are ensuring your outdoor space remains safe, sturdy, and beautiful for the long haul. Your backyard has incredible potential, and with the right precision, your deck can stand the test of time. Did you realize that a longer screw could actually shorten your deck’s life, or have you already seen the ‘wedge effect’ in your own backyard? Let’s swap stories in the comments below!