
The sound of a snapping clip is something you never forget once you have heard it over your morning coffee. I remember a scorching July afternoon back in 2018; I was particularly proud of the sleek, screw-free finish on my new composite build. Then, out of nowhere—pop. A board near the stairs arched up like a cat’s back, snapping the plastic clip clean off. It was embarrassing, frustrating, and honestly, a bit of a safety hazard for my kids. I had fallen into the trap of thinking ‘hidden’ meant ‘indestructible,’ but the summer sun had other plans for my handiwork.
The Science of Why Your Boards Want to Escape
We often treat our decks like static furniture, but they are living, breathing structures—at least in a physics sense. When the temperature spikes from a cool 60-degree morning to a 95-degree afternoon, your boards are physically growing. If they don’t have anywhere to go, they will find a way, usually by shearing off the very hardware meant to hold them down. I learned the hard way that composite decking secrets for longevity usually start with respecting the sun. If you are seeing your boards lifting, you are likely dealing with thermal expansion that has nowhere to vent. It’s a common issue where deck boards start popping up at the ends because the fasteners simply can’t handle the lateral pressure. Today, I am going to walk you through exactly why this happens and the simple adjustments I made to keep my latest projects locked tight, no matter how high the mercury rises.
Are Hidden Fasteners Just a Maintenance Nightmare?
I hear this a lot from skeptical neighbors: ‘Why not just face-screw them and be done with it?’ It is a fair question. While it is true that hidden fasteners can be a maintenance nightmare if installed poorly, the problem usually isn’t the hardware—it’s the prep work. Early in my career, I ignored the expansion gap rule that stops boards from buckling, thinking a tight fit looked more professional. I was dead wrong. According to the North American Decking and Railing Association (NADRA), composite materials can expand by as much as 1/32 of an inch for every 10 degrees of temperature change. Over a 20-foot board, that is significant movement. Have you ever noticed your boards feeling loose or ‘clicking’ when you walk on them during a heatwave? That is the first sign your fasteners are losing the battle against the sun. I want to help you avoid the mistake I made of over-tightening during a cold snap, only to watch the deck self-destruct by July.
Stop the Snap Before the First Board Goes Down
Getting a deck to stay flat isn’t about brute force; it is about creating a system that allows for movement. Think of your deck as a series of railroad tracks. If the tracks are bolted down too tightly without gaps, the heat will make them warp and buckle. To prevent this, you have to start with the skeleton. I once worked on a coastal project where I skipped the extra layer of protection on the joists. By the next season, the moisture had penetrated the screw holes, causing the wood to swell and pop the hidden clips right out. Now, I never start a build without the flashing tape move that doubles the life of your joists. This simple barrier prevents the wood from gripping the fastener too tightly or rotting away, ensuring the foundation remains stable while the boards expand above it.
Master the Art of the Expansion Gap
Precision is your best friend when dealing with hidden fasteners. You aren’t just aiming for a pretty line; you are engineering a relief valve for thermal energy. When the sun hits those boards, they need to grow lengthwise. I’ve found that using the cardboard spacer trick for consistent board gaps works in a pinch, but for professional results, you should use dedicated plastic spacers that match your fastener’s requirements. If you are installing on a 40-degree morning, that gap needs to be wider than if you’re installing in the heat of a 90-degree afternoon. Failing to do this is exactly why your composite boards are crowning and how to fix it becomes a search term in your browser six months later. I remember a deck in Seattle where we tight-butted the boards in November; by July, the entire middle of the deck had humped up three inches like a miniature mountain range.
The Soap Trick for Stubborn Boards
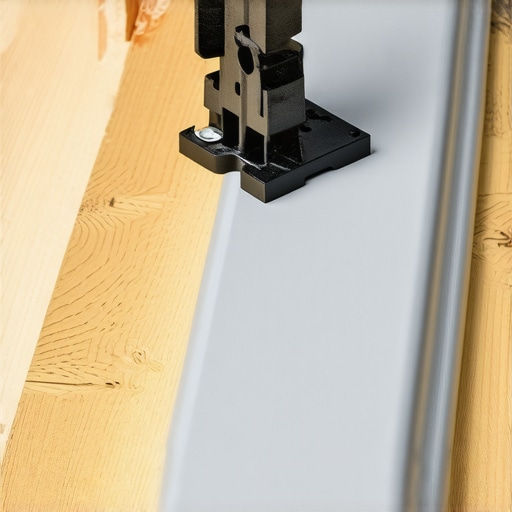
Sometimes, despite your best framing, a board just won’t sit flush against the previous row’s clips. Instead of beating it with a rubber mallet—which can scuff the expensive cap layer—try a bit of lubrication. I learned the soap slippage method for pulling composite boards tight from an old-timer who had been building since the first generation of Trex hit the shelves. A tiny drop of liquid dish soap on the groove of the board allows it to slide onto the hidden fastener without deforming the clip. It’s like greasing a wheel; it takes the friction out of the equation so the fastener can do its job of holding the board down, not just fighting to get it in place. This is especially vital when you are working solo and don’t have a second pair of hands to leverage a deck-straightening tool.
Frame the Perimeter for Maximum Stability
The ends of your boards are the most vulnerable points for ‘popping.’ Because composite is flexible, the very last fastener in the row has to handle all the tension of the board’s movement. To fix this, I always transition to a picture-frame border. This involves using the double joist trick for perfectly flush picture-frame borders. By adding an extra joist at the perimeter, you give yourself a solid wide surface to face-screw the border boards (using color-matched plugs) while the internal boards remain floating on their hidden clips. This locks the edges of the deck in place, preventing that unsightly ‘creeping’ effect where the middle boards start to slide past the rim joist over time. It creates a structural cage that keeps the expansion directed inward toward the gaps, rather than outward where it can shear off your hardware.
Everyone tells you that composite is a ‘set it and forget it’ product, but that is the biggest lie in the industry. In my years of building, I have seen $50,000 decks fail in less than a decade because the homeowner—and sometimes even the contractor—thought the plastic boards acted as a waterproof umbrella for the structure underneath. They don’t. In fact, composite can trap moisture against your joists longer than traditional wood would, creating a humid microclimate that accelerates rot. According to the ASTM D7032 standards, which govern the performance of wood-plastic composites, these materials are designed for surface durability, not for structural load-bearing or moisture protection of the frame. This is why I am so obsessive about the drainage move that saves your deck from mold; if you don’t plan for the water that slips through the gaps, your beautiful surface will eventually sit on a sponge of decaying wood.
The Maintenance-Free Lie That Ruins Subframes
Another nuance people miss is the heat retention and structural flexibility of the boards. I have had clients complain that their deck feels ‘spongy’ compared to their old pressure-treated one. A common mistake is using the standard 16-inch on-center joist spacing. While it meets minimum code, composite is far more flexible than timber. If you want a rock-solid feel, you have to tighten that spacing to 12 inches. Ignoring this is the structural reason your deck feels bouncy and how to fix it before it becomes a permanent nuisance. Also, keep in mind that not all composites are equal in the sun. If you live in a high-heat area, you should know why capped polymer composite stays cooler than wood-plastic blends, which can become literal griddles for bare feet by mid-afternoon.
Why does your railing still wobble despite those heavy-duty bolts?
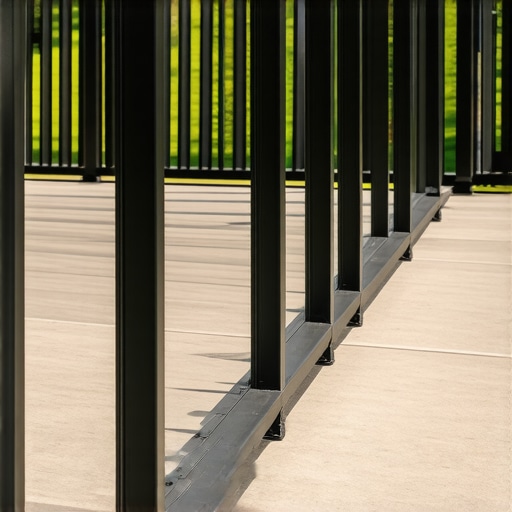
It is the most common ‘advanced’ complaint I get: the posts feel like they are anchored in Jell-O. Most DIYers think the solution is just more bolts, but the issue is usually the lack of internal blocking. You are asking a 4×4 post to resist several hundred pounds of lateral pressure at the top. Without solid wood blocking tied into at least two joists, the rim joist simply twists. I always suggest checking the complete guide to choosing railing systems for safety style to see how different materials interact with your frame. For a truly professional finish, I use the hidden bracket trick for perfectly rigid railing posts, which transfers the load away from the fasteners and into the deck’s primary skeleton.
Pergolas Need More Than Just Pretty Rafters
When you move from the floor to the overhead structures, the stakes get higher. I’ve seen gorgeous pergolas start to lean within two seasons because the builder treated composite or vinyl wraps like structural timber. They aren’t. You are building a sail that catches the wind. One of my biggest ‘oops’ moments early on was using standard pressure-treated pine for the internal rafters of a high-end pergola. I quickly realized why I stopped using pine for pergola rafters—the wood twists inside the sleeve, cracking the expensive composite exterior. Now, I always use the 15-degree cut that keeps water off your pergola beams to ensure the internal skeleton stays dry and true. Have you ever fallen into this trap of focusing so much on the pretty surface that you forgot the skeleton? Let me know in the comments.
Speaking of those comments, the most frequent follow-up question I get is about the ‘black box’ of deck planning. I’ve spent thousands of dollars on high-end miter saws and impact drivers, but the most important tool in my arsenal isn’t in my truck—it’s on my laptop. Before I cut a single piece of composite, I build the entire project digitally. There is a specific peace of mind that comes when you know exactly where every joist and beam lands. This is why you need a 3d model before buying a single deck board; it saves you from the ‘oops, I’m short two feet of railing’ panic at 4 PM on a Sunday. For the physical work, I’ve moved away from standard tape measures for my long runs and switched to a Bosch GLM laser measure. It’s about accuracy within 1/16 of an inch, which is vital when you’re trying to align a fifty-foot run of hidden fasteners. If your foundation is even slightly off, the cumulative error by the time you reach the house wall will be a nightmare to hide.
How do I keep my composite deck looking brand new for twenty years?
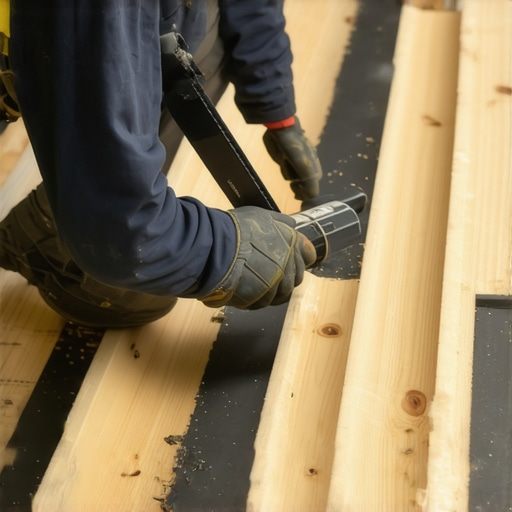
The biggest mistake I see homeowners make is ‘aggressive’ cleaning. They see a little green algae and reach for the heavy artillery. Stop right there. You need to know why you should never use bleach on your composite deck. Bleach is an oxidizer that eats away at the UV inhibitors in the plastic cap. According to technical documentation from Fiberon Decking, using harsh chemicals or a high-PSI stream can void your 25-year stain and fade warranty instantly. This is also why you should never use a pressure washer on composite; it’s too easy to ‘etch’ the surface, creating tiny grooves that actually trap more dirt in the future. I personally use a soft-bristle brush and a dedicated composite cleaner or even just Dawn dish soap and warm water. It’s slower, but it preserves the finish and ensures your composite decking secrets remain a point of pride rather than a source of regret.
Ditch the pressure washer before you ruin your warranty
Looking ahead, I predict we are about five years away from seeing ‘smart’ decking systems as the standard for high-end builds. We are already seeing low-voltage lighting integrated into every stair and rail, but the next step is structural monitoring. Imagine getting a notification on your phone because your tensioner secret for tight cable railings needs a quarter-turn adjustment after a heavy snow load. Until that tech is affordable, you have to be the sensor. I recommend performing the 15 minute deck inspection every homeowner should do at the start of every spring. Check the ledger, look for loose hardware, and ensure your drainage is clear. If you find a cable that’s gone limp, don’t panic—learn how to tension cable railings without specialized expensive tools using a simple pair of vise-grips and a wrench. My best advice? Go outside this weekend and do a quick check of your joists. Catching one small soft spot now saves you a $10,000 teardown later.
Hard Truths About What Actually Keeps Your Boards Level
Building a deck that stays flat is less about the brand of board you buy and more about the respect you show the physics of expansion. After twenty years in the dirt, I’ve realized that hidden fasteners aren’t a shortcut; they are a commitment to precision. I’ve seen too many people fall into the trap where hidden fasteners can be a maintenance nightmare simply because they didn’t account for the sun’s path. One of my biggest lightbulb moments was realizing that the deck isn’t just a floor—it’s a floating system. If you lock it down too tight, it will break. If you leave it too loose, it will rattle. Finding that ‘Goldilocks’ gap is the real composite decking secrets for a project that doesn’t groan every time you walk on it.
#IMAGE_PLACEHOLDER_FINAL#
My Personal Shortlist of Must-Have Gear
I don’t leave my driveway without a few specific items that make these jobs easier and more durable. First, I always advocate for 3D modeling; it is exactly why you need a 3d model before buying a single deck board—it eliminates the guesswork and waste. Second, use a high-quality flashing tape; it’s the heart of the flashing tape move that doubles the life of your joists. Finally, keep a dedicated composite-safe cleaner on hand. Skip the harsh chemicals and stick to products designed for capped polymers to avoid why you should never use bleach on your composite deck disasters that eat your finish.
Go Build Something That Lasts Decades
Your backyard is more than just square footage; it is where memories are made, and it deserves the stability of a well-engineered structure. By focusing on the structural details rather than just the surface color, you’re investing in years of hassle-free relaxation. Don’t be afraid to take the extra hour to double-check your joist spacing or your expansion gaps. In the world of composite decking trends, quality craftsmanship never goes out of style. If you ever hit a snag or need a second pair of eyes on a complex design, don’t hesitate to reach out and contact us for expert guidance. Have you ever seen your deck boards shift more than an inch between winter and summer? Let me know your thermal expansion horror stories in the comments below!