
I stood back, wiped the sweat from my brow, and realized my brand-new pergola looked like it was sliding down a mountain. It was my first big backyard project, and I had fallen for the oldest trap in the book: trusting my eyes instead of a level. My lawn looked flat enough, but the bubble on my level told a different story—one involving a four-inch discrepancy that made the whole structure look drunk. It was embarrassing. I had already spent hours researching pergola trends that I wanted to emulate, but I forgot the foundation. We’ve all been there, right? That moment of ‘oh no’ when the hardware is already bolted in. Today, I’m going to save you from that sinking feeling by showing you exactly how to cheat the slope and get a perfectly plumb structure every time. Have you ever stepped back from a project only to realize the ground was winning the battle? Let me know if your lawn has ever played tricks on you.
Your Lawn is Lying to You About Being Level
Most homeowners think a few inches of slope won’t matter until they try to install railing systems or overhead rafters. The truth is, even a subtle grade can compromise the entire build. Years ago, I made the amateur mistake of cutting all my posts to the same length before checking the ground elevation. I ended up with a wobbling mess that required a complete teardown. I finally learned the string line secret to establish a true baseline, which changed everything. By using a simple line level, you can account for the ‘roll’ of your yard without moving tons of dirt. This isn’t just about aesthetics; it’s about safety. According to the American Society of Civil Engineers, uneven load distribution is a primary factor in the structural failure of garden structures during high winds. You need that weight distributed evenly across your footings to ensure your pergola survives the next storm.
Is This Just a Quick Fix That Will Sag Next Year?
You might be thinking that shimming or adjusting post heights is just ‘faking it’ and that the ground will eventually settle and ruin your work. I had the same fear. I worried that my composite decking would eventually warp if the posts weren’t perfectly uniform. But the reality is that professional builders use the 5-shim trick to compensate for site imperfections all the time. It’s not about ignoring the slope; it’s about building a structure that stands independent of it. If you build it right, that pergola will stand straight for decades, regardless of how many hills and valleys are hiding in your grass. Now, let’s get into the actual math and the tools you’ll need to stop the tilt before it starts.
Why the Highest Point Dictates Your Entire Build
The most common mistake I see—and one I’ve paid for in back-breaking labor—is starting measurements from the ‘front’ or ‘back’ of the pergola based on where you want the entrance to be. You absolutely must identify the highest point of your yard’s slope first. If you don’t, you’ll likely end up with a post that needs to be buried three feet deep or, worse, a header that’s so low you have to duck to walk under it. I once built a 12×12 structure on a client’s property where I ignored this; by the time I got to the high side of the yard, my planned 8-foot clearance had shrunk to barely 6 feet. I spent the next four hours with a shovel and a lot of frustration re-digging footings. To avoid this, find your ‘benchmark’ post at the highest elevation and use it as your anchor for every other calculation. 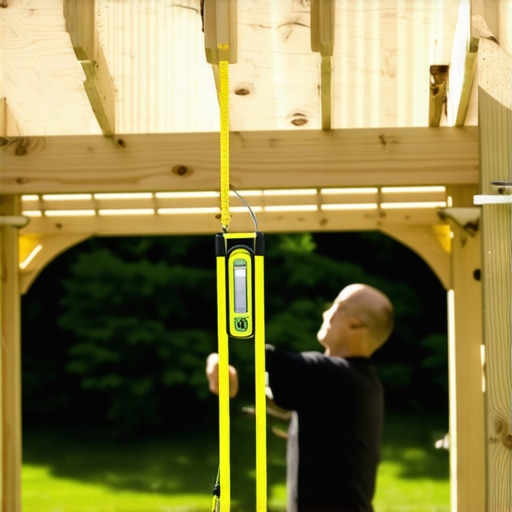
Pull the String Tight or Face a Leaning Disaster
Establishing a datum line is a non-negotiable step for any structure on a grade. You need to run a high-tension string from your benchmark post to the furthest corner, using a line level to ensure that string is perfectly horizontal. This string acts as a ‘virtual floor.’ Once this is locked in, you can apply the string line secret to measure the exact distance down to the ground or footing at each post location. If Post A is 96 inches from the string to the footing and Post B is 104 inches, you now know Post B needs to be exactly 8 inches longer. This method is the same one professionals use to maintain a consistent height for railing systems across multi-level decks or complex terrains.
The 3-4-5 Rule Keeps Your Pergola Square
A level top is useless if the footprint of your structure is a trapezoid. Before you bolt any posts into their brackets, you must ensure the frame is perfectly square. I swear by the 3-4-5 rule. It is simple geometry that never fails: measure three feet on one side, four feet on the perpendicular side, and the diagonal between those two points must be exactly five feet. If that diagonal is off by even half an inch, your rafters will never sit flush, creating gaps that invite water and eventual rot. This is especially vital when working with composite decking or high-end lumber where precision is visible to the naked eye.
Anchor the Posts to Defy the Slope
When dealing with a significant grade, your concrete footings will often sit at different heights. You should never just rest the post on the soil or a shim. You need to master how to anchor a pergola to a sloped concrete patio using adjustable standoff bases. These galvanized steel bases keep the wood 1 inch off the concrete, preventing ‘wicking’ rot, and allow for minor height adjustments during the final bolt-down. If you find a slight wobble persists as you assemble the upper frame, the $20 bracket that fixes wobbly railing posts fast can be repurposed to stiffen the connection between your post and the rim joist, ensuring the structure feels rock-solid.
Preventing the Dreaded Mid-Span Rafter Sag
Once the posts are plumb and the headers are level, the focus shifts to the rafters. If your span is too long for the lumber grade you chose, you’ll notice a subtle dip in the center after the first season of rain or snow. Understanding why your pergola rafters are sagging is key to a long-lasting build; usually, it is a lack of mid-span blocking or using a ‘decorative’ beam that isn’t actually rated for the load. While you are shoring up the structural integrity, take the time to learn how to hide the structural hardware. Using decorative caps or counter-sunk bolts transforms a DIY project into a professional-grade garden feature.Everyone told me that switching to composite decking meant I’d never have to think about my deck again. That is the biggest lie in the industry. While you aren’t staining it every year, the ‘set it and forget it’ mentality leads to one of the most expensive mistakes: ignoring thermal expansion. Unlike wood, which mostly shrinks and swells with moisture, composite expands and contracts significantly based on temperature. If you butt those boards tight against each other on a 70-degree day, they will have nowhere to go when the August sun hits 100 degrees. This is exactly why your composite decking is expanding more than the manual says. I’ve seen beautiful installs literally buckle and ‘hump’ off the joists because the DIYer didn’t leave a sufficient gap at the ends.
How Do You Prevent Your Hidden Fasteners From Popping?
The ‘oops’ factor here is the fastener choice. Many homeowners love the look of hidden clips, but the reason why your hidden fasteners are popping up in heat often comes down to the friction—or lack thereof—between the clip and the groove. If the board expands and the clip is too rigid, the screw can eventually shear or back out. It’s a nightmare to fix once the whole deck is down. The professional move is using specialized phantom clips or fasteners that allow for longitudinal movement. I also recommend applying the joist tape secret before the boards go down. It doesn’t just stop rot; it provides a slightly ‘grippier’ surface for the boards to sit on, reducing that annoying creaking sound when the plastic-wood hybrid moves. Another nuance people miss involves the railings. You’ll see builders nailing 4×4 posts to the outside of the rim joist. Please, for the sake of your family, don’t do this. There is a huge difference between ‘secure’ and ‘structural.’ Why your railing posts should be bolted, not nailed is a matter of simple physics; nails have almost zero withdrawal resistance against the leverage of a person leaning on a rail. According to the International Residential Code (IRC), a railing must withstand a 200-pound concentrated load at any point along the top. Nails simply won’t cut it. Use through-bolts with oversized washers to distribute that force. Have you ever stepped onto a deck and felt the railing ‘give’ just a half-inch? Have you ever fallen into this trap? Let me know in the comments. Finally, let’s talk about the ‘invisible’ enemy: moisture trapped under the boards. Even with composite decking trends moving toward capped polymers, the joists underneath are still wood. If you don’t account for the 2-degree slope trick for water runoff, you’re essentially building a giant tray that holds water against your house. Digging into composite decking secrets, the real pros know that longevity isn’t about the surface; it’s about the drainage and the air gap beneath. Don’t let a ‘maintenance-free’ promise blind you to the basic rules of carpentry.If you’re serious about the long-term health of your structure, you need to move past the basic hammer and screwdriver. I’ve gone through more cheap drill bits than I care to admit before I learned the secret to drilling through metal railing posts without breaking bits. It’s not just about the tool; it’s about heat management and using cobalt-tipped bits specifically designed for stainless steel. When you’re working on modern railing systems, that precision matters because a sloppy hole leads to a rattling baluster or, worse, a rust spot. I also never step onto a job site without a high-torque impact driver. While a standard drill is great for making holes, the impact driver’s rotational hammering action is what ensures those heavy-duty lag bolts actually seat properly into the ledger board without stripping the heads or snapping the shank.
How do I keep my deck looking brand new for twenty years?
Maintenance isn’t a weekend of suffering; it’s a series of small, smart checks. For wood, I use the simple spray test to see if your wood deck needs sealing every spring. If the water doesn’t bead, it’s time for a fresh coat. For those with composite, the game is different. You need to watch out for environmental factors like UV degradation. If you’ve inherited an older build, knowing how to restore the color of a faded composite deck can save you thousands in replacement costs. I recommend checking the American Wood Council’s DCA 6 – Prescriptive Residential Wood Deck Construction Guide, which emphasizes that annual inspections of the ledger connection are the single most important safety check you can perform.
Why the Next Decade of Decking Is Smarter Than You Think
We are moving away from just static structures. The trend for 2025 and beyond is integrated technology—think built-in sensors that alert you to moisture buildup under the boards or automated shade systems for pergolas. I’m already seeing a massive shift toward low-voltage lighting that syncs with your smart home. If you’ve struggled with hardware failure, you likely know why your deck lighting transformers keep blowing; it’s almost always a wattage mismatch or poor weatherproofing. The future is about creating a seamless transition from your living room to your lawn by using techniques like how to match your deck lighting to your landscape design. If you want to ensure your build is ready for these upgrades, I highly suggest you dive into composite decking secrets regarding joist spacing and airflow today. Try the spray test this weekend—it takes 30 seconds and will tell you exactly where your deck stands.
What 15 Years of Splinters and Sloped Lawns Taught Me
Building on a grade isn’t just about the math; it is about respecting the physics of the site. One thing I’ve learned is that the ‘Measure Twice’ rule is actually ‘Measure Four Times’ when gravity is involved. If you feel like you are over-calculating the tension on your string line, you are likely doing it just right. I used to rush the layout phase, but now I know that 80% of a successful build happens before the first post is even set. If your footings are perfect, the rest of the assembly feels like snapping LEGOs together. I’ve also realized that neighbors will judge the levelness of your roofline far more than the beauty of your wood grain, so keep that bubble centered at all costs. Finally, never underestimate the power of the sun—even the best composite decking secrets won’t save your feet from a dark-colored board on a 90-degree day.
The Gear That Saved My Sanity and My Spine
I don’t step onto a sloped job site without a few non-negotiable tools that separate the pros from the frustrated DIYers. First, throw away the cheap plastic levels and invest in a high-quality Stabila or Empire box beam level; the accuracy over a 12-foot span is the difference between a masterpiece and a headache. For the layout, I swear by braided mason’s line because it doesn’t stretch like cheap nylon, allowing you to maintain the string line secret for perfectly horizontal benchmarks. I also highly recommend downloading the American Wood Council’s DCA 6 guide. It is the ‘deck builder’s bible’ and takes all the guesswork out of span tables. And if you are working with modern hardware, having the secret to drilling through metal—cobalt bits and cutting fluid—will save you from snapping expensive tools mid-project.
#IMAGE_PLACEHOLDER_E#
Stop Planning and Start Digging
Building your own backyard retreat is about more than just following pergola trends; it is about the deep satisfaction of looking out your window and seeing a structure you conquered with your own two hands. Whether you are battling a steep hill or just a slightly annoying grade, you now have the professional methods to ensure your structure stays plumb, square, and safe for decades. Don’t let a little slope intimidate you into a boring patio. Grab your level, set your benchmark, and start creating the outdoor space you’ve always wanted. Your future self, relaxing under a perfectly level pergola, will thank you. What’s the biggest ‘sloped yard’ nightmare you’ve had to face during a build? Let me know in the comments below!