
I remember standing under my brand-new deck during a June thunderstorm, clutching a dry bag of charcoal, only to watch a steady stream of muddy water pour directly through the gaps in the boards and onto my feet. It was supposed to be my “outdoor sanctuary,” a place for storage and maybe a hammock. Instead, it was a soggy, mosquito-ridden mess. I had spent weeks obsessing over innovative deck design ideas, but I completely ignored the simple physics of gravity. I made the classic rookie mistake: I built the frame perfectly level because I thought “level” meant “high quality.” I couldn’t have been more wrong. Level is great for a pool table, but for a deck, level means puddles, rot, and a wasted lower patio. Today, I am going to show you how to avoid my five-thousand-dollar headache by mastering the pitch rule, ensuring your under-deck stays as dry as a desert bone.
I Built a Waterfall Instead of a Patio
The realization hit me when I saw the first signs of mold on my siding. Because I had not accounted for runoff, water was actually tracking back toward the house. I had committed the ledger board error that causes house leaks simply by being too precise with my spirit level. I thought I was being a pro, but I was actually bypassing the most important rule in outdoor construction: water always wins. If you do not give it a path, it will make its own. Usually, that path leads straight into your joists or your foundation. Have you ever walked under your deck only to get a face full of runoff? Drop a comment below; I want to hear your horror stories.
Does a tiny slope really make that much difference?
You might be thinking that your chairs will slide off or that the whole structure will look crooked to the neighbors. Trust me, I had those same fears. But a 1/4 inch drop for every foot of length is virtually invisible to the naked eye. You will not feel like you are walking on a ramp, but your under-deck dry space will certainly feel the difference. According to the American Society of Home Inspectors (ASHI), improper drainage is a leading cause of structural failure in wood-framed attachments. A slight slope isn’t just a “nice-to-have” feature; it is an insurance policy for your home’s equity and your family’s safety.
The Math That Saves Your Joists
To fix my mess, I had to go back and perform what I now call the garden hose test for proper deck water runoff. I watched in horror as the water sat motionless on the boards, soaking into the wood instead of shedding away. The Pitch Rule is simple: for every foot your deck extends away from the house, the outer edge should be 1/8 to 1/4 inch lower. It sounds like nothing, but it is the difference between a functional storage area and a rotted-out frame. I learned the hard way that skipping this step leads to “ponded water,” which is the fast track to a “spongy” feel underfoot. We are going to dive into exactly how to set this pitch without losing your mind or your level.
Why Your Spirit Level Might Be Lying to You
Start by mounting your ledger board. This is your zero-point. If you mess this up, you are building a swimming pool against your siding. I once tried to ‘eyeball’ the slope on a small landing, and two years later, I was dealing with the ledger board error that causes house leaks because the water pooled right at the house-to-deck transition. To do this right, use a laser level to establish a perfectly horizontal line on the house, then plan your drop from there. Think of it like a slide; the water needs a clear, downward path from the moment it hits the board.
Set the House Side High
When you install your joists into the hangers, you want the house-side to be the highest point of the structure. If you are using low-maintenance composite decking, keep in mind that these boards are denser and less forgiving than wood. They won’t ‘soak up’ your mistakes; they will simply hold the water in a puddle until it evaporates or rots your fasteners. I recommend using a 2×4 scrap as a temporary spacer to hold your joists at the correct angle while you nail them into the hangers. This ensures every single joist follows the exact same trajectory. 
The String Line Never Lies
Once your joists are in the hangers but not yet fastened to the outer beam, pull a tight string from the house to the rim joist. I swear by the string line method for perfectly level deck surfaces, but with a twist: I intentionally drop the far end of the string. Measure down from the string at the outer beam. For a 12-foot deck, if your string is level, your joists should sit about 1.5 to 2 inches below it at the far end. Use the string line trick for leveling deck joists before decking because it reveals every high and low spot that a 4-foot level might miss. This is where you prevent that ‘spongy’ feel often mentioned in why your composite boards feel spongy under heavy furniture.
Stop the Dam Effect at the Outer Beam
A common mistake is forgetting the ‘dam effect.’ If your outer beam sits higher than the joists, you’ve just built a reservoir. Water will run down the joists, hit the beam, and sit there. I learned this the hard way when I found a colony of carpenter ants living in the standing water behind a poorly placed rim joist. To avoid this, ensure your joists sit on top of the beam or that the beam is notched to allow water to pass through. If you are building a pergola over the deck, the same rule applies—never let a horizontal member trap water against a vertical post. Use the joist tape secret for doubling your decks life by applying butyl tape over the top of the beam and joists; this creates a mini-watershed that protects the wood grain even if the pitch is slightly off.
Test Your Boards for Wet Weather Grip
As you increase the pitch, you change how the surface feels when wet. Before committing to a specific board, I always perform the wet sand test for choosing the right composite texture. You want to make sure that a 1/4-inch slope doesn’t turn your deck into a skating rink during a spring thaw. If the boards feel slick, you might need a more aggressive wood-grain texture. This is especially vital if you’re planning a complex deck design with multiple levels, as each transition point becomes a potential drainage bottleneck or a slip hazard.
Everyone told me that switching to composite decking meant my maintenance days were over. That is the first big myth I had to unlearn. While the boards themselves do not rot, the wooden skeleton underneath still does—and often faster because composite traps heat and moisture differently than cedar. In my experience, the biggest ‘oops’ isn’t the decking material itself; it is the structural tug-of-war happening between the organic wood frame and the synthetic surface. If you do not account for this interaction, you will soon find that your pressure-treated frame is pulling your composite apart as the lumber seasons and shrinks over the first two years.
Why do my composite boards gap more in February than July?
It all comes down to thermal expansion. Most beginners assume wood and composite move the same way, but they are governed by different physical laws. Wood moves with moisture; composite moves with temperature. According to data from the North American Deck and Railing Association (NADRA), composite boards can expand or contract significantly based on sun exposure. If you butt those boards tight against your house in the peak of summer, come winter, you will be searching for how to stop composite deck boards from expanding into your siding or wondering why your gaps look like canyons. This is why I always use the joist tape secret for doubling your decks life; it provides a small, necessary buffer and prevents the joists from rotting while the composite ‘breathes’ and slides above them.The hidden nuance that most ‘weekend warriors’ miss involves the rail tension. I have seen countless DIYers crank down their cable rails until the end posts literally bow inward. This is a classic trap. When you are installing a railing system for safety and style, you have to remember that those posts act as lever arms. Over-tensioning can cause structural failure or lead to why cable railing tensioners fail as the wood posts dry out and shrink. I always recommend the blocking trick that stops railing post wobble to ensure the underlying frame can handle the literal tons of pressure a cable system exerts over its lifetime. And don’t even get me started on pergolas. The biggest mistake I see is the ‘direct-to-roof’ bolt. I have seen entire roof sections pulled up because most diy pergolas fail the uplift test in storms. You need a dedicated path for the wind to go, or a structural connection that does not turn your roof into a giant sail. Have you ever fallen into this trap of over-engineering one part of your deck while ignoring the simple physics of the other? Let me know in the comments; I want to know if I am the only one who learned the ‘roof sail’ lesson the hard way.I used to think my trusty impact driver was enough for everything, but once I switched to high-end boards, I realized that precision is the difference between a pro finish and a DIY disaster. I swear by the jig I use for consistent deck screw depth because nothing ruins the look of a sleek surface like a screw head that is buried too deep or, worse, sitting proud and ready to snag a toe. When you are dealing with expensive materials, you cannot afford to ‘feel’ the depth. You need mechanical consistency to ensure your low-maintenance composite decking stays structurally sound and visually perfect. If you have already finished the build, maintenance is your next hurdle. People buy composite because they want to be lazy, but ‘low maintenance’ does not mean ‘no maintenance.’ I always tell my friends to stick to the vinegar and water mix that cleans composite better than chemicals. It is cheap, it does not kill your grass, and it will not strip the protective cap. And for the love of your warranty, why you should never use a power washer on composite boards should be the first thing you learn. I have seen massive investments ruined in twenty minutes by someone trying to blast off pollen with 3000 PSI.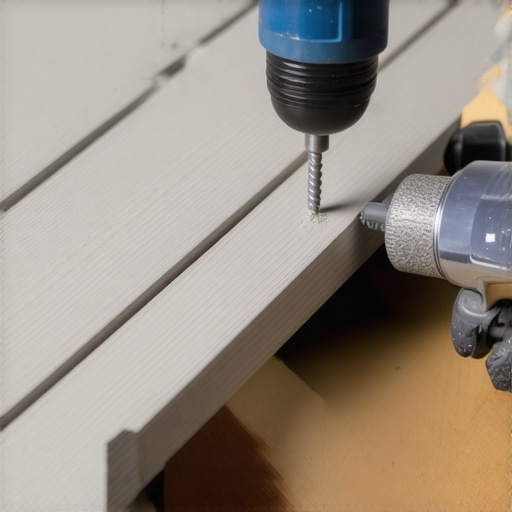
How can I keep my deck looking brand new for a decade?
The secret is not a magic spray; it is a biannual inspection. I spend thirty minutes every October and April looking at my joists. I use the structural vulnerability assessment for checking deck joist rot to catch issues before they become structural. If I see a scratch, I do not panic. I have mastered how to fix scuffs on dark composite boards with a heat gun, which carefully warms the plastic so you can buff out the mark. It is a game-changer for high-traffic areas. According to the North American Deck and Railing Association (NADRA), nearly 50% of the 50 million decks in the U.S. are past their safe lifespan—mostly due to neglected hardware. I predict the future of composite decking trends will involve even more heat-reflective technology and modular designs, making it easier to replace single boards without a total teardown. My challenge to you? Go outside right now and perform the garden hose test for proper deck water runoff. If that water is pooling against your house, you have got a weekend project ahead of you. To ensure you do not miss a single structural detail, always use the joist tape secret for doubling your decks life; it is the cheapest insurance policy you will ever buy for your home.
The Mistakes That Taught Me More Than Any Manual
One thing I wish someone had shouted at me from the start is that beauty is skin deep, but rot is structural. I used to focus entirely on the aesthetics of innovative deck design ideas, only to find that the frame was decaying underneath within five years. I also learned the hard way that stairs require extra care; using the hidden clip trick for no visible screw stairs not only looks better but prevents water from sitting in screw holes, which is the number one cause of premature tread failure. Another lightbulb moment came when I realized that dark composite boards actually show more dust than medium tones; I always recommend composite decking secrets like choosing variegated patterns to hide the inevitable footprints of life. Finally, never underestimate the winter; I have seen firsthand why your cable railing sagged after only one winter because the builder didn’t account for the massive tension forces that cold weather exerts on wood posts.
Tools and Tricks That Turned Me Into a Pro
If you want to move from ‘amateur’ to ‘expert,’ you need to stop guessing and start measuring. I never start a project now without applying the joist tape secret for doubling your decks life; it is the single most effective way to prevent the wooden skeleton from rotting under the waterproof surface. I also recommend keeping a simple garden hose nearby during the framing stage. Perform the garden hose test for proper deck water runoff before you lay down a single board to ensure your pitch is actually doing its job. For maintenance, forget the high-pressure chemicals; a simple vinegar solution is your best friend for keeping low-maintenance composite decking looking brand new. If you encounter a stubborn mark, knowing the soap and sponge fix for oil stains will save you from a full board replacement. #IMAGE_PLACEHOLDER_E#
Build a Sanctuary That Stands the Test of Time
Your outdoor space should be a place of relaxation, not a source of constant stress. By mastering the slope and drainage early on, you are building more than just a platform; you’re building a sanctuary that will serve your family for decades. Don’t be afraid to take that extra hour to check your levels, pull your string lines, and double-check your pitch. It is the difference between a lifetime of memories and a decade of frustrating repairs. A well-built deck is an investment in your home’s equity and your own peace of mind. Have you ever found standing water under your deck after a heavy storm? Let me know your drainage struggles or your biggest ‘aha!’ moments in the comments below!