
I stood there with a cold drink in my hand, staring at my “finished” project from the previous autumn, and felt my heart sink. It wasn’t just a little flake here and there; my deck looked like it was suffering from a catastrophic sunburn. Large, ugly patches of expensive semi-transparent stain were lifting right off the wood, exposing the gray, weathered timber underneath. [IMAGE_PLACEHOLDER] I had followed the directions on the back of the can—or so I thought—but here I was, only six months later, facing the prospect of doing the whole grueling job over again. It was a humbling moment that taught me a hard lesson: a deck’s finish is only as good as the physics you allow it to follow. Today, I am going to pull back the curtain on why this happens and how you can ensure your next staining job lasts for years, not weeks.
Stop Blaming the Paint Can and Look at Your Wood
We’ve all been there, standing in the aisle of the big-box store, convinced that the $80-a-gallon “lifetime” stain is the silver bullet. But here is the cold, hard truth: even the best product on the market will fail if your wood isn’t ready to receive it. My biggest mistake early on was impatience. I washed the deck on Friday and started staining on Saturday morning because it “looked dry.” I didn’t realize that the internal moisture was still trapped deep in the grain, creating a barrier that the oil simply couldn’t penetrate. If you are tired of the constant upkeep, you might even be considering switching to composite decking secrets for longevity, but for those of us who love the look of real wood, we have to get the prep right.
Is professional-grade stain actually worth the extra money?
You might be skeptical. Is there really a difference between the stuff the pros use and the DIY cans? The answer is a resounding yes, but only if the substrate is prepared. Before you even think about opening a can, you need to perform the garden hose test for proper deck water runoff. If water beads up, your stain won’t soak in; it is that simple. According to researchers at the Forest Products Laboratory, wood surfaces that have been weathered for more than two weeks without protection can lose significant structural integrity at the cellular level, making it nearly impossible for stains to bond correctly. This is why “new” wood often fails faster than old wood—it hasn’t been “opened up” yet.
I want to hear from you—have you ever spent a whole weekend staining only to see it peel by the next season? It’s a frustrating cycle, but one we can break together. Beyond the aesthetics, keeping that seal intact is vital for safety, so don’t forget to periodically learn how to test your deck for structural fatigue while you’re down there inspecting the boards. We are also going to look at common structural issues, like the ledger board error that causes house leaks, because a pretty stain won’t save a rotting frame. Let’s get into the nitty-gritty of why your deck is rejecting its coat.
Strip the Surface to the Raw Grain
Before you even touch a brush, you have to get rid of the ‘dead’ wood. Those grey, weathered fibers on the surface are essentially tiny sponges that have lost their structural integrity; if you stain over them, the stain is only bonding to dust. I learned this the hard way on a hot July afternoon when I tried to ‘save time’ by skipping the chemical cleaner. I thought a quick blast with a garden hose was enough. By September, the finish was literally blowing away in the wind. You need a dedicated wood cleaner—usually something with sodium percarbonate—to break down the lignin and lift the dirt. While you are down there scrubbing, it is the perfect time to check your substructure; for instance, you might want to see if the deck joist tape test reveals any hidden rot on your framing before you commit to the aesthetic finish.
Why 80-Grit is the Magic Number for Sanding
Once the wood is clean and bone-dry, you need to scuff it. Many DIYers make the mistake of using a fine-grit sandpaper (like 120 or 150) because they want the deck to feel smooth like a dining room table. Don’t do it. High grits actually polish the wood fibers, closing the pores and preventing the stain from soaking in. I use 60 to 80 grit. It’s aggressive enough to remove the ‘mill scale’—that shiny layer on new lumber—but open enough to let the oil dive deep. If you are dealing with a larger project, perhaps one utilizing the staggered joist trick for ultra long deck spans, renting a commercial floor sander will save your knees and your sanity. Sanding ensures every board is uniform, which is the only way to avoid those annoying splotches where one board looks dark and the next looks translucent.
Drive the Oil Home with Back-Brushing
If you use a sprayer or a roller, you are only doing half the job. The real secret to a five-year finish is back-brushing. I remember one specific job where I used a high-end pump sprayer and felt like a genius because I finished the floor in forty minutes. Two days later, it looked like a leopard print. The oil had puddled in the low spots and barely touched the high spots. Now, I always follow the sprayer with a thick, natural-bristle brush, physically pushing the liquid into the grain. It is exhausting work, but it creates a mechanical bond that a simple spray-on application can’t match. 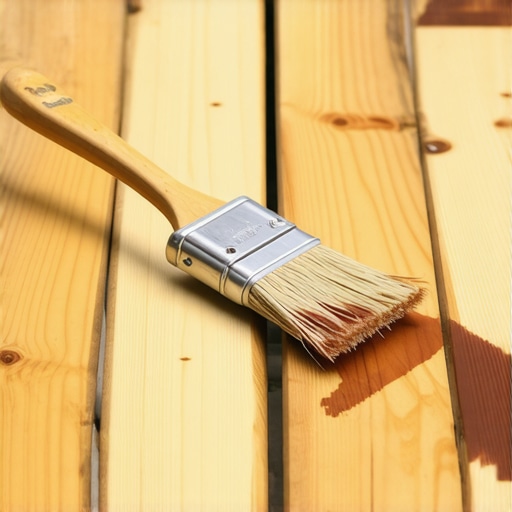
Work One Board at a Time from End to End
The biggest enemy of a beautiful deck is the ‘lap mark.’ This happens when you stain half a board, let it dry for a few minutes while you move your ladder, and then overlap it with fresh stain. The overlap creates a double-dark line that is impossible to remove. You have to commit to the full length of the board. Think of it like a marathon—once you start a plank, you don’t stop until you hit the house or the rim joist. If your deck design is complex, perhaps involving the perfect railing system for every deck, be sure to tape off your posts and balusters before you start. There is nothing more frustrating than getting a beautiful mahogany stain on a clean white railing post. If you’ve spent time perfecting your framing, maybe even using the jig I use for consistent deck screw depth, don’t ruin that precision with a sloppy, rushed stain application. If you find your boards are bouncing while you work, it might be time to learn how to fix the bounce in your over-spanned deck joists before the final seal goes down.
The Lie of Maintenance-Free Decking
Many homeowners throw their hands up in frustration after a wood-staining disaster and sprint toward the nearest supplier of synthetic boards. They believe the marketing that says these materials are ‘set and forget.’ In my experience, this is the biggest trap in modern home improvement. While you won’t be out there with a brush every two years, composite and PVC come with a different, more complex set of physics. If you don’t account for the thermal expansion coefficients, your beautiful investment will eventually buckle or ‘creep.’ I have seen $30,000 installations look like a rolling ocean because the builder didn’t understand composite decking secrets for longevity. It isn’t just about the boards; it is about how they interact with the skeleton underneath.
Why does my expensive composite deck feel like a trampoline?
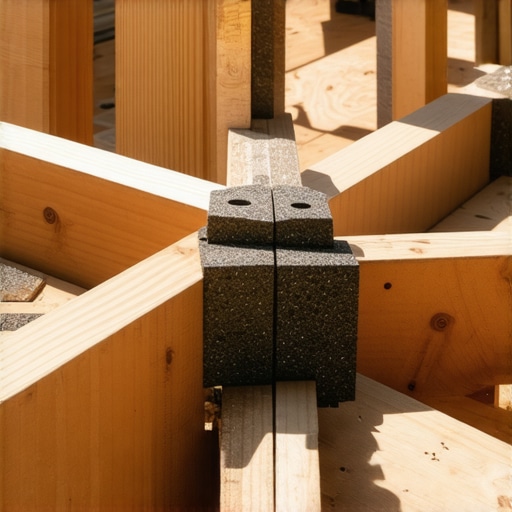
This is a question I get constantly from homeowners who just spent a fortune. Most of them think the boards are defective. The nuance here is joist spacing. While building codes often allow for 16 inches on center for joists, most high-end composite materials are significantly more flexible than traditional pressure-treated lumber. According to a technical study by the North American Deck and Railing Association (NADRA), substructure movement and improper joist spans are responsible for over 60% of ‘bouncy’ deck complaints. If you want that rock-solid feel, you have to go 12 inches on center. If you skip this, you will find out quickly why your composite deck feels like a trampoline and why the manufacturer might deny your warranty claim. Have you ever stepped on a brand-new deck only to feel that weird, spongy give? Let me know in the comments if you’ve dealt with a ‘trampoline’ deck.
The Expansion Joint Trap Most Pros Miss
Wood shrinks as it dries, but composite expands and contracts based on temperature. I once visited a site where the installer had butt the boards tight against the house siding in the middle of a cool October morning. By the following July, those boards had expanded so much they actually bowed upward and pushed the siding off the wall. This is a classic ‘oops’ factor. You must leave specific gaps at the ends of the boards to allow the material to ‘breathe’ thermally. If you are struggling with your layout, you might need to learn how to stop composite deck boards from expanding into your siding before the summer heat hits. Furthermore, the framing itself can be an enemy; I often see cases why your pressure-treated frame is pulling your composite apart because the wood frame is drying out and shrinking while the composite is expanding in the sun.
Don’t Ignore the Heat and Static Factors
Another nuance people overlook is the ‘barefoot test.’ Darker colors are trendy, but they act as massive heat sinks. On a 90-degree day, a dark grey or black board can reach temperatures exceeding 150 degrees—enough to cause second-degree burns. This is one reason why black composite decking burns your feet and why choosing the right color is more about thermodynamics than aesthetics. Finally, watch your fasteners. A very common mistake is using standard wood screws that don’t allow for this movement, leading to the 3-inch screw mistake that ruins composite joists by mushrooming the material and creating trip hazards. High-end builds require high-end attention to detail—don’t let a lack of nuance ruin your sanctuary.
Skip the Pressure Washer Before You Regret It
I’ve spent years watching homeowners ruin five-figure investments with a $200 pressure washer they bought on a whim. It’s painful to see. If you want to keep your composite looking fresh, you need to understand that high pressure is the ultimate enemy of the protective cap stock. Instead of blasting the grain and potentially voiding your warranty, I swear by a much gentler approach. I’ve found that the vinegar and water mix that cleans composite better than chemicals does more for the surface than any industrial detergent ever could, all without the risk of etching the plastic or killing your perimeter hostas. For those of you sticking with traditional wood, maintenance isn’t just about the aesthetics of the surface; it’s about the health of the skeleton. I make it a non-negotiable habit every spring to perform the 10-minute flashlight test for finding hidden ledger rot because the most dangerous failures always happen in the dark corners where the house meets the frame.
How do I keep my deck structure safe over the long haul?
Maintenance is an engineering mindset, not just a bucket and a scrub brush. The American Wood Council (AWC) specifies in their DCA 6 document—the gold standard for residential wood deck construction—that fastener corrosion is a leading cause of catastrophic structural failure, especially in newer ACQ-treated lumber that is highly corrosive to standard zinc. This is why I am absolutely obsessed with my precision tool kit. When I’m setting posts for a new build, I never rely on a simple bubble level and a prayer. I use the level and laser method for setting pergola heights alone because it’s the only way to ensure the beam won’t have a nagging 1-degree slope that ruins your water drainage. If you’re working on the floor boards, the jig I use for consistent deck screw depth is a total game changer. It prevents you from over-driving screws, which creates those small ‘volcanoes’ or craters that trap standing water and eventually cause rot or unsightly mushrooming in composite materials.

The Future of High-End Outdoor Living
As we look toward the next decade of outdoor design, I see the industry moving rapidly toward ‘Smart Decks.’ We’re already seeing composite decking trends for durable solutions for modern outdoor living that incorporate embedded sensors for moisture detection and integrated low-voltage lighting systems that adjust automatically based on ambient sunset levels. The era of the simple wooden platform is ending; we are now building sophisticated outdoor living rooms that require the same level of precision as a custom indoor kitchen. If you’re ready to level up your craftsmanship and leave the ‘basic builder’ title behind, I challenge you to try the staggered joist trick for ultra long deck spans on your next project. It adds incredible lateral rigidity and allows for those massive, open-concept designs that are dominating the 2025 architectural catalogs. Don’t just build a deck; build a legacy that stays square, solid, and silent for decades to come.
I stood there with a cold drink in my hand, staring at my “finished” project from the previous autumn, and felt my heart sink. It wasn’t just a little flake here and there; my deck looked like it was suffering from a catastrophic sunburn. Large, ugly patches of expensive semi-transparent stain were lifting right off the wood, exposing the gray, weathered timber underneath. [IMAGE_PLACEHOLDER] I had followed the directions on the back of the can—or so I thought—but here I was, only six months later, facing the prospect of doing the whole grueling job over again. It was a humbling moment that taught me a hard lesson: a deck’s finish is only as good as the physics you allow it to follow. Today, I am going to pull back the curtain on why this happens and how you can ensure your next staining job lasts for years, not weeks.
Stop Blaming the Paint Can and Look at Your Wood
We’ve all been there, standing in the aisle of the big-box store, convinced that the $80-a-gallon “lifetime” stain is the silver bullet. But here is the cold, hard truth: even the best product on the market will fail if your wood isn’t ready to receive it. My biggest mistake early on was impatience. I washed the deck on Friday and started staining on Saturday morning because it “looked dry.” I didn’t realize that the internal moisture was still trapped deep in the grain, creating a barrier that the oil simply couldn’t penetrate. If you are tired of the constant upkeep, you might even be considering switching to composite decking secrets for longevity, but for those of us who love the look of real wood, we have to get the prep right.
Is professional-grade stain actually worth the extra money?
You might be skeptical. Is there really a difference between the stuff the pros use and the DIY cans? The answer is a resounding yes, but only if the substrate is prepared. Before you even think about opening a can, you need to perform the garden hose test for proper deck water runoff. If water beads up, your stain won’t soak in; it is that simple. According to researchers at the Forest Products Laboratory, wood surfaces that have been weathered for more than two weeks without protection can lose significant structural integrity at the cellular level, making it nearly impossible for stains to bond correctly. This is why “new” wood often fails faster than old wood—it hasn’t been “opened up” yet.
I want to hear from you—have you ever spent a whole weekend staining only to see it peel by the next season? It’s a frustrating cycle, but one we can break together. Beyond the aesthetics, keeping that seal intact is vital for safety, so don’t forget to periodically learn how to test your deck for structural fatigue while you’re down there inspecting the boards. We are also going to look at common structural issues, like the ledger board error that causes house leaks, because a pretty stain won’t save a rotting frame. Let’s get into the nitty-gritty of why your deck is rejecting its coat.
Strip the Surface to the Raw Grain
Before you even touch a brush, you have to get rid of the ‘dead’ wood. Those grey, weathered fibers on the surface are essentially tiny sponges that have lost their structural integrity; if you stain over them, the stain is only bonding to dust. I learned this the hard way on a hot July afternoon when I tried to ‘save time’ by skipping the chemical cleaner. I thought a quick blast with a garden hose was enough. By September, the finish was literally blowing away in the wind. You need a dedicated wood cleaner—usually something with sodium percarbonate—to break down the lignin and lift the dirt. While you are down there scrubbing, it is the perfect time to check your substructure; for instance, you might want to see if the deck joist tape test reveals any hidden rot on your framing before you commit to the aesthetic finish.
Why 80-Grit is the Magic Number for Sanding
Once the wood is clean and bone-dry, you need to scuff it. Many DIYers make the mistake of using a fine-grit sandpaper (like 120 or 150) because they want the deck to feel smooth like a dining room table. Don’t do it. High grits actually polish the wood fibers, closing the pores and preventing the stain from soaking in. I use 60 to 80 grit. It’s aggressive enough to remove the ‘mill scale’—that shiny layer on new lumber—but open enough to let the oil dive deep. If you are dealing with a larger project, perhaps one utilizing the staggered joist trick for ultra long deck spans, renting a commercial floor sander will save your knees and your sanity. Sanding ensures every board is uniform, which is the only way to avoid those annoying splotches where one board looks dark and the next looks translucent.
Drive the Oil Home with Back-Brushing
If you use a sprayer or a roller, you are only doing half the job. The real secret to a five-year finish is back-brushing. I remember one specific job where I used a high-end pump sprayer and felt like a genius because I finished the floor in forty minutes. Two days later, it looked like a leopard print. The oil had puddled in the low spots and barely touched the high spots. Now, I always follow the sprayer with a thick, natural-bristle brush, physically pushing the liquid into the grain. It is exhausting work, but it creates a mechanical bond that a simple spray-on application can’t match.
Work One Board at a Time from End to End
The biggest enemy of a beautiful deck is the ‘lap mark.’ This happens when you stain half a board, let it dry for a few minutes while you move your ladder, and then overlap it with fresh stain. The overlap creates a double-dark line that is impossible to remove. You have to commit to the full length of the board. Think of it like a marathon—once you start a plank, you don’t stop until you hit the house or the rim joist. If your deck design is complex, perhaps involving the perfect railing system for every deck, be sure to tape off your posts and balusters before you start. There is nothing more frustrating than getting a beautiful mahogany stain on a clean white railing post. If you’ve spent time perfecting your framing, maybe even using the jig I use for consistent deck screw depth, don’t ruin that precision with a sloppy, rushed stain application. If you find your boards are bouncing while you work, it might be time to learn how to fix the bounce in your over-spanned deck joists before the final seal goes down.
The Lie of Maintenance-Free Decking
Many homeowners throw their hands up in frustration after a wood-staining disaster and sprint toward the nearest supplier of synthetic boards. They believe the marketing that says these materials are ‘set and forget.’ In my experience, this is the biggest trap in modern home improvement. While you won’t be out there with a brush every two years, composite and PVC come with a different, more complex set of physics. If you don’t account for the thermal expansion coefficients, your beautiful investment will eventually buckle or ‘creep.’ I have seen $30,000 installations look like a rolling ocean because the builder didn’t understand composite decking secrets for longevity. It isn’t just about the boards; it is about how they interact with the skeleton underneath.
Why does my expensive composite deck feel like a trampoline?
This is a question I get constantly from homeowners who just spent a fortune. Most of them think the boards are defective. The nuance here is joist spacing. While building codes often allow for 16 inches on center for joists, most high-end composite materials are significantly more flexible than traditional pressure-treated lumber. According to a technical study by the North American Deck and Railing Association (NADRA), substructure movement and improper joist spans are responsible for over 60% of ‘bouncy’ deck complaints. If you want that rock-solid feel, you have to go 12 inches on center. If you skip this, you will find out quickly why your composite deck feels like a trampoline and why the manufacturer might deny your warranty claim. Have you ever stepped on a brand-new deck only to feel that weird, spongy give? Let me know in the comments if you’ve dealt with a ‘trampoline’ deck.
The Expansion Joint Trap Most Pros Miss
Wood shrinks as it dries, but composite expands and contracts based on temperature. I once visited a site where the installer had butt the boards tight against the house siding in the middle of a cool October morning. By the following July, those boards had expanded so much they actually bowed upward and pushed the siding off the wall. This is a classic ‘oops’ factor. You must leave specific gaps at the ends of the boards to allow the material to ‘breathe’ thermally. If you are struggling with your layout, you might need to learn how to stop composite deck boards from expanding into your siding before the summer heat hits. Furthermore, the framing itself can be an enemy; I often see cases why your pressure-treated frame is pulling your composite apart because the wood frame is drying out and shrinking while the composite is expanding in the sun.
Don’t Ignore the Heat and Static Factors
Another nuance people overlook is the ‘barefoot test.’ Darker colors are trendy, but they act as massive heat sinks. On a 90-degree day, a dark grey or black board can reach temperatures exceeding 150 degrees—enough to cause second-degree burns. This is one reason why black composite decking burns your feet and why choosing the right color is more about thermodynamics than aesthetics. Finally, watch your fasteners. A very common mistake is using standard wood screws that don’t allow for this movement, leading to the 3-inch screw mistake that ruins composite joists by mushrooming the material and creating trip hazards. High-end builds require high-end attention to detail—don’t let a lack of nuance ruin your sanctuary.
Skip the Pressure Washer Before You Regret It
I’ve spent years watching homeowners ruin five-figure investments with a $200 pressure washer they bought on a whim. It’s painful to see. If you want to keep your composite looking fresh, you need to understand that high pressure is the ultimate enemy of the protective cap stock. Instead of blasting the grain and potentially voiding your warranty, I swear by a much gentler approach. I’ve found that the vinegar and water mix that cleans composite better than chemicals does more for the surface than any industrial detergent ever could, all without the risk of etching the plastic or killing your perimeter hostas. For those of you sticking with traditional wood, maintenance isn’t just about the aesthetics of the surface; it’s about the health of the skeleton. I make it a non-negotiable habit every spring to perform the 10-minute flashlight test for finding hidden ledger rot because the most dangerous failures always happen in the dark corners where the house meets the frame.
How do I keep my deck structure safe over the long haul?
Maintenance is an engineering mindset, not just a bucket and a scrub brush. The American Wood Council (AWC) specifies in their DCA 6 document—the gold standard for residential wood deck construction—that fastener corrosion is a leading cause of catastrophic structural failure, especially in newer ACQ-treated lumber that is highly corrosive to standard zinc. This is why I am absolutely obsessed with my precision tool kit. When I’m setting posts for a new build, I never rely on a simple bubble level and a prayer. I use the level and laser method for setting pergola heights alone because it’s the only way to ensure the beam won’t have a nagging 1-degree slope that ruins your water drainage. If you’re working on the floor boards, the jig I use for consistent deck screw depth is a total game changer. It prevents you from over-driving screws, which creates those small ‘volcanoes’ or craters that trap standing water and eventually cause rot or unsightly mushrooming in composite materials.
The Future of High-End Outdoor Living
As we look toward the next decade of outdoor design, I see the industry moving rapidly toward ‘Smart Decks.’ We’re already seeing composite decking trends for durable solutions for modern outdoor living that incorporate embedded sensors for moisture detection and integrated low-voltage lighting systems that adjust automatically based on ambient sunset levels. The era of the simple wooden platform is ending; we are now building sophisticated outdoor living rooms that require the same level of precision as a custom indoor kitchen. If you’re ready to level up your craftsmanship and leave the ‘basic builder’ title behind, I challenge you to try the staggered joist trick for ultra long deck spans on your next project. It adds incredible lateral rigidity and allows for those massive, open-concept designs that are dominating the 2025 architectural catalogs. Don’t just build a deck; build a legacy that stays square, solid, and silent for decades to come.
Hard Truths From a Decade of Deck Failures
I’ve learned that the environment always wins if you fight it. Instead of forcing a finish onto a wet deck, I’ve realized that humidity and wood moisture levels are the real bosses of the job site. One lightbulb moment for me was realizing that clear sealers are almost useless; they lack the pigment needed to block UV rays, which is what actually destroys the wood fibers. If you want protection, you need some color. Also, don’t ignore the framing—even if you’re installing low-maintenance composite decking, the wood skeleton underneath remains the foundation of your safety. If you skip the prep, you’re just painting a shelf life on your hard work.
Gear That Actually Saves Your Back
You don’t need a garage full of gadgets, but a few specific tools make the difference between a DIY experiment and a professional result. I never start a framing project without the string line trick for leveling deck joists, as it ensures the surface is perfectly flat before the stain even touches it. I also rely heavily on a moisture meter—don’t guess if the wood is dry; know it. For the actual application, a high-quality natural bristle brush on an extension pole is my go-to for back-brushing without destroying my knees. Finally, if you’re struggling with aesthetics, remember that choosing the right deck color for a white house or any specific siding requires testing samples in the actual afternoon sun before committing to the whole floor.
Build Your Backyard Legacy Today
At the end of the day, your deck is more than just a pile of lumber or plastic; it’s where your family gathers for Sunday barbecues and quiet morning coffees. Taking that extra day for prep or spending those few extra dollars on better fasteners ensures that your custom railing systems for safety and style won’t be wobbly in three seasons. You have the knowledge now to avoid catastrophic peeling and the “trampoline” feel of poorly built structures. It’s time to stop planning and start building something that lasts. What was the biggest “aha!” moment you had while working on your own deck design? Let me know in the comments below!