
Last summer, I was hosting a neighborhood barbecue, balancing a platter of slow-smoked ribs in one hand and a stack of napkins in the other, when the bottom step of my stairs decided to take a permanent vacation into the mud. I felt that sickening tilt, the ribs almost became a tribute to the grass gods, and my pride took a serious hit. It wasn’t just embarrassing; it was a wake-up call that my backyard was slowly reclaiming my hard work. I had spent weeks perfecting my innovative deck design, only to realize I had ignored the most important part: where the wood meets the weeds. If you have ever felt that slight, unnerving wobble when you step off your deck, you are not alone. Today, we are going to fix that sinking feeling once and for all by building a foundation that stays put, no matter how much it rains.
The Muddy Mess Your Grass Is Hiding
When I first built my stairs, I made the classic rookie mistake of thinking a few heavy patio stones would be enough to hold the weight. I was wrong. Soil is a living, moving thing that compacts and shifts with every season. In many regions, the soil expands when it freezes and turns into a soft sponge during the spring thaw. Without a proper landing, your stairs act like a slow-motion shovel, digging themselves deeper into the earth every time you walk on them. This is especially true if you have upgraded to heavier materials like modern composite decking, which adds significant weight compared to traditional cedar. I ignored a 15-minute deck inspection that could have caught the early signs of settlement, and I paid for it with a lopsided staircase. Have you noticed one side of your stairs sitting lower than the other after a heavy storm?
Is a full concrete landing actually worth the extra sweat?
You might be tempted to just throw more gravel under the stringers and call it a day, but that is a temporary band-aid on a structural wound. According to the International Association of Certified Home Inspectors, a landing is required at the bottom of a stairway to ensure a stable, level transition that prevents trip hazards. While it sounds like a lot of work, a solid landing is the only way to ensure your railing systems stay plumb and your stairs don’t pull away from the deck frame. I eventually learned that if you don’t account for the frost line depth for your base, nature will always win the tug-of-war. We are going to look at why a proper footing is the secret to a deck that feels solid underfoot, rather than like a bouncy castle. It is about more than just aesthetics; it is about keeping your guests upright and your structural integrity intact. Once you get the base right, you can even hide those concrete footers with river rock to keep the look clean and professional.
Dig Deep and Master the Slope
To prevent your stairs from becoming a mud-trap, you need to excavate at least 6 to 8 inches of topsoil. This isn’t just about making room for gravel; it is about removing the ‘sponge’ layer of organic matter that holds moisture. Once you have a clean pit, you must focus on drainage. I learned this the hard way last autumn when I ignored the slope on a small stone landing for a client’s side-stairs. Three months later, the bottom step was permanently submerged in a puddle of ice. I ended up spending two days re-excavating for free because I forgot the 2-degree slope trick for proper deck water runoff. Your landing should tilt slightly away from the deck, ensuring water moves toward the yard rather than pooling under the stringers. Think of it as a protective shield for the wood; if the base stays dry, the wood stays strong. 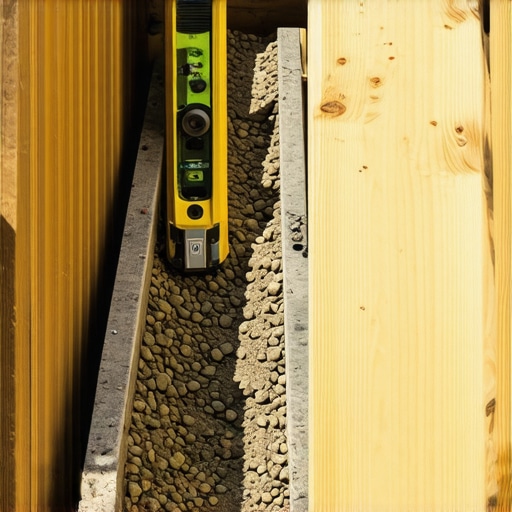
The Secret to Squeak-Free Steps
The connection between your stairs and the landing is where most DIY projects fail. If you just rest the wood on the ground, it will rot within five years. Instead, use a ‘kick plate’ or a solid pressure-treated 2×4 bolted to the concrete or landing pad. To ensure the steps don’t groan every time you walk on them, you need to employ the stringer notch hack for squeak-free deck stairs. This involves precision cutting where the stringer meets the landing, allowing for a tight, flush fit that eliminates the micro-movements that cause noise. It is like fitting a puzzle piece; if there is a gap, there is a rattle.
Armor Your Joists Against Rot
Even if you are using the most expensive modern composite decking, the frame underneath is likely pressure-treated lumber. Many people assume this wood is invincible, but why pressure treated wood still needs maintenance under composite is a lesson usually learned after ten years of silent decay. Before you attach your treads, apply a high-quality butyl tape to the top of the stringers. I call this the flashing tape move that doubles the life of your joists. It creates a waterproof seal that prevents water from sitting in the screw holes, which is the primary cause of internal rot in stair frames.
Why 6×6 Posts Change Everything
When it comes to the railing at the bottom of the stairs, don’t settle for flimsy 4×4 posts. They often wobble after a single season of kids swinging on them. I always recommend upgrading because why 6×6 posts look better than 4x4s on any outdoor structure goes beyond just aesthetics—it provides a massive increase in surface area for bolts to grab onto. To keep everything straight, use the simple tool for making sure your railing posts are plumb, like a dedicated post level, before you tighten your carriage bolts. Finally, reinforce the frame with the double rim joist secret for rock solid deck edges to ensure your entire staircase feels like a permanent part of the house, not an afterthought.Most homeowners are told that hidden fasteners are the absolute gold standard for a premium finish. I used to believe that too, until I spent a week ripping up a three-year-old high-end deck because one board in the middle had cracked. Here is the contrarian truth: why hidden fasteners can be a maintenance nightmare is a reality you only face when things go wrong. If you live in an area with extreme temperature swings, why your hidden fasteners are popping up in heat will become your primary concern. The clip systems don’t always allow for the natural ‘breathing’ that composite materials require. In fact, studies by the Forest Products Laboratory highlight that wood-plastic composites can expand significantly along their length, and if your clips are too rigid, the boards have nowhere to go but up.
The Thermal Expansion Trap Most DIYers Ignore
One of the biggest ‘oops’ factors I see is people treating composite boards like they are wood. They aren’t. While wood mostly expands in width, composite expands in length. I once saw a deck where the boards were installed tight against the house in winter; by July, the boards had buckled so hard they actually pulled the rim joist away from the house. You must follow the expansion gap rule that stops boards from buckling to avoid this structural catastrophe. This is especially vital if you are attempting innovative deck design features like picture-framing, where multiple angles meet. Without the right spacing, those beautiful miters will open up or crush against each other within a single season. 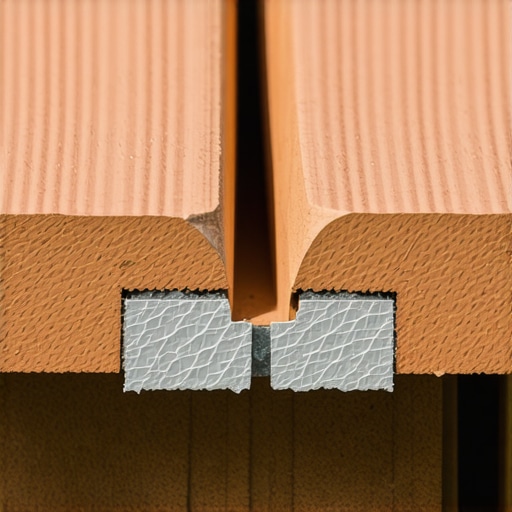
Is a freestanding pergola actually safer for your home’s structure?
Many people assume bolting a pergola to the house is the sturdiest option, but the ledger-free pergola: why freestanding is often better is a lesson in moisture management. Attaching a ledger board to your home’s siding creates a new opportunity for water to seep into your wall cavity. By building a freestanding structure, you protect your home’s envelope and gain the freedom to use the notched rafter secret for a pergola that never wobbles without worrying about the house’s sway.
Fix the Rattle Before It Ruins Your Evening
There is nothing that makes a deck feel ‘cheap’ faster than a rattling railing. Often, why your railing balusters are rattling and the 5-minute fix comes down to the material choice. Metal balusters in vinyl or wood rails often loosen as the materials expand at different rates. If you want a rock-solid feel, I always suggest the hidden bracket trick for perfectly rigid railing posts. It ensures that the most visible part of your deck feels as strong as the foundation we built earlier. Have you ever fallen into this trap of choosing aesthetics over movement? Let me know in the comments.Once the dust settles and the drill is finally back on its charger, you might think the job is done. But a deck is a living extension of your home, and if you treat it like a ‘set it and forget it’ appliance, it will eventually remind you of its mortality. I have found that the difference between a deck that looks tired in five years and one that stays pristine for twenty comes down to the gear you use and the habits you build. Personally, I stopped eyeballing my layouts a long time ago. Now, I won’t even pick up a saw until I have run the numbers through a digital rendering.
How do I keep my deck looking brand new for twenty years?
It starts with what you do not do. Most people reach for a bottle of bleach when they see a little grime, but why you should never use bleach on your composite deck is a lesson in chemistry; bleach can actually eat away at the protective cap of the boards. Instead, I stick to a gentle pH-neutral cleaner and a soft-bristle brush. I also make it a point to perform the 15-minute deck inspection every homeowner should do at the start of every spring. I am looking for loose fasteners, checking for why your post bases are rusting and the fix, and ensuring no debris is trapped in the gaps between boards.
Stop Guessing and Start Modeling
Before you even buy your first piece of lumber, you need to see the project in 3D. I tell every client that why you need a 3D model before buying a single deck board is not about the visuals—it is about reducing waste. A good model helps you realize that you can shift a joist by two inches and save hundreds in wasted composite offcuts. It also lets you play with innovative deck design ideas for 2025, like multi-level zones, without the risk of a structural error mid-build. According to the North American Deck and Railing Association (NADRA), over 40 million decks in the U.S. are over 20 years old and need significant repair; do not let yours join that statistic by skipping the digital planning phase. 
Smart Scaling with Capped Polymer
If I am looking at where the industry is heading, the trend is moving away from basic wood-plastic blends. I am seeing a massive shift toward high-performance materials because why capped polymer composite stays cooler than wood-plastic is the number one question I get from parents with kids and pets. Capped polymer does not have any wood fibers in the cap, making it nearly impervious to mold and scratches. If you are planning to scale your project or add a pergola trend-focused structure later, choose your base material now to match that future growth. You want composite decking secrets for longevity to be your guide from day one. **My challenge to you:** Before your next gathering, grab a roll of butyl tape and try the flashing tape move that doubles the life of your joists on any exposed framing—it is the single cheapest way to add a decade to your deck’s life.
The Hardest Lesson My Sinking Stairs Taught Me
After years of building and a few embarrassing failures, I have realized that the most expensive part of a deck isn’t the lumber—it is the time spent fixing mistakes you could have avoided. One lightbulb moment for me was realizing that your staircase is essentially a bridge between two worlds: the solid, unmoving house and the constantly shifting earth. If you do not account for that movement, something will eventually snap. I also learned that why hidden fasteners can be a maintenance nightmare is a lesson best learned through reading, not through ripping up your own boards. Finally, never underestimate the power of a proper plan; using a 3d model before buying a single deck board saved me from three extra trips to the lumber yard on my last project alone. Experience has taught me that the smallest details, like a piece of tape or a slightly larger post, are what separate a ‘backyard project’ from a professional masterpiece.
Gear That Saves Your Back and Your Budget
I do not go onto a job site without a few specific items that have earned my total trust. First, a dedicated post level is the only way to ensure your railing posts are plumb every single time. For structural longevity, I swear by high-quality butyl flashing tape; performing the flashing tape move that doubles the life of your joists is the best $30 you will ever spend. When it comes to the finish, I always recommend using the hidden bracket trick for perfectly rigid railing posts because it eliminates that annoying wobble that plagues most DIY builds. These aren’t just ‘extras’—they are the tools that ensure your hard work survives the elements for decades.
The Future of Your Backyard Is in Your Hands
Building a deck is about more than just square footage; it is about creating a space where memories are actually made without the distraction of a squeaky step or a wobbly rail. When you embrace innovative deck design, you are investing in your home’s value and your own peace of mind. Don’t be afraid to take that first shovel turn or make that first cut. As long as you follow the principles of moisture management and structural reinforcement, you will create an outdoor sanctuary that stands the test of time. Your journey toward a perfect composite decking masterpiece starts with that very first stable step. What part of your deck build are you most nervous about getting started on? Let me know in the comments below.