
I stood there with a handful of sawdust and a heart full of regret, looking at a three-hundred-dollar pile of ruined boards. My first attempt at fitting a deck around a jagged, rustic stone chimney was an absolute disaster. I’d tried to ‘eyeball it’ with a tape measure and a prayer, but the results were laughable—gaps so wide a squirrel could take up residence without brushing the sides. If you’ve ever felt that sinking feeling when your vision for an innovative deck design meets the gritty reality of a crooked stone wall, you aren’t alone. Today, I’m going to show you how to avoid my early-career blunders and get that professional, ‘grown-out-of-the-rock’ look that makes the neighbors stop and ask which high-end contractor you hired.
The Day My Jigsaw Met Its Match Against Fieldstone
When I first started out, I thought scribing was some dark art reserved for master cabinet makers working in mahogany. I made the rookie mistake of thinking I could just cut a straight line somewhere near the stone and hide the mess with a thick bead of color-matched caulk. Big mistake. I quickly realized that composite decking is a living, breathing material in its own right. It expands and contracts significantly—sometimes up to 1/32 of an inch for every 10 degrees of temperature change, according to technical data from the North American Decking and Railing Association (NADRA). That means a gap that looks ‘tolerable’ in the humid heat of July becomes a massive canyon by the time January’s frost hits. I learned the hard way that composite decking secrets aren’t just about how long the boards last; they’re about the geometry of the installation itself. We’re going to tackle the specific technique of how to scribe deck boards to an uneven stone foundation or a chimney using a simple compass and a bit of patience. This isn’t just about making things look pretty for the photos; it’s about the structural integrity of your layout and keeping organic debris from falling into those gaps and rotting out your joists. Have you ever tried to hide a bad cut with a piece of trim, only for the trim to pop off six months later because of board movement?
Is This Level of Precision Really Worth the Hassle?
You might be sitting there thinking, ‘It’s an outdoor deck, not a custom kitchen island. Does it really matter?’ But here’s the thing: stone chimneys are the natural centerpiece of the most innovative deck design ideas for 2025. A sloppy fit at the most visible point of your home screams ‘amateur hour’ and can actually ding your home’s curb appeal. When you nail the scribe, it looks like the stone was built right through the deck. It’s that ‘wow factor’ that distinguishes a project that looks DIY from one that looks like a custom architectural feature. In the steps that follow, I’m going to pull back the curtain on the compass-and-template method—a technique that cost me a lot of wasted lumber to master, but will save you a fortune in headaches. We’ll look at why a jigsaw isn’t always your best friend and how to account for the specific expansion gaps that stone requires. Trust me, once you see that first board slide perfectly against the stone with a hair-thin margin, you’ll never go back to ‘eyeballing it’ again.
I remember a humid Tuesday on a job site in the Blue Ridge Mountains where I was working with a particularly stubborn piece of dark walnut composite. I had the board clamped down, trying to use a scrap piece of wood as a guide, and it slipped. I ended up with a gouge that looked like a lightning bolt. That was the day I went to the local hardware store, bought a simple school compass, and changed my workflow forever. To get this right, you have to treat your deck board like a piece of parchment and the stone like a stamp.
Bring the Stone to the Board with a Simple Compass
Before you even touch your compass, you need to ensure your deck frame is perfectly square using the 3-4-5 rule. If the frame is off, your scribed line will look slanted once you reach the other end of the stone. I once ignored a slight half-inch variance on a wrap-around porch, thinking I could fudge it at the chimney. By the time I reached the stone, the grain of my boards was running noticeably uphill. I had to rip out four rows of expensive material just to reset my baseline. When you are working with the latest composite decking trends, you are often dealing with boards that have a beautiful, embossed grain. You do not want to ruin that with a jagged, poorly planned cut.
Set Your Board Parallel to the Finish Line
Start by laying your board on top of the last installed row, but slide it tight against the stone foundation. Use clamps to lock it into place. If the board shifts even an eighth of an inch during the process, your scribe is toast. You want the board to be perfectly parallel to the house wall, not the stone. This ensures that once the board is cut and slid into its final position, it maintains the same spacing as the rest of the deck. I like to think of this as setting the stage; the compass is just the lead actor.
Trace the Profile with Zero Room for Error
Open your compass so the gap between the metal point and the pencil lead is just slightly wider than the largest gap between your board and the stone. This is the crucial part: keep the compass perfectly perpendicular to the board at all times. If you tilt the tool, the line will wander and your gap will vary. I tell my apprentices it is like shaving; you have to follow the contours of the face, not try to change them. Follow every bump and dip in the fieldstone. 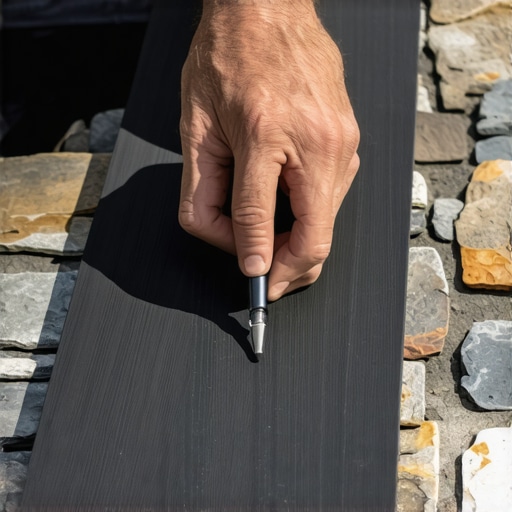
The Undercut Strategy That Saves Your Knuckles
Once your line is drawn, do not just cut straight down. Use a jigsaw with a fine-tooth blade and tilt the base to a 45-degree angle to create a back-cut. This ensures that only the very top edge of the board touches or sits near the stone, while the bottom of the board clears any hidden protrusions or mortar chunks. This is especially vital because why your composite decking is expanding more than the manual says is often due to heat trapping and restricted movement; a tight fit without an undercut can cause the board to buckle or groan as the sun hits it. While you are at it, do not forget to apply the joist tape secret to the joists underneath the stone-deck junction. This specific area often traps moisture and organic debris that leads to premature rot. If you end up with a small gap that is slightly larger than you intended, use the pvc glue trick mixed with a bit of color-matched sanding dust to bridge the visual transition for a seamless, architectural finish.
Once you have mastered the scribe against that stone chimney, you have conquered the most visible aesthetic hurdle. But do not let that victory blind you to the structural nuances that actually keep your deck safe and functional over the next two decades. Let us dig deeper into the elements that separate a professional-grade build from a weekend project that fails by year five.
Stop Believing the Low Maintenance Myth
The industry loves to sell the dream that you can maximize outdoor living with low maintenance composite decking and never pick up a tool again. In my experience, that is a recipe for disaster. While you are not staining every summer, composite boards are incredibly sensitive to the environment. I have seen hundreds of cases why your composite decking is warping at the joists simply because the homeowner ignored the debris buildup in the gaps. A study by the International Association of Certified Home Inspectors (InterNACHI) notes that railings and stair connections are the most frequent failure points in residential decks, often exacerbated by a lack of basic inspections. If you think your deck is ‘zero maintenance,’ you are likely missing the early signs of thermal stress or fastener fatigue. Have you ever fallen into this trap? Let me know in the comments.
Why Your Railing Posts Still Wobble After Six Months
The biggest mistake I see—even from seasoned contractors—is mounting railing posts only to the rim joist with a few through-bolts. It feels solid on day one, but after a season of people leaning on it, the wood fibers compress and the wobble begins. This is the ‘Oops’ factor of deck building. To get a rock-solid feel, you must use internal blocking and structural tension brackets. I always recommend using the 20 bracket that fixes wobbly railing posts fast during the initial frame-up. It ties the post directly into the joist network rather than just the perimeter board. When you are following the complete guide to choosing railing systems for safety and style, remember that the most beautiful cable or glass system is worthless if the posts move when a guest grabs the handrail. 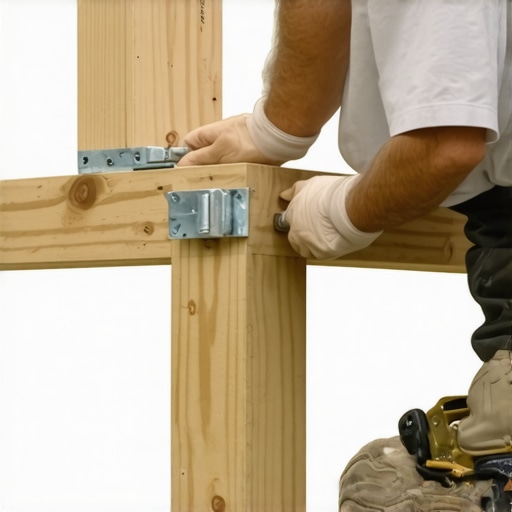
Why do your mitered corners always open up after a single season?
Everyone wants those clean, 45-degree mitered corners because they look like fine furniture. However, for high-traffic decks or areas with extreme temperature swings, I will tell you flat out: miters are a mistake. Composite decking expands linearly, meaning a twelve-foot board can grow or shrink by nearly half an inch. In a miter, those boards are pushing against each other at an angle, which eventually forces the joint apart or causes the boards to ‘mushroom’ at the tips. This is why mitered corners are a mistake for high traffic decks. Instead, I advocate for a ‘picture frame’ border with butt joints. It handles expansion much more gracefully and hides the raw cut ends of the boards. If your deck feels unstable while you are installing these intricate borders, you should investigate the structural reason your deck feels bouncy and how to fix it before you lay the final boards. High-end design is not just about the top layer; it is about the engineering hidden beneath the surface. Using composite decking secrets like proper joist spacing and airflow management will ensure that your beautiful scribe to that stone foundation remains perfect for years to come.I’ve spent years lugging around a heavy tool belt, but if you asked me what’s in my ’emergency kit,’ it’s not just a hammer and a pry bar. To truly scale your craft from basic DIY to high-end architectural work, you need precision instruments that don’t lie. For me, that’s the Stabila LAX 300 G cross-line laser. Why? Because the string line secret for perfectly level railing runs is great, but a laser doesn’t sag over a thirty-foot span. When I’m setting up a ledger-free pergola, I need to know that every post base is within a sixteenth of an inch before I even think about cutting rafters. If your foundation is off, the rest of the project is just an expensive exercise in frustration. Before you buy your first board, I highly recommend you spend time with digital tools too; why you need a 3d model before buying a single deck board isn’t just about the visual—it’s about catching structural clashes between your joists and your plumbing or HVAC vents before they become onsite nightmares.
How do I maintain my deck’s structural integrity over time?
People often ask me if they can just ‘set it and forget it’ once the last screw is in. The short answer is no. Even with composite decking trends moving toward ultra-durable caps, you still have an organic skeleton underneath. Every spring, you should perform the 15 minute deck inspection every homeowner should do. Look for signs of ‘white rot’ or copper-colored staining around your fasteners. According to the American Wood Council’s DCA6 technical guide, the interaction between chemicals in pressure-treated lumber and standard steel can lead to rapid galvanic corrosion. This is why I obsess over using high-grade stainless steel or double-dipped galvanized hardware. If you have a traditional wood section, use the simple spray test to see if your wood deck needs sealing. For your composite areas, remember that why you should never use bleach on your composite deck is because it can eat away at the UV inhibitors in the capping, leading to premature fading. Instead, a simple pH-neutral soap and a soft-bristle brush will keep those gaps clear and prevent moisture traps where how to stop moss from growing in the gaps of your deck becomes a recurring battle. 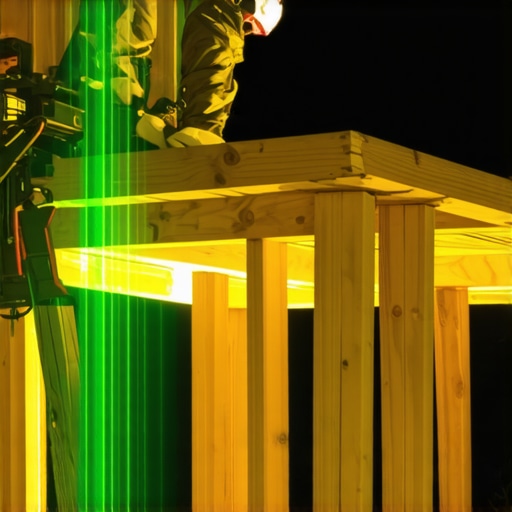 Looking ahead, I predict a massive shift toward cold-formed steel framing for residential decks. As composite boards become ‘forever’ materials, the industry is realizing that 20-year pressure-treated pine joists simply can’t keep up. We are moving toward ‘the 50-year deck,’ where every component—from the frame to the perfect railing system—is engineered for total climate resilience. My challenge to you: don’t just build for this summer. Go out there and install a set of the 20 bracket that fixes wobbly railing posts fast on your current deck today. It’s a small, cheap upgrade that will immediately change how solid your home feels underfoot.
Hard Lessons I Learned While Scribing Against Fieldstone
Reflecting on my early failures, I’ve realized that scribing isn’t just a physical task; it’s a mental shift in how you view precision. First, remember that your scribe is only as accurate as your initial layout; if you don’t use the 5-shim trick for leveling out-of-square deck frames, your boards will never align with the stone correctly. Second, never ignore the physics of water. Using the 2-degree slope trick for proper deck water runoff is essential to prevent rot where the wood meets the masonry. Lastly, always keep your compass perpendicular to the board, or you’ll find yourself making expensive firewood out of high-end composite.
Tools That Turn Your DIY Project Into Architectural Art
To move beyond basic construction, you need a kit that supports your ambition. I always keep a specialized contour gauge for those tight corners around custom railing systems. For structural elements, I rely on the hidden bracket hack for invisible pergola connections to ensure the hardware doesn’t distract from the aesthetic. These small investments are what help you win the resale value battle between wood decks and composite upgrades by creating a finish that looks intentional and high-end. #IMAGE_PLACEHOLDER_E#
Make Sure Your Vision Outlasts the Seasons
The beauty of an innovative deck design is in its longevity and the memories you’ll make on it. By taking the extra hour to scribe that board perfectly or to reinforce a wobbly post, you aren’t just building a platform; you’re crafting a centerpiece for your home. Don’t be afraid to take that first cut—the confidence comes with the doing. You’ve now got the techniques to ensure your deck looks like it grew right out of the landscape. Have you ever spent hours on a single cut only to realize you mirrored the line? Let me know your biggest ‘oops’ moment in the comments below!