
I will never forget the sound of my wedding ring hitting a joist and bouncing into the dark, unreachable void between my new composite deck and the house siding. It was a Saturday afternoon, and I had just finished installing the last of the boards. Instead of celebrating, I was on my hands and knees with a flashlight, cursing that awkward half-inch gap I thought was just a minor cosmetic quirk. It wasn’t just a ring-swallower; it was an eyesore that made the whole professional-grade project look unfinished.
Stop Staring at the Black Hole Between Your Deck and Siding
That gap is a notorious junk-catcher. Over the first season, mine filled up with pine needles, dead bees, and even a few stray Lego pieces. If you have been wondering how to clean up that transition without ruining your home’s drainage, you are in the right place. We are going to fix that visual disconnect today. I will walk you through the trim techniques and flashing secrets that make your deck look like it grew right out of the foundation. We will also make sure you do not repeat the ledger board error that causes house leaks, which I learned the hard way when I tried to plug the hole with way too much silicone.
Will Blocking the Gap Trap Moisture and Rot My Walls?
This is the big fear, right? You want it to look tight, but you do not want to trap water. It is a valid concern because moisture is a deck’s silent killer. Interestingly, the International Association of Certified Home Inspectors notes that the majority of deck failures occur at the ledger connection, often due to improper water diversion. We need to strike a balance between aesthetics and airflow. If you have ever noticed boards expanding into your siding, you know that the house and the deck are constantly in a slow-motion wrestling match. I have found that using a dedicated transition board or a frieze style trim piece can give you that flush look while still allowing the house to breathe. These composite decking secrets are what separate a DIY look from a custom builder finish. Have you ever dropped something valuable down that narrow abyss and spent an hour trying to fish it out with a coat hanger?
Install a Frieze Board to Mask the Opening
One of the cleanest ways to bridge the gap is by using a horizontal trim piece, often called a frieze board, that sits just above the deck surface but below the siding. This acts like a skirt for your house. I once spent an entire Sunday trying to shimmy a 12-foot board into place alone, only to realize I hadn’t accounted for the house being slightly out of square. Since then, I always use the 3-4-5 triangle move for squaring up a new deck frame before the first board ever touches the ledger. By mounting a matching composite board directly to the house framing behind the siding, you create a solid stop that the deck boards can butt up against without actually touching the house wall.
Don’t Let Your Flashing Become a Water Trap
You have to be surgical with your flashing here. If you just shove metal into the gap, you are creating a shelf for debris. You want a Z-bar flashing that goes behind the house wrap and over the ledger board. This is where most people make the deck-to-wall flashing mistake that causes kitchen rot. Think of it like shingles on a roof: everything must overlap so water always moves downward and outward. I once saw a deck where the homeowner installed the flashing under the deck boards but over the siding; it was basically a funnel for rain into their basement. 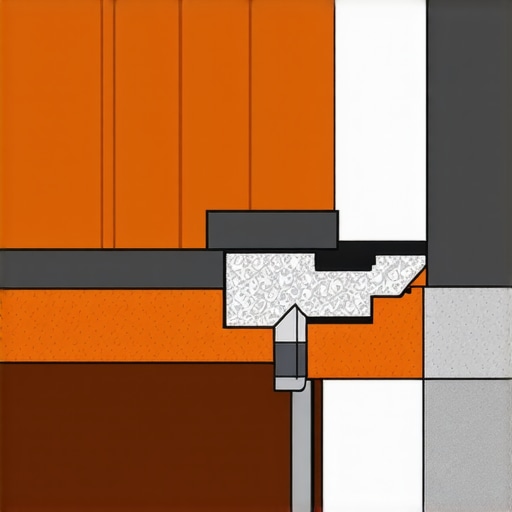
Leave a Gap for Board Expansion
Composite decking isn’t a static material; it is more like a living thing that grows and shrinks with the sun. If you jam your boards tight against the siding, they will eventually buckle or push your siding off the wall. You need to understand how to stop composite deck boards from expanding into your siding by leaving at least a 1/4-inch gap. I use the cardboard spacer trick for consistent board gaps to ensure that as the temperature swings from 40 to 90 degrees, the deck doesn’t start a fight with the house structure.
The Picture Frame Technique for a Pro Look
If you really want to hide that gap, stop running your boards parallel to the house and start using a picture-frame border. This involves running a perimeter board perpendicular to the main decking. It covers the cut ends of your boards and can be tucked slightly under the siding for a seamless transition. I remember the first time I tried this without a proper plan; I ended up with a massive overlap on one side and a gaping hole on the other. Now, I always use the jig i use for consistent deck screw depth to make sure the border looks uniform. When you learn how to match your railing to your house siding as well, the whole transition becomes a design feature rather than a problem you are trying to hide.
Why Your Composite Deck Feels Like a Trampoline
I used to think that the slightly spongy feeling underfoot was just the price you paid for low-maintenance materials. It is a common belief: people assume composite is naturally softer than wood. In my experience, however, that trampoline feel usually has nothing to do with the boards and everything to do with joist spacing and framing. If your joists are 16 inches on center, some composite brands will flex noticeably. I always recommend 12 inches on center for a rock-solid feel. You can learn more about why your composite deck feels like a trampoline and how to stiffen up that frame before you lay the first board.
Is Your Pressure-Treated Frame Actually Ruining Your Expensive Composite?
This is the hidden nuance most DIYers miss. You spend thousands on high-end boards, but you are likely attaching them to a wet pressure-treated frame. As that wood dries out over the first two years, it twists and shrinks. Because composite does not move at the same rate, the frame can actually pull the fasteners right through the boards. This is why your pressure-treated frame is pulling your composite apart. To avoid this, I have started using black joist tape as a buffer, though even then, you must be careful with how you seat your fasteners. 
The Hidden Trap of Hidden Fasteners
Everyone wants that clean, screw-free look. It is the gold standard for low-maintenance composite decking. But here is the contrarian truth: hidden fasteners are often the wrong choice for wide-profile boards or areas with extreme temperature swings. I have seen beautiful decks literally un-clip themselves during a heatwave because the boards expanded beyond the fastener’s grip. Understanding why hidden fasteners fail on wide profile boards can save you a massive headache three years down the line. According to the North American Deck and Railing Association (NADRA), structural failures often stem from fasteners that do not allow for the specific thermal expansion rates of synthetic materials.
Stop Making the 3-Inch Screw Mistake
One specific oops factor I see constantly is using standard 3-inch wood screws for composite trim or railings. Composite is much denser than cedar or pine. If you do not use specialized reverse-thread screws, you will end up with mushrooming—that ugly little ring of plastic that bulges up around the screw head. It is a small detail, but it is the 3-inch screw mistake that ruins composite joists and overall aesthetics. Even your railing is not safe; I have seen many homeowners wondering why their cable railing sagged after only one winter, only to find they used the wrong mounting hardware that could not handle the tension of the cold-contracted metal. Have you ever fallen into this trap? Let me know in the comments.
Put Down the Pressure Washer Before You Scar the Boards
I have seen more $20,000 decks ruined by a homeowner with a weekend rental and too much enthusiasm than by any storm. It is tempting to blast away that winter grime, but you must realize that why you should never use a power washer on composite boards comes down to the integrity of the protective cap. High pressure can create micro-fissures in the plastic, which then trap more dirt and mold than you started with. My personal maintenance kit is surprisingly low-tech: a soft-bristle deck brush and a simple vinegar and water mix that cleans composite better than chemicals. For the stubborn grease spots left over from the grill, I swear by the soap and sponge fix for oil stains on composite decking. It takes a bit more elbow grease, but your boards will keep their factory finish for decades rather than looking like frayed plastic after three seasons. 
How do I maintain my composite deck and pergola over the long haul?
Maintenance is less about scrubbing and more about regular inspections of the structural connections. According to the Simpson Strong-Tie Deck Connection and Fastening Guide, the choice of fastener coating is critical when dealing with the copper-rich chemicals in pressure-treated lumber, as the wrong pairing can lead to galvanic corrosion that eats through your supports in under five years. Every spring, I spend thirty minutes checking my post bases and joist hangers. If you notice your overhead structures swaying, it is often a sign that the hardware has loosened or the wood has shrunk. Understanding why your pergola shakes when the wind blows is the first step toward adding the right bracing or tension ties to keep it rigid. These small composite decking secrets regarding structural integrity ensure the deck stays safe long after the warranty on the boards expires.
Bracing for the Big Storms That Want to Level Your Pergola
If you are building a pergola as part of your deck design, do not treat it as a separate project. It needs to be integrated into the framing. I have learned that even the most beautiful structure can become a liability if it is just sitting on top of the deck boards. You should always use the 15-degree cut that keeps water off your pergola beams to prevent end-grain rot, which is the number one killer of wooden overheads. I recommend trying this specific cut on your next rafter project; it is an advanced move that drastically improves water shedding. When you combine these technical framing details with current pergola trends like integrated sunshades or hidden wiring, you are not just building a deck—you are building a permanent extension of your home.
The Shift Toward Intelligent Outdoor Spaces
Looking ahead, I see the industry moving away from just ‘pretty’ materials toward high-performance systems. We are already seeing composite manufacturers incorporate heat-reflective technology into their top-tier lines. In the next few years, I expect to see more automation in our outdoor spaces, from pergolas with rain-sensing louvers to built-in deck sensors that alert you to moisture buildup under the ledger. The goal is to move from reactive maintenance to proactive preservation. By using the right tools now, you are setting yourself up to enjoy that space without the ‘oh no’ moment I had with my wedding ring years ago.
Hard Lessons from My Decades on the Ledger Board
Building a deck is a marathon, not a sprint, and I have stumbled more than once over the years. One of the most surprising things I learned is that color choice isn’t just about aesthetics; it is about mid-summer comfort. Knowing why black composite decking burns your feet and how to fix it would have saved me a lot of “hot-footing” it to the grass during July BBQs. I also discovered that if you feel a slight give on the first step, you need to investigate why your deck stairs feel bouncy before the wood starts to fatigue. Speaking of safety, every homeowner should learn how to test your deck for structural fatigue every few seasons to ensure the hidden hardware is still doing its job. And for those of you wanting to add some architectural flair, the pencil and string hack for perfectly curved deck corners is the only way to get a smooth radius without losing your mind.
The Toolkit That Saves My Back and My Budget
You do not need a garage full of industrial machinery to achieve a high-end finish, but you do need a few “precision cheats” that the pros use. I never start a layout without mastering the secret to a perfectly square deck frame, which relies more on simple geometry than luck. When I am working on overhead structures, I always keep a few custom blocks on hand; the scrap wood spacer for perfectly uniform pergola slats keeps my overhead lines looking like they were set by a robot. Finally, for those finishing touches on your perimeter, using the simple jig for drilling straight baluster holes is a total lifesaver that prevents the “crooked tooth” look that ruins many DIY railing installs.
Build a Space That Outlasts the Seasons
At the end of the day, your deck is more than just a collection of boards and screws—it is the stage where your summer memories will play out. Whether you are following the latest composite decking trends or designing custom railing systems for safety and style, the effort you put into the details now pays dividends in decades of maintenance-free relaxation. Take your time, trust your measurements, and do not be afraid to tackle those tricky transitions one board at a time. What part of the deck-to-wall transition has been the biggest headache for your project so far? Let me know in the comments below!