
I remember hosting a backyard barbecue three years ago where everything that could go wrong with my deck layout actually did. I had just finished installing a beautiful new surface, yet the space felt like a crowded elevator the moment twelve people showed up. Guests were stumbling over the legs of bulky folding chairs, and I actually tripped over a stray plastic seat while carrying a tray of sliders. It was embarrassing, cramped, and frankly, a waste of a good view. That was my lightbulb moment: the floor of your deck is precious real estate, and traditional furniture is a notorious space hog. I realized that the answer wasn’t a bigger deck, but smarter seating.
Ditch the Clutter and Reclaim Your Deck Floor
Today, I’m going to let you in on the strategy that completely transformed my hosting experience: the built-in storage bench. When you integrate seating directly into your innovative deck design, you’re not just adding a place to sit; you’re structuralizing your organization. I’ve found that the hidden storage move for under-deck benches is the single most effective way to keep your outdoor area looking like a professional showroom rather than a storage shed. Early in my DIY journey, I made a massive mistake by building a bench with a perfectly flush lid that had no overhang. The first rainstorm turned my expensive cushions into a soggy, mildewed mess because I hadn’t accounted for basic drainage. I learned the hard way that a slight lip and a bit of weatherstripping are non-negotiable. Have you ever felt like your deck is shrinking the moment you bring out the patio set? You aren’t alone.
Are Built-In Benches Actually Worth Losing the Flexibility of Chairs?
It’s a fair question. Most people fear that permanent furniture will lock them into one layout forever. However, when you consider that a built-in bench can hide away everything from charcoal bags to kids’ toys, the trade-off is almost always a win. According to the American Society of Landscape Architects, ‘flexible seating and integrated storage’ consistently rank as top priorities for homeowners looking to maximize small outdoor footprints. By using a secret to making a small deck feel massive, you free up the center of the deck for movement while providing more seating capacity than individual chairs ever could. Plus, if you are working with low-maintenance composite decking, these benches can be built to last decades without the splintering or fading issues of old-school wood furniture. We’re about to dive into the exact framing secrets that ensure your bench is both rock-solid and bone-dry inside.
Build a Frame That Handles a Crowd
Your bench frame is the skeletal system of your seating area. If it’s weak, the whole structure will eventually fail. When I first started, I treated bench framing like a piece of indoor furniture, using light 2x4s and basic nails. Big mistake. On a humid July afternoon, three of my largest friends sat on that bench at once, and I heard a sickening crack. That’s when I learned that over-engineering is your best friend. You need to tie the bench structure directly into the deck’s joists. I always use the framing move that stops deck boards from bouncing by doubling up the blocking underneath where the bench walls sit. This creates a rock-solid anchor point that won’t shift when people sit down or stand up.
Kill the Bounce with Strategic Blocking
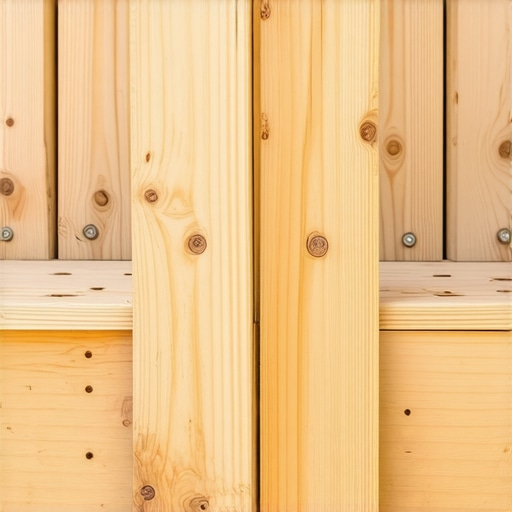
If you are using composite materials for your bench, remember that they are more flexible than natural wood. If your supports are spaced too far apart, you’ll find that why your composite deck feels spongy between joists becomes a daily annoyance. I recommend spacing your bench-seat supports every 12 inches instead of the standard 16. It feels like extra work, but it’s the difference between a bench that feels like a stone wall and one that feels like a trampoline. Think of it like adding extra rungs to a ladder; more contact points mean less stress on the individual boards.
Guide Water Away from Your Cushions
The biggest challenge with hidden storage is water management. Gravity is either your best friend or your worst enemy. To keep your charcoal and cushions from rotting, you must apply the 2-degree slope secret for dry under-deck storage to the floor of the bench itself. I didn’t do this on my first build, and I ended up with a literal aquarium of stagnant rainwater inside my bench by mid-August. Now, I always build the internal floor with a slight pitch toward the outside edge of the deck. Combine this with composite decking secrets like leaving a 1/8-inch gap at the back of the lid for airflow, and you’ll never have to worry about that musty, “old basement” smell when you open the lid.
Match Your Railing for a Professional Look
A built-in bench shouldn’t look like an afterthought; it should look like it grew out of the deck itself. One way I achieve this is by integrating the bench backrest directly into the railing system. By using the complete guide to choosing railing systems for safety and style, you can select balusters that match the rest of your deck perimeter. I once made the error of using wooden slats for a bench backrest while the rest of the deck had black aluminum railings. It looked like two different projects smashed together. When you use the hidden bracket trick for perfectly rigid railing posts to secure the back of the bench, you create a seamless, professional aesthetic that actually increases the resale value of your home.
I often hear contractors tell homeowners that composite decking is ‘zero maintenance.’ This is arguably the biggest lie in the outdoor living industry. While you won’t be spending your weekends sanding and staining every two years, synthetic materials come with their own set of high-stakes rules that, if ignored, lead to expensive failures. For example, if you think you can just blast away seasonal grime with a pressure washer, you’re in for a nasty surprise. I’ve seen beautiful, expensive boards permanently scarred because someone didn’t realize why you should never use a power washer on composite boards. In my experience, the vinegar and water mix that cleans composite better than chemicals is the only way to keep the finish looking factory-new without eating through the protective cap layer.
Your Composite Deck is Not a Set It and Forget It Project
The real ‘oops’ factor I see most often—and it’s a mistake that can cost thousands—is ignoring thermal expansion. Unlike natural lumber, which expands primarily with moisture, composite expands and contracts significantly with temperature changes. If you butt those boards tight against your house or a railing post, they will eventually buckle or, worse, put enough pressure on your siding to cause structural damage. I always share how to stop composite deck boards from expanding into your siding because I’ve seen boards literally pop out of their hidden fasteners during a July heatwave. This is why why your deck boards are popping up at the ends is rarely a fastener issue and almost always a spacing error. According to the North American Deck and Railing Association (NADRA), improper spacing for thermal movement remains one of the top three reasons for composite deck insurance claims.

Why do those expensive boards still warp despite the high price tag?
It usually comes down to the sub-structure and hardware choices. People spend $15,000 on high-end boards but try to save money by using the same old framing techniques meant for pressure-treated pine. If you use the wrong hardware, such as the 3-inch screw mistake that ruins composite joists, you’re essentially inviting moisture into the core of your frame. Even when building a shade structure, these nuances apply. If you notice a slight tilt in your new overhead feature, it’s often the structural reason your pergola is leaning, likely because you didn’t account for the increased weight of composite rafters compared to cedar. And don’t forget the ‘barefoot test’—why black composite decking burns your feet and how to fix it is a conversation you absolutely must have before committing to a dark, trendy color palette that becomes unusable in August.
Stop the Shake with Better Framing
Finally, let’s talk about that ‘rock-solid’ feel that separates a pro build from a DIY disaster. Most people focus on the style of the balusters, but the secret to a high-end feel is actually hidden inside the deck frame. I always use the blocking trick that stops railing post wobble to ensure the safety system doesn’t flex when a guest leans against it. A railing that moves feels cheap, no matter how much you paid for the materials. Have you ever fallen into this ‘zero maintenance’ trap and regretted a specific color or material choice once the sun came out? Let me know in the comments.
I’ve spent thousands on tools over the years, but only a handful have actually improved my builds rather than just cluttering my garage. If you want that high-end, architectural finish, you have to stop eyeballing your measurements. I learned this the hard way when I built a beautiful wrap-around deck and realized, only after the final board was down, that my screw lines were as wavy as a mountain road. Now, I never start a project without the jig I use for consistent deck screw depth. It ensures every fastener is perfectly countersunk, which is vital because high-end composite materials can mushroom around the screw head if you aren’t precise. For larger structures like an overhead shade, I’ve moved away from standard bubble levels. When I’m working solo, the level and laser method for setting pergola heights alone is the only way to ensure your beam heights are accurate within an eighth of an inch across a twenty-foot span.
How do I maintain my deck and railing over time?
Maintenance is where most homeowners lose their way, thinking they need harsh chemicals to fight off the elements. In reality, you probably have the best cleaning agent in your pantry right now. I always swear by the vinegar and water mix that cleans composite better than chemicals because it’s gentle enough not to strip the UV-resistant cap from your boards but strong enough to kill mold spores. Beyond cleaning, you need to be a bit of a detective. Once a year, I perform a ‘hardware audit.’ The American Wood Council (AWC) emphasizes in their DCA 6 guidelines that fastener compatibility is the single most important factor in preventing structural rot. I look for any signs of galvanic corrosion or loosening. If you find your posts are starting to sway, don’t just tighten the screws; use the simple tool for making sure your railing posts are plumb to recalibrate the entire section. Remember, composite decking secrets for longevity aren’t just about the boards; they’re about the integrity of the hidden hardware keeping everything together.

Looking toward the future, I predict we are going to see a massive shift toward fully integrated ‘smart decks.’ We are already seeing boards with built-in sensors to track moisture levels in the joists, and I suspect that within five years, automated cleaning systems—similar to lawn sprinklers but for your deck surface—will become a standard luxury feature. For now, the best thing you can do is stick to the basics. Avoid the temptation to take shortcuts; for instance, why you should never use a power washer on composite boards is a lesson you don’t want to learn on a $20,000 investment. Instead, focus on perfecting your layout with innovative deck design that accounts for the specific climate of your backyard. My challenge to you? Grab a dedicated deck jig for your next repair or expansion. Once you see the difference a calibrated tool makes in the visual alignment of your railing systems for safety and style, you’ll never go back to the ‘close enough’ method of building.
Hard-Won Truths from My Years on the Joists
If I could go back to that first shaky deck I built, I’d tell myself that beauty is only joist-deep. I’ve learned that ignoring thermal movement is a recipe for disaster; you absolutely must know how to stop composite deck boards from expanding into your siding or you’ll be ripping up expensive work by the next summer. Also, don’t let a trendy dark color palette fool you—I’ve seen too many families realize too late why black composite decking burns your feet and how to fix it before they can even host their first neighborhood lunch. Finally, remember that your frame is the silent hero of the story, so avoid the 3-inch screw mistake that ruins composite joists if you want your structure to survive the next decade without rot or sagging.
#IMAGE_PLACEHOLDER_E#
Gear That Actually Earns Its Spot in My Toolbox
I don’t believe in buying every gadget at the hardware store, but three things are non-negotiable for me now. First, the jig I use for consistent deck screw depth is the only way to get that high-end, clean look without wavy or protruding fastener lines. For anything vertical, like a shade structure, the level and laser method for setting pergola heights alone has saved my back and my sanity more times than I can count. And when it comes to seasonal upkeep, forget the pressure washer and stick to the vinegar and water mix that cleans composite better than chemicals to protect your investment’s finish and UV-resistant layer.
Build Something That Lasts for More Than One Season
Your outdoor space is an extension of your home’s soul and a place for memories. By focusing on these small but critical structural details, you aren’t just building a wooden platform; you’re creating a sanctuary. Whether you’re experimenting with innovative deck design for the first time or refining a lifelong DIY craft, the effort you put into the foundation will pay off every time you step outside. Have you ever had a lightbulb moment where a simple framing change fixed a massive headache? Let me know in the comments below!