
I stood back, wiped the sweat from my brow, and admired the new rafters I had just finished leveling for my latest project. The wood looked magnificent, and the architecture was spot on, but then I looked down. There they were: three chunky, industrial-gray concrete piers sticking out of the dirt like sore thumbs. It felt like wearing a tuxedo with muddy work boots. I realized then that no matter how much effort I put into pergola design inspiration, if those footers stayed visible, the whole project would look unfinished. I tried to ignore them for a week, but every time I sat down with a cold drink, my eyes went straight to that cold, lifeless concrete. Today, I’m going to show you how to use river rock to turn those eyesores into a professional-grade landscaping feature that actually enhances your home’s value. It’s a low-cost, high-impact move that bridges the gap between your structure and the earth. [image]
Stop Letting Industrial Concrete Ruin Your Backyard Oasis
My biggest mistake early on was trying to ‘hide’ my footers by painting them green. I thought they would blend into the grass, but they just looked like radioactive blocks of moss. It was embarrassing. We spend thousands on stunning deck design strategies and premium materials, yet we often leave the structural foundation exposed for the world to see. River rock works because it introduces organic shapes and varied colors that soften the harsh lines of a pier. Beyond just looking better, proper stone placement can help with drainage, keeping water away from the base of your posts. According to a study by the National Association of Realtors, high-quality landscaping and ‘visual continuity’ in outdoor spaces can provide an estimated 100% return on investment when it comes time to sell. By using river rock, you aren’t just covering a mistake; you are finishing the story of your backyard. Have you ever finished a beautiful build only to realize the foundation looked like a construction site?
Will This Trap Moisture and Rot My Posts?
This is the number one question I get from neighbors peering over the fence. People worry that piling stones around a post will create a ‘wet blanket’ effect. I used to worry about that too, especially when I was figuring out how to anchor a pergola correctly. The truth is, river rock is actually much better for airflow than mulch or soil. Because the stones are rounded and varied in size, they create large air gaps that allow the wood to breathe and the water to pass through quickly. However, the secret is making sure you aren’t burying the wood itself under the stones without a proper moisture barrier or a solid beam support system. If you do it right, you’re actually protecting the post from string trimmer damage and soil splash-back.
Stop the ‘Dump-and-Run’ Approach to Landscaping
Creating a professional-looking ‘rock well’ is like framing a high-quality photo; the frame is what makes the art actually pop. To get this right, you cannot just dump a bag of stones and call it a day. I remember my very first attempt at this; I threw some white marble chips around a post, and within two months, they were half-buried in mud and getting launched across the yard by my lawnmower. It was a frustrating mess that actually made the yard look worse. You need a contained system. This starts by clearing a 12-to-18-inch radius around each footer. You want to dig down about three inches, creating a dedicated ‘pocket’ for the stones. If you skip this step, your rocks will inevitably migrate into the grass like runaway marbles. This precision is what separates basic DIY from the innovative deck design ideas that truly increase a home’s value.
Carve Out a Dedicated Space for Your Stones
Use a sturdy metal or heavy-duty plastic edging to define the space you just dug. This creates a hard stop for your grass and a clear boundary for the rocks. This is especially important if you are integrating this into a larger landscape plan involving composite decking trends that favor clean, crisp lines. Once the edging is in, ensure the ground slopes slightly away from the concrete pier. This minor adjustment is part of the drainage move that saves your deck from mold and structural decay. 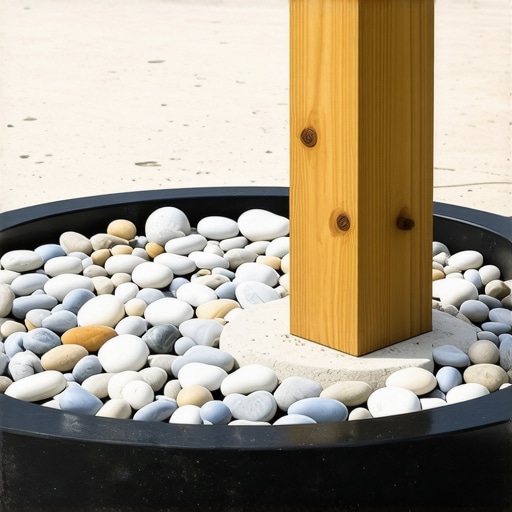
The Fabric Barrier That Saves Your Back Later
Next, lay down a high-quality landscape fabric. Avoid the thin, paper-like stuff found at big-box stores; it tears if you look at it wrong. You want the professional grade that feels more like heavy felt. This serves two vital purposes: it keeps the rocks from sinking into the soil over time and prevents weeds from turning your footer into a miniature jungle. While you are down there, check your post for any signs of trouble. I always use the simple spray that identifies hidden rot on the wood before the rocks go in, just to be 100% sure the foundation is healthy. Wrap the fabric snugly around the base of the concrete pier, but never directly against the wood post to ensure maximum airflow.
Stone Selection and the Art of the Pour
For the best visual results, I recommend 1-to-3-inch river rocks. Small pebbles are a nightmare because they get sucked into leaf blowers, and giant boulders look like you’re trying to build a fortress. The medium-sized stones lock together nicely while leaving those crucial air gaps that allow the wood to breathe. If your concrete piers are particularly tall or unsightly, you might even consider combining this method with other textures. For example, some people use how to hide ugly concrete piers with stone veneer for the visible vertical portion while using river rock at the base for a tiered, architectural look. Pour the stones in layers, hand-placing the ones closest to the post to ensure they sit flat and cover every inch of that industrial gray concrete.
Keep Your Rocks Where They Belong
One thing I learned the hard way: do not overfill the well. Keep the stones about half an inch below the top of your edging. This prevents ‘spillover’ when you are walking nearby or when a heavy rain hits. Think of it like a glass of water; if you fill it to the absolute brim, someone is going to get wet eventually. By keeping the level slightly lower, you maintain that clean, intentional look for years without constant maintenance. This is one of the essential composite decking secrets for a truly low-maintenance yard: do the heavy lifting once, and enjoy the pristine result forever.While finishing those footers is a visual win, I often see homeowners get tunnel vision on aesthetics and miss the structural nuances that actually keep a structure standing for decades. Everyone wants the ‘clean’ look of hidden fasteners, assuming they are the gold standard for innovative deck design ideas. However, in my experience, why hidden fasteners can be a maintenance nightmare is a lesson usually learned too late. When you use wide-profile boards, the natural expansion and contraction from sun exposure can exert enough force to shear those hidden clips right off. In high-exposure areas, a high-quality color-matched screw is often the smarter, more durable choice.
Hidden Fasteners Might Be Your Maintenance Nightmare
The ‘Oops’ factor usually hits when a builder falls for the 3-inch screw mistake that ruins composite joists. They think more length equals more strength, but over-penetrating can split the sub-structure or create deep pockets where water pools. If you really want that professional finish without the structural risk, why you should paint your deck joists black under composite is the pro-level nuance that hides the ugly pressure-treated wood from peeking through the gaps. 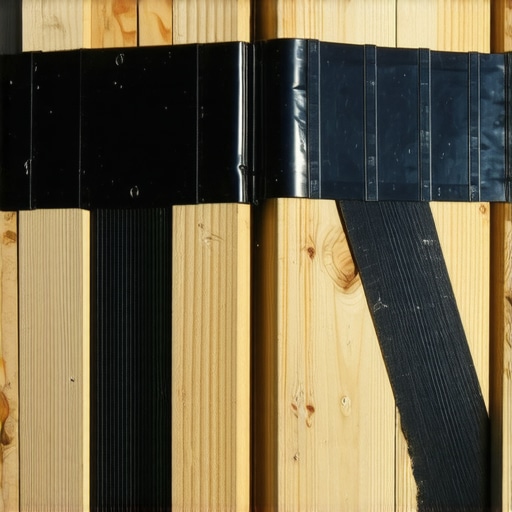
Why Does My Composite Deck Feel Like a Trampoline?
This is a sophisticated concern for anyone who has invested in composite decking trends. You followed the standard 16-inch-on-center joist rule, yet the surface feels spongy. The truth is, many composite materials are significantly more flexible than traditional wood. According to a structural study by the North American Deck and Railing Association (NADRA), deflection is the leading cause of consumer dissatisfaction. The fix? You need the framing move that stops deck boards from bouncing, which often involves tightening your joist spacing to 12 inches for a rock-solid feel. If you ignore this, why your composite deck feels like a trampoline will become a permanent annoyance every time you host a gathering.
The Joist Tape Myth That Leads to Rot
We have all been told that joist tape is the ultimate savior for a frame. While it is a great tool, why pressure-treated wood still rots under joist tape is a reality when the wood is not allowed to reach its equilibrium moisture content before application. If you seal in moisture, you are essentially creating a rot-incubator. Real expertise means knowing how to time your installation. Finally, don’t forget the wind; how to stop your glass railing from whistling in high winds is an advanced detail most pros forget until the customer calls a week later. Have you ever fallen into one of these ‘premium’ traps? Let me know in the comments.
The Little Tool That Saved My Knees and My Sanity
I’ve spent more hours than I care to admit hunched over deck boards, squinting at screw heads to make sure they are perfectly flush. It’s exhausting, and if you’re off by even an eighth of an inch, the shadows make your deck look like a topographical map. That’s why the jig I use for consistent deck screw depth is the one tool I never lend out. It’s a simple depth-set bit that clicks when the screw hits the exact millimeter you want. This level of precision is what makes innovative deck design ideas look professional rather than like a weekend hack job. If you’re building a pergola alone, forget the tape measure for a second and grab a rotary laser. Using the level and laser method for setting pergola heights alone changed the game for me. It ensures your rafters are dead-level across a 20-foot span, something a bubble level just can’t guarantee over distance. I’ve seen beautiful structures fail because someone trusted their ‘eye’ over a beam, leading to the structural reason your pergola is leaning two years later.
How do I maintain my composite deck and pergola over time?
The biggest threat to your longevity isn’t the sun; it’s the ‘cleaning’ methods people use. I see homeowners blasting their beautiful boards with 3000 PSI every spring. Please, I’m begging you, understand why you should never use a pressure-washer on composite. It shears the protective ‘cap’ off the board, leaving the wood-flour core exposed to mold and UV. Instead, stick to a soft-bristle brush and composite decking secrets: longevity tips for a lasting deck like a simple vinegar wash. According to the American Wood Council’s DCA 6 guide, ensuring proper lateral load connections—like those specialized tension ties—is the single most important factor for long-term structural safety. It keeps the deck attached to the house during seismic events or high winds. 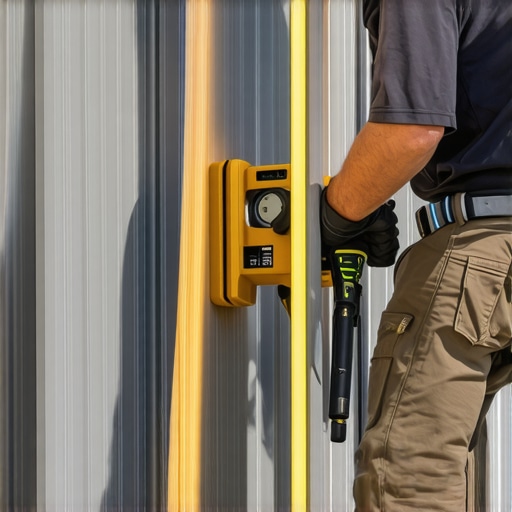
Get Ready for the Smart Deck Revolution
We are moving toward a future where your backyard is as connected as your kitchen. I’m already seeing a massive shift in composite decking trends toward integrated sensor arrays that can detect moisture levels in your joists before rot even starts. The goal is achieving the secret to making your deck feel like a living room while maintaining the durability of an industrial bridge. In five years, your deck won’t just be a platform; it’ll be a high-performance piece of architecture that alerts your phone when the drainage system is clogged. Before you lay your next board, try the string line trick for leveling deck joists before decking—it’s an old-school move that solves modern problems by identifying crowns in the wood that cause a wavy surface. Get out there and check your joist heights today; your feet will thank you.
Hard Truths I Learned While Staring at My Footer Rocks
One thing I’ve discovered after years of tweaking these rock wells is that the color matters more than you think. Pure white marble chips look great for a week, then they turn yellow or green from algae and dirt splash-back. I’ve found that multi-colored river stones with grays, tans, and deep blues hide the natural backyard grime much better and require far less scrubbing. Also, do not forget that these landscape features are part of your larger aesthetic; if your stones look too artificial or uniform, your whole project might suffer from 7 reasons your composite decking looks like plastic and lose that high-end organic feel. I also learned the hard way that why built-in deck planters are a rot risk applies to rock wells too if you do not keep the fabric clear of organic debris like wet leaves. Keep those air gaps open, and your wood stays happy for decades.
The Gear That Keeps My Backyard Projects Professional
If you want to move beyond basic DIY and achieve a custom-fit finish, you need the right kit. First, skip the plastic edging and go for heavy-duty steel or aluminum; it stays straight and won’t crack during a hard freeze. For cleaning your finished work, forget the heavy chemicals and use the vinegar and water mix that cleans composite better than chemicals to wipe down your posts and stones without killing your grass. I also swear by the jig I use for consistent deck screw depth because a clean finish on the boards makes the ground-level stone work look even more intentional and high-end. Finally, always keep a can of the simple spray that identifies hidden rot in your toolbox to check your footers every spring before the summer humidity sets in.
#IMAGE_PLACEHOLDER_E#
Turn Your Foundation Into a Feature
Don’t let a few inches of industrial concrete be the reason your backyard feels like a work in progress. By taking an afternoon to install a well-thought-out river rock border, you are adding the final layer of polish that defines true pergola design inspiration. It is about more than just hiding a footer; it is about creating a transition that makes your structure look like it was always meant to be part of the landscape. Go ahead and grab a few bags of stone this weekend—your home’s curb appeal and your own peace of mind will thank you. Have you ever found a clever way to hide your structural footers, or do you prefer the raw industrial look? Let me know in the comments below!