
I remember the exact moment my foot crunched through the third step of my back deck. It wasn’t just a loud, splintering crack; it was the sound of my weekend plans and my wallet shattering. I had built that deck only six years prior, and I used what I thought was the best lumber available. But as I peeled back the boards, I saw the truth: the wood wasn’t just wet; it was basically soil. If you’ve noticed a bit of ‘give’ when you walk up your steps or seen dark staining where the stairs meet the house, you aren’t alone. Most homeowners focus on the beauty of modern composite decking, but they ignore the invisible killer lurking behind the ledger board. Today, I am going to show you why your stairs are a ticking rot-bomb and how a simple flashing upgrade can save you thousands. Have you ever felt that unsettling ‘squish’ underfoot on an otherwise solid deck?
Stop Letting Water Kill Your Deck From the Inside Out
The reality is that gravity is your enemy. When it rains, water doesn’t just fall off your deck; it clings to the vertical surfaces of your stair stringers and seeks out every unsealed screw hole. I made the mistake early in my DIY journey of thinking ‘pressure-treated’ meant ‘invincible.’ It doesn’t. In fact, many builders fail to realize that proper deck flashing is actually more important than the choice of decking material itself. When water gets trapped between the stair stringer and the rim joist, it creates a permanent micro-climate of decay. This is why the joist tape secret is such a game-changer for longevity. According to the North American Deck and Railing Association (NADRA), millions of decks are currently reaching the end of their useful life, often due to hidden structural rot at critical connection points. You might think your stringer notch hack or fancy railing is enough, but without a waterproof barrier, you’re just building a very expensive sponge.
Will a few strips of flashing really make a difference?
It is easy to be skeptical when a pro tells you that a thin piece of metal or some sticky tape is the only thing standing between a solid structure and a total collapse. I used to think it was just an extra step invented to sell more supplies at the hardware store. But after seeing how water wicks into the end grain of a stair stringer—essentially acting like a straw for moisture—I realized that ignoring this detail is the fastest way to a ‘spongy’ staircase. If you want to avoid the disaster I faced, you need to understand the ‘drip path.’ It isn’t just about keeping the wood dry; it’s about directing the water away from the house and the structural frame. You can have the most innovative deck design in the neighborhood, but if the stairs rot out, the whole thing is a hazard.
Apply the Waterproof Barrier Early
To stop the rot-bomb, you have to treat the connection point between your house and the stairs as a high-moisture combat zone. The first thing I do now—and I learned this the hard way—is ensuring the rim joist is entirely isolated from the stair stringers using a high-quality butyl tape or metal flashing. Think of it like a raincoat for your frame; if there is even a tiny gap, the water will find it. This is particularly crucial because why pressure-treated wood still needs maintenance under composite is a concept many homeowners overlook. The treatment chemicals eventually leach out or the wood checks (splits), leaving raw fibers exposed to the elements.
Treat Every Cut Surface as a Vulnerability
When you cut your stair stringers, you are exposing the end grain, which acts like a bundle of tiny straws sucking up every drop of water that runs down the boards. I used to just slap them on and call it a day until I saw a set of stairs turn into mush in record time. Now, I apply a liberal amount of wood preservative to every single notch. Following that, I use the flash and tape method for protecting deck joists, but I adapt it for the stairs. I run the tape over the top of the stringer and down the face of each ‘rise’ and ‘run’ cut. This ensures that when your modern composite decking expands and contracts, any water that slips through the gaps hits the tape, not the wood. 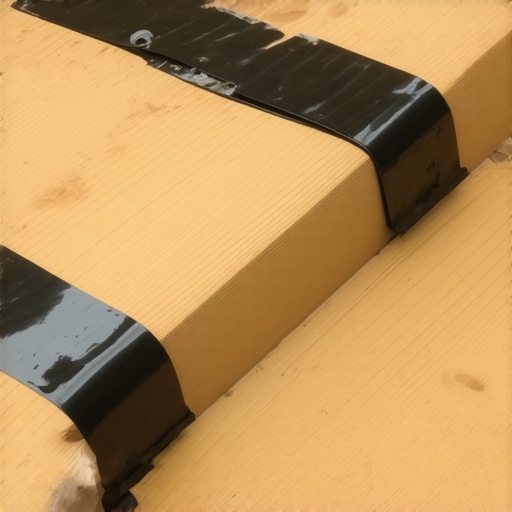
Lock Out Moisture with a Proper Drip Path
One time, I was helping a neighbor fix a modern pergola and deck combo where the ledger was failing because the ‘drip path’ was non-existent. The water was literally running behind the siding. We had to implement the ledger bolt hack for brick veneer houses just to get enough structural bite back into the home. To avoid this on your stairs, you must install a ‘Z-flashing’ or a similar drip edge that directs water away from the rim joist. This is the drip edge hack for preventing deck rim joist rot that keeps the structural core of your home dry. If you see water pooling where the stairs meet the deck, you’ve already lost the battle.
Don’t Skimp on the Structural Support
Beyond just water, structural movement accelerates rot by opening up gaps for moisture to enter. This is why your deck stairs need more than two stringers. When the stairs bounce, the mechanical fasteners pull at the wood, creating entry points for decay. By adding extra stringers and using the stringer notch hack to reinforce the connection, you eliminate the micro-movements that let water in. Combined with the joist tape secret for doubling your decks lifespan, you create a staircase that is as solid as the foundation of the house itself. I’ve found that spending an extra hour on these ‘invisible’ details saves a full week of demolition and repair work down the road.
Stop Believing the Maintenance-Free Lie
Many contractors sell homeowners on the idea that once you switch to modern composite decking, your work is done. This is the biggest myth in the industry. While you won’t be out there with a sander and a gallon of stain every two years, ignoring composite decking secrets for longevity will lead to a deck that looks ten years old after only three seasons. In my experience, composite requires a different kind of vigilance. You have to keep the gaps clear of organic debris—pollen, pine needles, and dirt—that traps heat and moisture against the joists. If you don’t, you’ll find that even ‘indestructible’ boards can foster mold growth in the shadows or lead to premature structural decay.
Why is your composite decking expanding more than the manual says?
Most DIYers read the installation guide and leave a standard 1/8-inch gap at the butt joints, only to find their boards buckling like a mountain range by July. Here is the advanced nuance: the ‘manual’ assumes average ambient temperatures during the build. If you are installing in 40-degree weather, those boards are going to grow significantly more than if you install them in the heat of summer. According to data from the Forest Products Laboratory (USDA), the coefficient of thermal expansion for wood-plastic composites is drastically higher than that of traditional lumber. This is why your composite decking is expanding more than the manual says in extreme climates. If you don’t follow the expansion gap rule that stops boards from buckling, the sheer force of the expanding plastic can actually shear off your hidden fasteners or pull them right out of the pressure-treated frame. 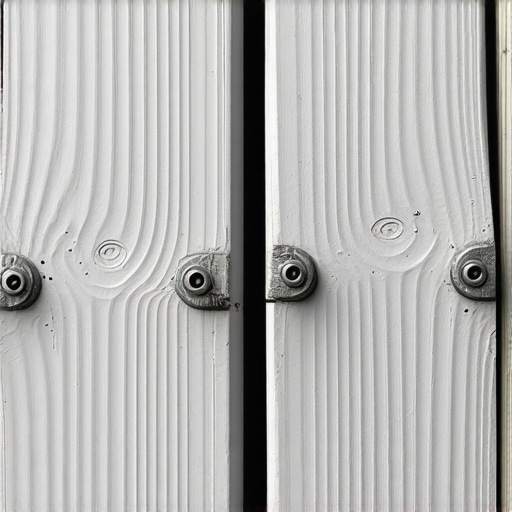
Fix the Wobbly Railing Before the Inspection
I see it all the time on high-end builds: gorgeous innovative deck design ruined by a railing that feels like a wet noodle. People assume that bolting the post to the rim joist is enough. It isn’t. The ‘oops’ factor here is failing to realize that the wood of the joist will compress and shrink over time as it dries and seasons. I always recommend the 20 dollar bracket that fixes wobbly railing posts fast to ensure the connection is mechanical and stays tight even as the lumber seasons. If you’re trying to figure out how to identify high-quality capped decking from the cheap stuff, look at the density and the thickness of the polymer cap; cheaper boards often have thin shells that crack at the railing connection points, leading to moisture ingress and unsightly railing post sleeves cracking at the base.
A Strong Pergola Needs More Than Just Big Posts
Finally, let’s talk about that modern pergola you’ve been dreaming of for your backyard sanctuary. Most people think using massive 6×6 posts is all the structural integrity they need to pass a ‘shake test.’ But the real expertise is found in the rafter connections. Without the notched rafter secret for a pergola that never wobbles, your structure is essentially a giant sail waiting for the first major windstorm to twist it out of square. Don’t fall into the trap of relying solely on long screws or nails to hold up your shade rafters. Mechanical notches carry the weight of the structure, and the screws just hold those components in place. Have you ever fallen into this trap of skipping the small structural details for the sake of speed? Let me know in the comments.
I often get asked what tools are actually worth the investment and what is just marketing fluff. After building hundreds of decks, I can tell you that the most important tool in my kit isn’t a power tool—it’s a simple piece of neon masonry string. When you are setting up your perimeter, you should use the string line secret for perfectly level railing runs. A laser level is great, but in the bright sun, a tightly pulled string doesn’t lie and doesn’t run out of batteries. I use it because it gives me a visual reference for the entire length of the deck simultaneously, allowing me to spot a sagging joist or a crooked post from twenty feet away before the first board is ever screwed down.
Modern Technology for a Better Backyard
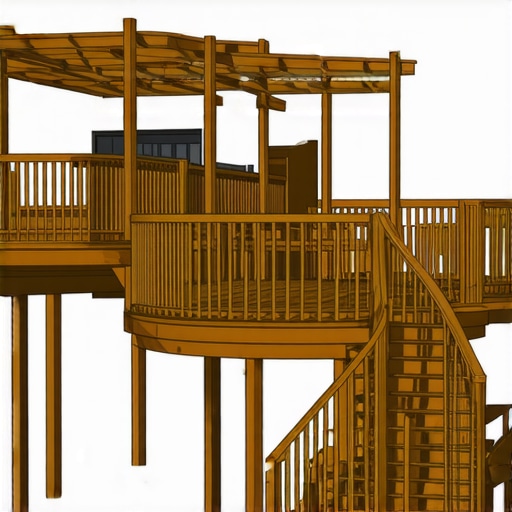
Before you even pick up a hammer, you need to visualize the project in a way that spreadsheets simply can’t handle. This is why you need a 3d model before buying a single deck board. I started using 3D modeling software about five years ago, and it revolutionized my workflow. It isn’t just about showing a pretty picture to your spouse; it’s about catch-points. You’ll see exactly where a stair riser might clash with a window or where your furniture will feel cramped. In the future, I expect we will see augmented reality (AR) apps that let us ‘walk’ on our virtual decks via our phones to check sightlines in real-time. This level of planning prevents the ‘oops’ moments that usually lead to expensive waste.
How do I keep my composite deck looking brand new for decades?
Maintenance isn’t about a massive weekend of scrubbing every spring; it is about consistent, small actions. I tell all my clients to implement composite decking secrets longevity tips for a lasting deck, starting with the ‘soft-bristle rule.’ Never use a pressure washer on high settings or a metal shovel to clear snow. You will scar the polymer cap, and once that’s gone, the board is vulnerable to staining. If you do notice some fading after a decade of harsh sun, you can actually learn how to restore the color of a faded composite deck using specific water-based restorers designed for synthetic materials. It’s about being proactive rather than reactive.
The 15-Minute Habit That Saves Your Structure
Every season, I perform what I call the 15 minute deck inspection every homeowner should do. I start at the ledger board and work my way out, looking for any signs of ‘white rot’ or rust. According to the American Wood Council’s DCA 6 (Prescriptive Residential Wood Deck Construction Guide), the interaction between copper-based pressure-treated wood and non-compatible fasteners can lead to rapid galvanic corrosion. If I see a single rusted bolt head, I know I have a systemic problem. I also check the underside for any signs of moisture traps. This is the moment to verify that your the joist tape secret is still holding firm and that no debris has clogged your drainage path.
Don’t Let Ugly Wires Ruin Your Pergola Design
When you are scaling up to a full outdoor living room with a pergola, the ‘finish’ is what separates a DIY job from a professional build. I see so many people spend thousands on a beautiful structure only to have orange extension cords draped over the rafters for their lights. I always use the best way to hide electrical wires in your pergola rafters, which involves routing a small channel in the top of the timber or using hollow-core beams. It takes an extra hour, but it makes the tech invisible. If you’re feeling overwhelmed by the technical details of a complex build, don’t hesitate to contact us for a consultation. My best advice for this weekend? Grab a screwdriver and do that 15-minute inspection; catching one loose bolt now could save your entire deck from a costly failure next year.
What the Lumber Yard Won’t Tell You
After years in the field, I’ve realized that the best innovative deck design isn’t just about the aesthetics; it’s about outsmarting the elements. Here are a few lightbulb moments I wish I’d had on day one:
- The ‘Invisible’ Skeleton: You can spend thousands on the prettiest modern composite decking, but if your frame is trapped in a moisture pocket, it’s a wasted investment.
- Gravity is Patient: Water never stops trying to enter your home’s envelope. If your flashing isn’t perfect, the structural damage isn’t a matter of ‘if,’ but ‘when.’
- Materials Evolve, Physics Doesn’t: Even the most robust railing systems will eventually fail if you don’t account for the natural seasoning and movement of the structural lumber beneath them.
The Toolbelt Essentials for Your Next Build
I don’t get paid to promote these, but I trust them because they’ve saved my skin on more than one occasion. First, the NADRA (North American Deck and Railing Association) safety checklists are the gold standard; use them as your project bible. Second, don’t build without a dedicated design app; you can see why you need a 3d model before buying a single deck board to avoid those gut-wrenching layout errors that lead to wasted material. Finally, always keep a roll of high-quality butyl joist tape handy. It is the cheapest insurance policy you will ever buy for your outdoor living space.
#IMAGE_PLACE_A#
Start Building Your Backyard Sanctuary
There is a unique kind of satisfaction in sitting under a modern pergola that you know is structurally sound from the footings to the rafters. By applying these composite decking secrets longevity tips, you aren’t just building a platform; you’re creating a durable stage for a decade of family memories. Don’t be intimidated by the technical details. Take it one joist, one board, and one screw at a time. If you ever hit a wall or need a professional eye on your specific deck design, you can always contact us for a consultation. Which part of the deck build feels the most daunting to you right now—the stairs, the framing, or the finishing touches? Let me know in the comments below!