
It was a Tuesday afternoon, and the humidity was so thick you could practically swim through it. I was about halfway through a massive wrap-around deck project, feeling pretty good about myself, until I hit ‘The Board.’ You know the one. It looks straight on the pile, but the moment you try to seat it against the previous row, it develops a mind of its own. I was wrestling with a twenty-foot plank of high-end composite that refused to budge. I used my heavy rubber mallet until my wrist throbbed, and when that didn’t work, I did the one thing I always tell my neighbors never to do: I grabbed a steel pry bar. One slip later, I had a permanent, ugly gouge in a hundred-dollar board. That was the moment I realized that brute force is the enemy of a professional finish. Early on, I hadn’t yet mastered the composite decking secrets for longevity, and I was treating this modern material like it was old-school pressure-treated pine. It’s not. Composite is dense, it’s slick when you don’t want it to be, and it’s incredibly stubborn when friction takes hold. If you’ve been fighting your boards all afternoon, I promise you there’s a better way that involves your kitchen pantry more than your toolbox.
The Day My Deck Frame Almost Won the Fight
The real issue isn’t usually that the board is “bad.” The problem is the massive amount of surface tension between the underside of the composite and the top of your joists. When you’re dealing with hidden fasteners that fail on wide profile boards, you don’t have the luxury of a screw pulling the material down and forward simultaneously. You’re trying to slide a heavy, rubbery material over a wooden surface, and they just want to grab each other. I’ve seen guys try the clamp and lever move for straightening bowed 2x10s on their decking, but that often leads to cracked clips or, like in my case, ruined board faces. You need the board to glide, not grind. According to the structural guidelines at Professional Deck Builder magazine, friction is one of the primary reasons DIYers struggle with consistent gapping, as the board “locks” into place before it’s actually flush. This tension can even lead to issues later on, like learning how to stop composite deck boards from expanding into your siding, because the boards were stressed during the initial install.
Is Lathering Up Your Joists Actually a Good Idea?
I know what you’re thinking because I thought it too: “Won’t soap rot my wood or make the deck a slippery mess?” It’s a fair concern. Nobody wants to build a deck that smells like a laundromat every time it rains. But here’s the kicker—we’re talking about a tiny amount of biodegradable dish soap, and its job is done the minute the board is snapped into place. By the time you’re finished with the next three rows, that soap has dried or been washed away by the first morning dew, leaving behind a perfectly tight joint. It’s the difference between a three-hour struggle and a twenty-minute breeze. Have you ever found yourself standing on a board, bouncing like a maniac just to get it to move an eighth of an inch?
Why Friction is Killing Your Consistency
[image_placeholder_1] When you eliminate that friction, the whole physics of the deck changes. Instead of fighting the joist, you’re just guiding the board. This is especially crucial when your deck is starting to feel a bit “busy” or if your composite deck feels spongy between joists because things aren’t seated quite right. A properly seated board distributes the load better and keeps your lines laser-straight for the lifetime of the project. By using a small amount of lubrication, you are essentially tricking the material into moving as if it were on rollers, allowing those hidden clips to bite into the groove with zero resistance.
Get the Glide Without Damaging the Grain
The secret isn’t in how hard you hit the board, but in how little resistance it feels. Think of your composite boards like giant, expensive pieces of a jigsaw puzzle. When the wood of your joists is dry and rough, it acts like sandpaper against the plastic-heavy underside of the board. To fix this, you need a lubricant that disappears. I always keep a small squeeze bottle of biodegradable dish soap in my pouch. You don’t need a gallon; just a thin, intermittent bead along the top of the joist where the board will sit. This creates a temporary “hydroplaning” effect. It’s similar to how the string line trick for leveling deck joists helps you visualize the plane before you commit, the soap helps you execute that plane without physical struggle. Composite doesn’t slide like traditional timber; it bites. The friction between the joist and the board can actually cause the material to heat up if you’re sliding long spans, making the ‘grab’ even worse. The soap breaks that thermal and physical bond instantly.
Apply Just Enough to Break the Tension
Last summer, I was working on a multi-level project near a lake. The humidity was brutal, and the boards were “sticky.” I was sweating through my shirt trying to kick a board into a hidden clip system, and it wouldn’t move an inch. I applied the soap method, and suddenly, I could move the board with my pinky finger. This is vital because if you force it, you risk stripped screws or bent clips. If you’ve already checked the deck joist tape test and your frame is solid, the soap won’t hurt the longevity of the wood. It actually helps you ensure that every board is fully seated, which prevents that annoying “click-clack” sound later on. 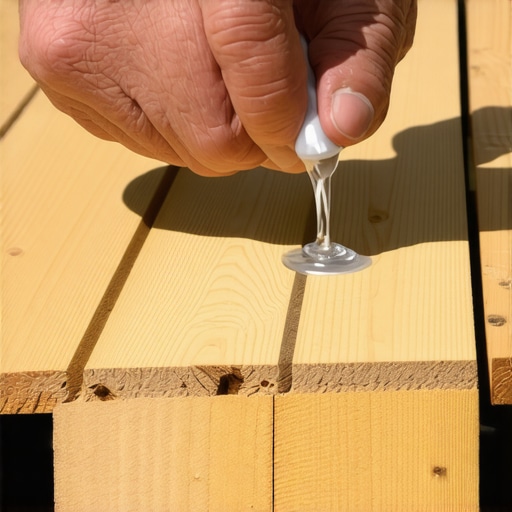
Keep Your Gaps Consistent When the Boards Resist
Once the board is sliding freely, you can focus on the alignment. This is where most DIYers fail; they get one end tight and the other end drifts. By using the soap, you can shift the entire board laterally to line up your “picture frame” borders perfectly. If you are also installing railing systems for every deck type, you know that being off by even a quarter inch at the start makes the posts look crooked later. The same logic applies here. You want to use the jig I use for consistent deck screw depth only after the board is perfectly positioned. If the board is under tension, the screw will pull it at an angle, ruining your straight lines. This method also helps prevent the common issue where your composite deck feels spongy between joists because the board isn’t sitting flat against the wood. When the board can glide, it finds its natural center of gravity against the fastener, eliminating those tiny air gaps that lead to that trampoline-like bounce.
Why You Should Skip the Brute Force
I’ve seen guys use sledgehammers on composite, and it makes me cringe. Composite doesn’t have the “memory” of wood; once you dent it, it stays dented. If you are worried about cleanup, don’t be. The next time you use the soap and sponge fix for oil stains or even just a garden hose, any residue is gone. The goal is to make the installation as “low-impact” as possible. When you aren’t fighting the material, you have more energy to focus on the details, like ensuring you know how to stop composite deck boards from expanding into your siding by leaving the appropriate gap at the house wall. A relaxed board is a stable board, and a stable board lasts decades.
Most homeowners buy into the popular idea that composite is a set-it-and-forget-it material. In reality, you are often dealing with a service-life mismatch that can ruin your investment. While your boards might be rated for 25 years, your pressure-treated frame is pulling your composite apart long before that if you aren’t careful. This happens because the organic wood frame expands and contracts at an entirely different rate than the inorganic plastic-cap boards. I’ve seen beautiful, high-end installs warp within three seasons because the builder ignored the crown of the lumber. If you do not face the natural curve of the joist upward during the framing stage, your expensive boards will eventually follow that dip, leading to a wavy surface that even the best clips cannot fix. This phenomenon is precisely why your composite boards are crowning and losing their flat profile over time.
The Thermal Expansion Trap Most Pros Ignore
One of the most common myths in the industry is that modern composite is dimensionally stable. It isn’t. According to data from the North American Deck and Railing Association (NADRA), structural failure and aesthetic warping often occur because builders treat composite as a static material. If you use the 3-inch screw mistake that ruins composite joists, you are essentially pinning an object that wants to move to one that is already under stress. You must allow the deck to breathe. This same logic applies to your overhead features as well. I have found that the structural reason your pergola is leaning is almost always a failure to account for how the beams twist and pull against the deck frame as the seasons change. When you are looking for innovative deck design ideas, do not let the aesthetics blind you to the underlying physics of the build.
How much gap do these boards actually need?
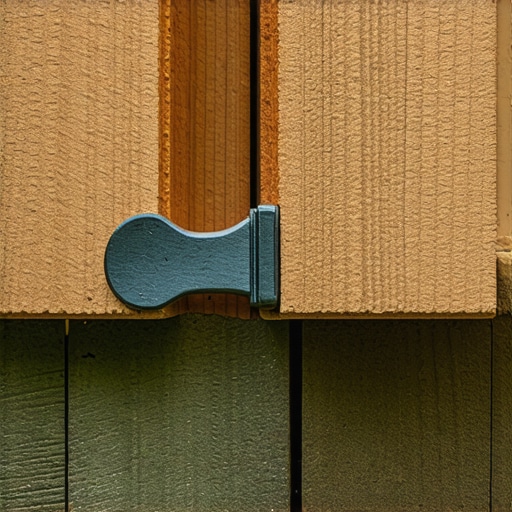
The industry standard usually suggests a 3/16ths of an inch gap, but I’ve found that to be a dangerous oversimplification. You have to account for the ambient temperature at the exact second of installation. If you are installing on a 90-degree afternoon, that board is already at its maximum expansion. If you leave a standard gap then, you will have a massive canyon between boards once the winter chill sets in. Conversely, tight-butting boards on a cold morning is a recipe for buckled fasteners by July. Have you ever fallen into this trap where the material seemed to fight your design? Let me know in the comments. Even when you are following the complete guide to choosing railing systems, you have to consider how those posts are anchored to a frame that is constantly in motion. If the frame is improperly braced, your composite deck feels like a trampoline underfoot, regardless of how much you spent on the surface boards. The key to a professional finish is respecting the tension between the wood and the plastic.
To respect that tension between the wood frame and the plastic boards, you have to stop relying on your eyes and start relying on precision tools. I used to be an ‘eyeball it’ kind of guy, but after spending an entire weekend trying to figure out the simple way to fix a sagging deck beam that I’d measured manually, I bought a rotary laser.
Why I Swapped My Tape Measure for a Laser Level
If you are building solo, the level and laser method for setting pergola heights alone isn’t just a luxury; it’s the only way to ensure your structure doesn’t look like it’s sliding off the side of the house in five years. When your frame is perfectly level, the composite boards sit flat, which means less stress on your fasteners. I’ve found that using a high-quality impact driver with adjustable torque settings is the single most important tool in my kit. If you over-drive a screw in January, your railing bracket keeps snapping in the cold because the material has no room to breathe. Use the jig I use for consistent deck screw depth to ensure that every fastener is set exactly the same. This prevents the ‘mushrooming’ effect where the composite skin peels up around the screw head, creating a trip hazard and an eyesore.
How do I maintain my composite deck and pergola over time?
Maintenance isn’t about heavy labor; it’s about the right chemistry. You should perform how to test your deck for structural fatigue every spring by looking for loose fasteners or board deflection. For cleaning, skip the harsh store-bought detergents. I swear by the vinegar and water mix that cleans composite better than chemicals because it breaks down pollen and bird droppings without stripping the UV-protective cap. And please, listen to me on this: why you should never use a power washer on composite boards is because the high-pressure stream can actually open up the pores of the plastic, making it more susceptible to permanent staining later. If you have pets, you’ll also want to learn how to stop your dog from scratching your composite boards, which usually involves keeping nails trimmed and using area rugs in high-traffic zones. 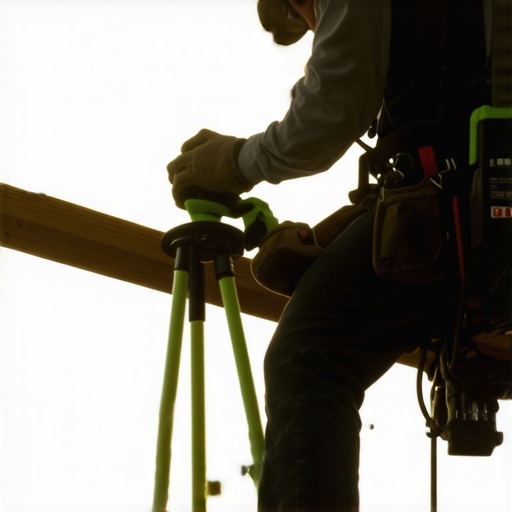
The Future of Smart Decking and Long-Term Results
As we look toward the next decade, I predict we will see a massive shift toward bio-based resins and ‘self-healing’ composite surfaces. Current composite decking trends offer durable solutions, but the next generation will likely include embedded sensors to alert homeowners of subsurface rot. For now, we rely on the manual approach, like using the simple spray that identifies hidden rot on old deck posts. According to the technical documentation from the American Wood Council, moisture trapped between the board and joist is the #1 cause of premature failure. To combat this, I always perform the garden hose test for proper deck water runoff after every build. If water pools anywhere, the pitch is wrong, and that’s a problem that soap and water won’t fix. Before you drive your next fastener, I challenge you to test your impact driver’s torque setting on a scrap board—it’s the simplest way to prevent ruined boards and ensure your deck stays as smooth as the day you built it.
Lessons from the Day My Deck Almost Won
I spent years thinking that if a board didn’t fit, I just needed a bigger hammer. That mindset cost me thousands in wasted material and countless weekends of frustration. The biggest lightbulb moment for me was realizing that composite is a technical product, not just a piece of lumber. Here are the hard truths I learned on the job: First, heat is your greatest enemy or your best friend. A board left in the sun for an hour can grow by nearly a quarter inch, so always measure and cut in the shade if possible. Second, never underestimate the power of a perfectly square start. If you don’t use the 3-4-5 triangle move for squaring up a new deck frame, you will be fighting cumulative errors by the time you reach the outer rim joist. Finally, stop treating your fasteners like they are optional. Every clip has a purpose, and skipping even one can lead to the dreaded ‘walking’ effect where boards shift over time. By shifting my focus from speed to precision, I finally started to maximize outdoor living with low-maintenance composite decking that actually looks professional.
My Go-To Toolbox for a Stress-Free Install
To get the results you see in the magazines, you need more than just a drill and a saw. I’ve refined my kit down to a few essentials that I never step onto a job site without. I always keep the cardboard spacer trick for consistent board gaps in my back pocket for those areas where hidden fasteners aren’t an option. I also rely heavily on a high-quality rotary laser; it is the only way to ensure your surface is flat enough to prevent puddling. For the finishing touches, I suggest looking into pergola designs that turn your garden into a sanctuary to add that vertical interest that complements a flat deck surface. I trust these tools and methods because they eliminate the guesswork that leads to late-night hardware store runs. #IMAGE_PLACEHOLDER_E#
Crafting Your Perfect Outdoor Sanctuary
Building a deck is more than just a home improvement project; it is about creating a space where memories are made. Whether you are hosting summer barbecues or enjoying a quiet morning coffee, the quality of your build determines how much you’ll actually enjoy the space. Don’t be afraid to take your time on the framing and the friction-reduction steps we discussed. A little extra effort today ensures you won’t be out there with a pry bar in two years trying to fix a ‘springy’ board. You have the knowledge and the tricks of the trade to build something that lasts. If you hit a snag or need professional advice on a complex layout, you can always contact us for guidance. Now, get out there and turn those innovative deck design ideas that elevate your homes curb appeal into a reality. Have you ever wrestled with a board that just wouldn’t sit flush or had a ‘near-miss’ with a pry bar? Let me know your deck-building stories in the comments below!