
I still remember the sickening squelch of my screwdriver sinking three inches into my home’s rim joist back in 2018. I had spent thousands on high-end boards, thinking I was building a masterpiece, but I missed the one thing that actually matters for your home’s longevity: drainage. I’d essentially bolted a giant, water-trapping sponge directly to my house. Watching a contractor peel back siding to reveal wood that looked more like wet oatmeal than structural lumber was a wake-up call I’ll never forget. Today, I want to show you the ‘Hidden Ledger’ trick—a way to ensure your deck remains a beautiful retreat rather than a Trojan horse for rot.
Stop Letting Your Deck Rot Your House From the Inside Out
Many homeowners get so caught up in choosing between low-maintenance composite decking and traditional wood that they ignore the connection point. That connection—the ledger board—is the most dangerous spot on your entire home. If water gets trapped behind it, it has nowhere to go but into your house walls. This is why I always tell my neighbors that why your deck flashing is more important than the decking itself. In my early DIY days, I thought a few tubes of caulk would solve everything. I was wrong. Gravity and surface tension are powerful forces, and they will pull moisture into the tiniest gaps. According to the American Society of Home Inspectors (ASHI), ledger board failures and subsequent rot are among the top causes of deck-related structural issues in North America. To avoid this, we have to rethink how the deck actually sits against the house. Have you ever noticed dark water stains on your basement ceiling right below where your deck is attached? If so, you might already be facing the problem I had. Using the flash and tape method for protecting deck joists is a great start, but the real secret lies in creating a physical gap that allows the house to breathe.
Is a ledger-free design actually worth the extra digging?
I get this question all the time because the ‘Hidden Ledger’ trick often involves moving the deck just an inch or two away from the house entirely. People worry about the extra footings or the complexity of a ledger-free pergola or deck structure. They think it’s overkill. But let me tell you, digging two more holes is a lot cheaper than replacing the entire back wall of your kitchen. By using the drip edge hack for preventing deck rim joist rot, you create a fail-safe system where water simply cannot reach your home’s sheathing. It’s about peace of mind. When the rain starts pouring, I don’t want to be wondering if my house is drinking it up. I want to know the water is hitting the ground where it belongs. Let’s look at how we can implement this without making the deck look detached or awkward.
The Physics of Making Your Ledger Float
To get this right, you need to think of your deck ledger not as a structural part of your house wall, but as a separate entity that happens to be invited over for dinner. The goal is mechanical separation. You want to create a physical gap—ideally a half-inch—between the ledger board and the house siding using stainless steel spacers or a stack of oversized washers on your lag bolts. This is the heart of the ‘Hidden Ledger’ trick. It allows water to fall straight through the gap rather than getting wicked into your sheathing like a thirsty paper towel. When I was rebuilding a project for a friend in a swampy part of the Carolinas, we realized that even with the best flashing, the wood-on-wood contact was acting like a petri dish for mold. By introducing that air gap, we ensured the house’s house-wrap could actually do its job and breathe. If you are dealing with a brick exterior, you’ll need to apply the ledger bolt hack for brick veneer houses to ensure you aren’t putting lateral stress on the brick itself while maintaining that crucial drainage space.
Create a Breathable Barrier with Stainless Spacers
When you install your bolts, don’t just crank them down flush. Use structural screws designed for ledger attachments and slide your spacers on behind the board. This creates a ‘drainage plane.’ Think of it like the gap in a rainscreen siding system; it’s a dedicated lane for gravity to take the water away. While you’re at it, don’t forget that your joists need protection too. Applying the joist tape secret for doubling your decks lifespan is non-negotiable here. The tape acts like a rubberized suit for the top of your lumber, preventing water from sitting in the screw holes where rot usually starts its journey. 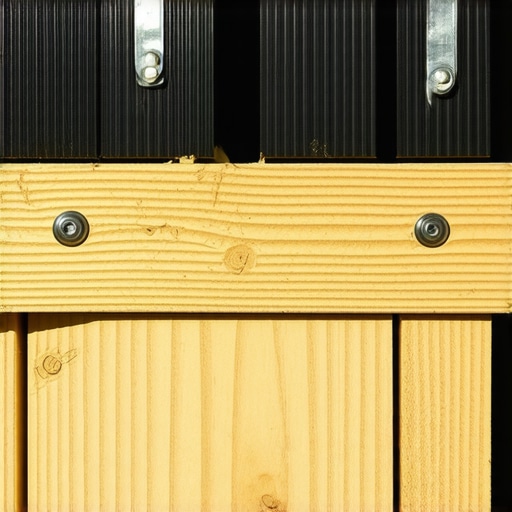
Angle Your Frame to Shed Water Faster
Even a perfectly gapped ledger can fail if the deck itself is holding onto puddles. I always implement the 2 degree slope trick for proper deck water runoff. It’s subtle enough that your patio table won’t look crooked, but steep enough that rain moves toward the outer rim joist immediately. To support this movement without compromising the feel of the deck, I recommend using the double rim joist secret for rock-solid deck edges. This provides a beefy anchor point for your railing posts and ensures the ‘exit’ side of your deck drainage is just as strong as the ledger side.
Stop the Bounce Before You Bolt the First Board
There is nothing worse than a deck that feels like a trampoline when you walk across it. Usually, homeowners think they need more posts, but the problem is often lateral movement. If you find the structural reason your deck feels bouncy and how to fix it, you’ll see that it’s often about the connection to the house. Even with a stand-off ledger, you need rigidity. I once spent three days chasing a ‘shiver’ in a 20-foot deck until I realized I’d skipped the internal blocking. Using the simple blocking move that stops your deck from shaking when you walk provides the necessary stiffness to keep the structure stable while the air gap keeps it dry. This combination of airflow and rigidity is what separates a 10-year deck from a 40-year deck. If you are moving toward composite decking secrets longevity tips for a lasting deck, remember that the composite itself won’t rot, but the frame underneath absolutely will if you don’t master these drainage steps first.If you think finishing the frame is the hard part, wait until you start the ‘pretty’ stuff. Most people assume that once the structure is sound, they can just bolt down the railing and call it a day. But in my experience, this is where the most expensive mistakes happen. There is a common belief that the tighter you fasten your components, the more secure they are. This is a trap. When you’re working with composite materials, ‘tight’ often leads to structural failure.
The Tighter Is Better Myth is Killing Your Railings
When I first started, I would drive my lag bolts into railing posts until the wood groaned. I thought I was being thorough. In reality, I was setting the stage for disaster. If you don’t use the counter-bore secret for seamless railing connections, you risk splitting the material as it naturally shifts. The big nuance here is thermal expansion. Composite decking doesn’t just sit there; it’s a living, breathing thing that grows and shrinks with the thermometer. If you don’t account for this, you’ll eventually wonder why your composite decking is expanding more than the manual says. I’ve seen beautiful $30,000 decks look like a wavy ocean after one hot summer because the builder forgot the expansion gap rule that stops boards from buckling.
Why does your high-end railing rattle after just one season?
It’s incredibly frustrating to spend a premium on a modern railing system only to have it feel loose six months later. Often, the culprit isn’t the railing itself, but how the post sleeves interact with the temperature. This is exactly why your railing post sleeves are cracking at the base; the metal or wood post inside is expanding at a different rate than the plastic sleeve outside. According to a study by the North American Decking and Railing Association (NADRA), over 60% of railing-related failures stem from improper attachment and lack of thermal allowance. 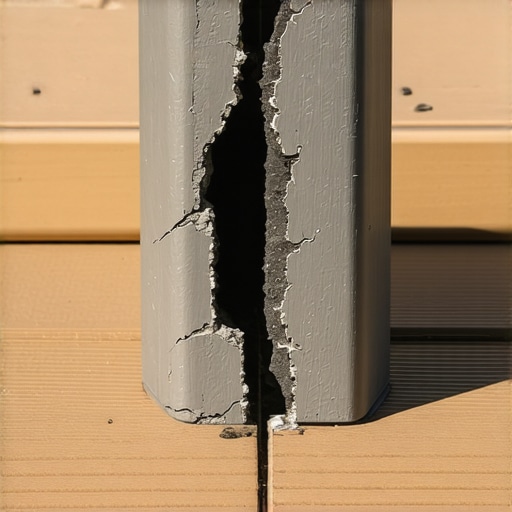
Respect the sun or watch your deck buckle
The ‘Oops’ factor usually hits in mid-January or July. For instance, if you’ve installed a sleek cable system, you might be wondering why your cable railing sagged over winter. It’s simple physics: metal contracts. If you didn’t use the tensioner secret for tight cable railings to allow for seasonal adjustments, your sleek look will turn into a sagging mess. The same goes for those annoying sounds you hear when walking. You can usually find why your railing balusters are rattling and the 5 minute fix by looking at how the vibrations from the deck boards are transferring through the posts. Have you ever fallen into this trap? Let me know in the comments.
Stop guessing and start measuring with better tools
I’ve spent too many years trying to ‘eyeball’ a pergola rafter only to realize it was an eighth of an inch off, which becomes a mile when you’re looking at it from across the yard. If you want a result that stays beautiful for decades, you have to stop relying on luck. I never start a project without my Bosch GLM laser—it’s the only way to ensure everything is dead-on. Beyond the physical tools, I’ve learned that why you need a 3d model before buying a single deck board isn’t just about the aesthetics; it’s about calculating load points and seeing how the shadows from your pergola trends crafting shade elegance in your outdoor space will actually hit your windows in July. Even if you aren’t a tech person, having a digital twin of your deck prevents the ‘measure twice, cut once, then cry’ cycle. When you get to the framing stage, don’t forget the 3-4-5 rule for squaring your deck frame every time. It’s a low-tech math trick that outperforms almost any fancy gadget for making sure your corners are perfect.
How do I keep my deck looking brand new for ten years?
The biggest mistake I see people make is reaching for the power washer and a bottle of Clorox the second they see a green spot. Please, for the sake of your boards, stop. I’ve written extensively about why you should never use bleach on your composite deck; it’s a harsh chemical that can break down the UV inhibitors in the plastic, leading to premature fading. Instead, I use a dedicated pH-neutral cleaner and a soft-bristled brush. If your boards have already seen better days, you can learn how to restore the color of a faded composite deck without sanding. But maintenance isn’t just about cleaning. You need to be proactive. According to the International Residential Code (IRC) Section R507, the connection of the deck to the house is the most critical inspection point. This is why I perform the 15 minute deck inspection every homeowner should do every spring. I’m looking for rusted fasteners, loose railing posts, and any signs of movement at the ledger. 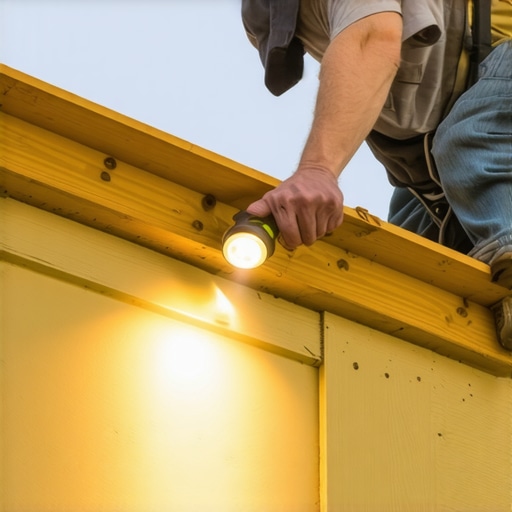
The future of outdoor living is smarter than you think
We are moving into an era where decks aren’t just platforms; they are integrated systems. I’m already seeing a shift toward modular construction and built-in sensors that can detect moisture levels in your joists before rot even starts. If you’re building today, you should be looking at composite decking trends durable solutions for modern outdoor living that incorporate heat-reflective technology. The goal is to spend more time drinking coffee on the deck and less time crawling under it with a flashlight. I’m also a big fan of ‘clean’ finishes—knowing how to hide the structural hardware on your pergola makes it look like a custom architectural feature rather than a weekend DIY project. I challenge you to try one thing this weekend: go outside and do that 15-minute inspection. You might just save yourself $20,000 in structural repairs down the road.
Three Hard-Earned Truths That Changed My Build Strategy
Looking back at my first few projects, I realized that most mistakes didn’t happen because I was lazy—they happened because I followed ‘standard’ advice that ignored the reality of physics. First, moisture is a relentless ghost; if you don’t provide a way for it to exit, it will eventually find a way into your home’s framing. Second, composite materials are not static objects; treating them like wood is a recipe for warping at the joists or buckling under the summer sun. Finally, the best innovative deck design ideas are the ones that prioritize the skeleton over the skin. You can buy the most expensive boards in the world, but if your frame is trapped against your siding without a drainage gap, you’re essentially building a timer on your home’s structural health.
The Toolkit That Keeps My Decks Standing for Decades
I’ve learned the hard way that ‘eyeballing it’ is just another word for ‘doing it twice.’ My essential list always starts with a high-quality 3D model to visualize load points and sun paths before the first hole is dug. Beyond the software, I swear by specific railing systems for safety and style that allow for thermal movement without rattling over time. I also keep a library of pergola design inspiration on hand to ensure every structure feels like a natural extension of the architecture. If you are aiming for professional-grade precision, mastering the secret to a perfectly level multi-level deck is non-negotiable—it is the fine line between a masterpiece and a DIY disaster.
Your Vision for a Lifetime of Backyard Memories
Building a deck is more than just a home improvement task; it is about creating a sanctuary where your family will gather for years to come. Whether you want to transform your home with stunning deck design strategies or simply want a quiet place for morning coffee, the care you put into the hidden details today will pay off for decades. Don’t let the fear of a complex build stop you from starting. With the right drainage plane, proper expansion gaps, and a solid structural plan, you can build an outdoor space that survives every season with grace. #IMAGE_PLACEHOLDER_E#
Have you ever discovered rot behind an old ledger board or struggled with a railing that just wouldn’t stay tight after a single winter? Let me know your biggest deck-building headache in the comments below.